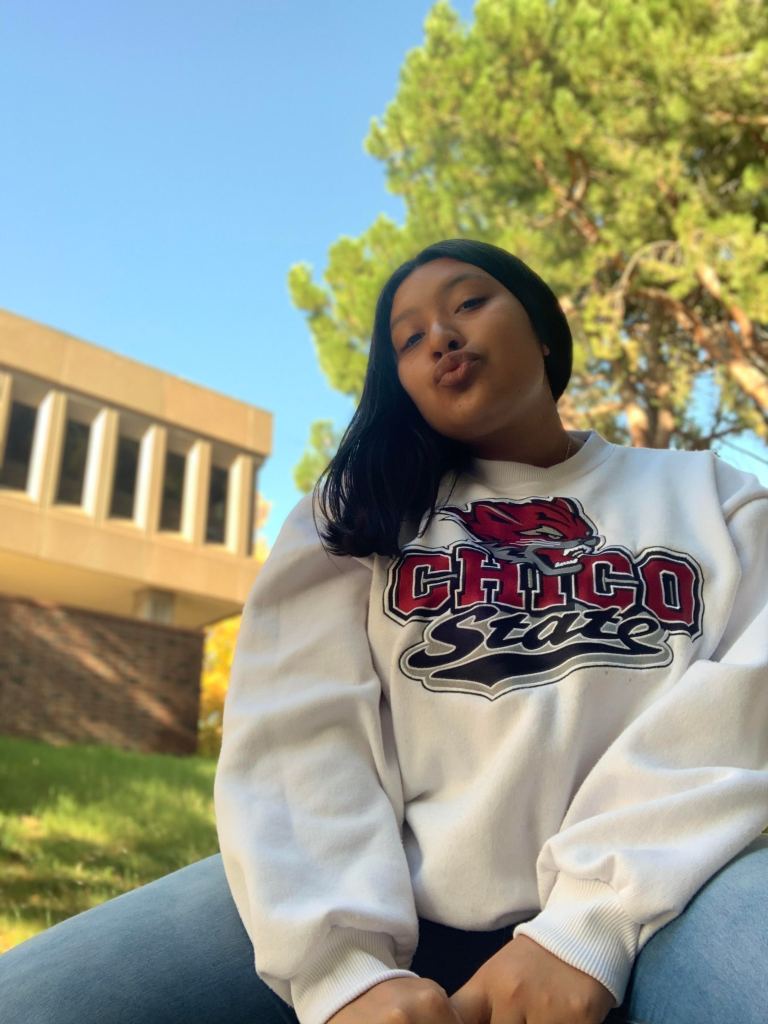
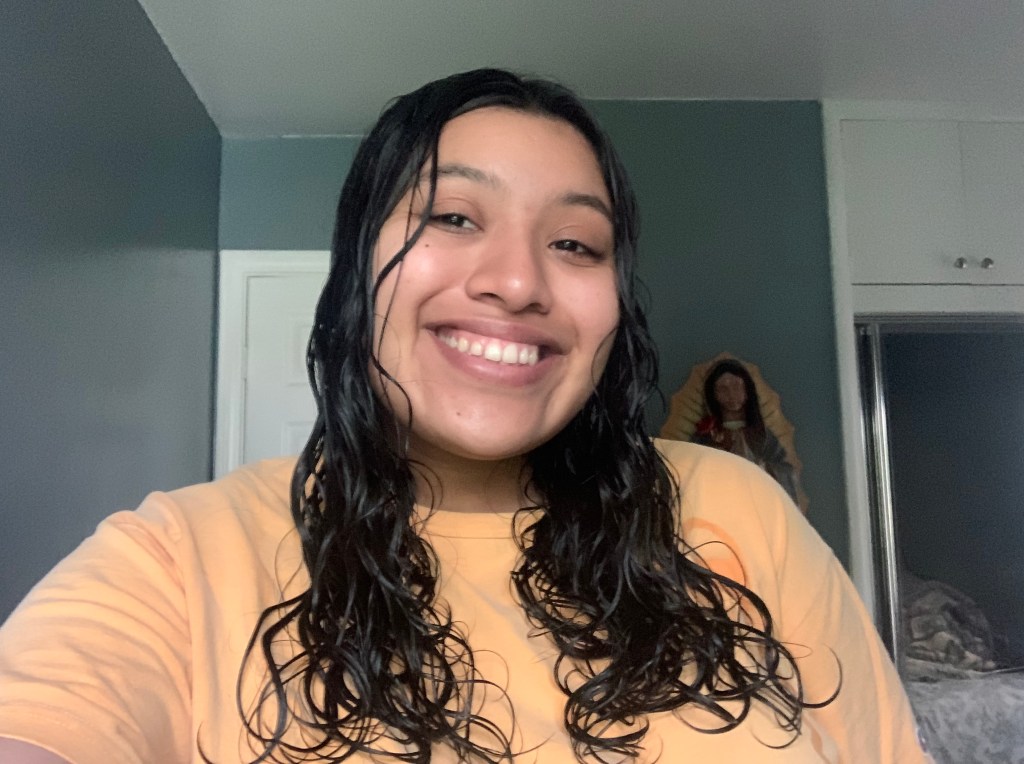
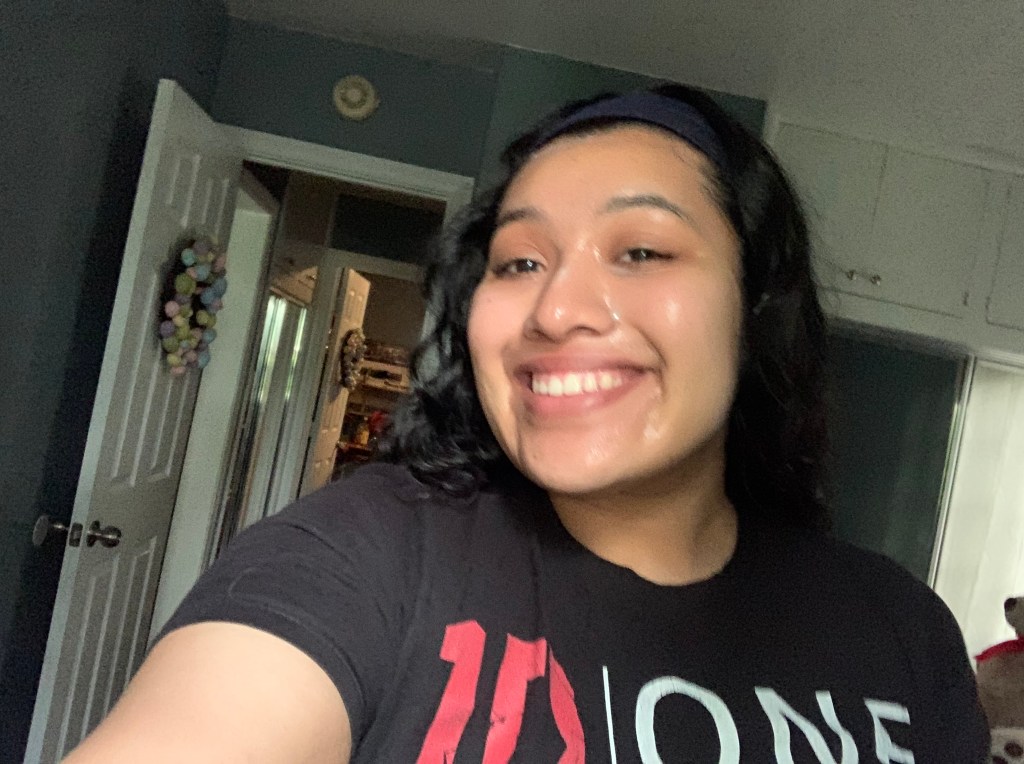
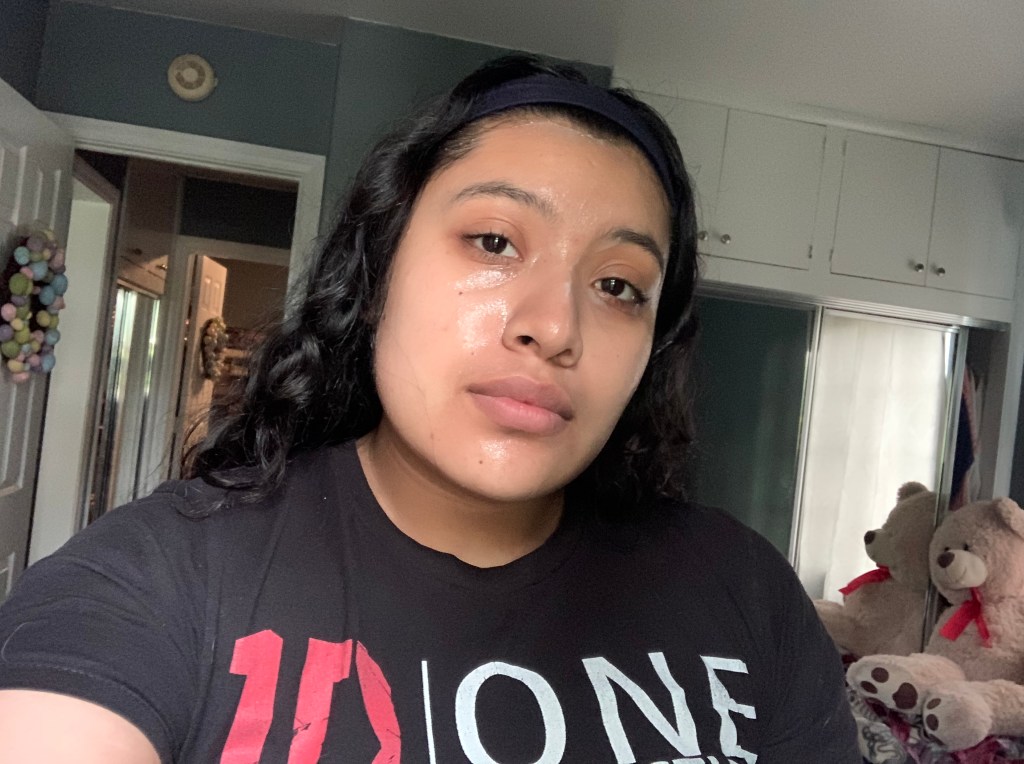
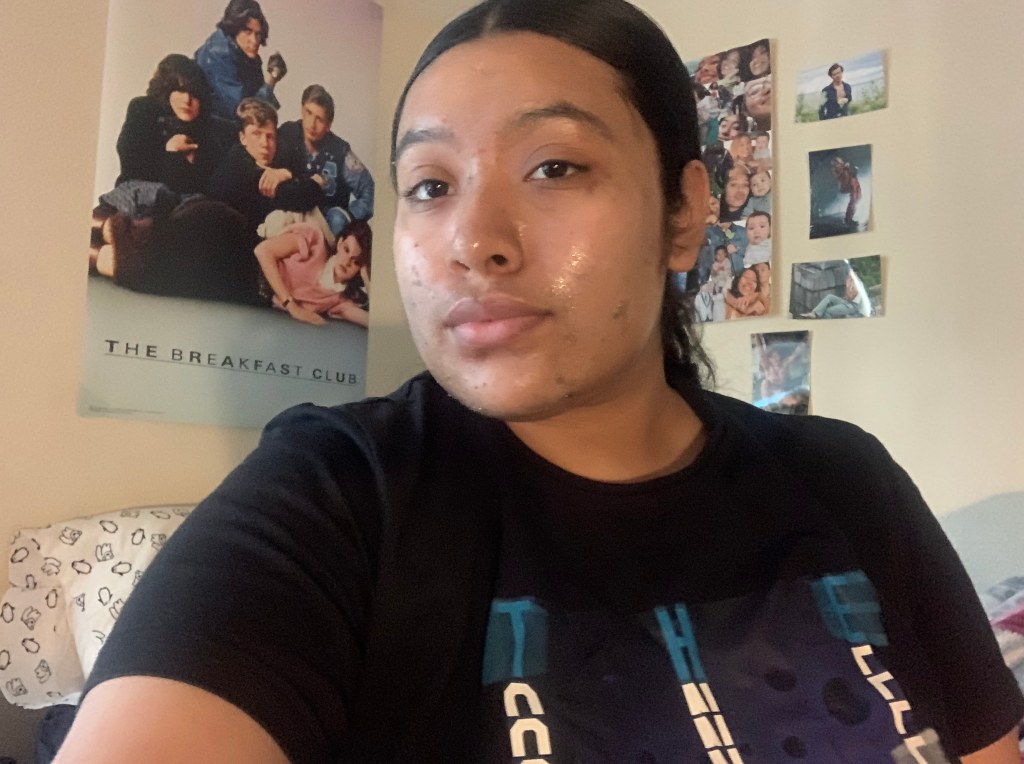
Hi! My name is Angelina Mendez! I am a freshman that currently attends California State University Chico and I’m here to share my experience within a field that is very popular today: Health and Beauty.
Why health and beauty? I literally could’ve chosen anything else.
Health and beauty is a huge part of my life. It shaped the way I see life and how I see myself. Growing up, I absolutely hated the idea of make-up, and anything that made me seem feminine. It is ridiculous but true. My family would label me as a “tomboy” and I owned it. I would hate wearing the color pink and hate dressing girly but as I got older, I became more interested in expressing how I truly feel about my gender. And that is where I began to develop my interest for health and beauty. Makeup tutorials and health products were all over my social media timeline as I began to change my algorithm. It gives me a way to explore myself and what I like and gives me more ways to go deeper into self care.
What should we expect on this blog? My hard truth.
In this blog, I will review a series of beauty products, health products, beauty hacks, and anything that is considered to be a routine in this area. I want to try new things and introduce products to an audience that is curious, and also lazy to try or see how well these products or tips or routines workout. There will be some negative and positive reviews on products but for the purpose of informing you how well it worked. Some examples of products would be makeup products, face masks, skin care routines, bath bombs, homemade products, and crazy tricks people wouldn’t believe.
Where do I expect this blog to go? Hopefully up.
My sole purpose of this blog is to discover new things that will broaden the way I choose and use products. I want to try new things that I wouldn’t have considered using before because that’s how I will find good products I and other people are looking for. It will be a great way to connect with my audience, if I develop one, so they could try and recommend things to me as well.
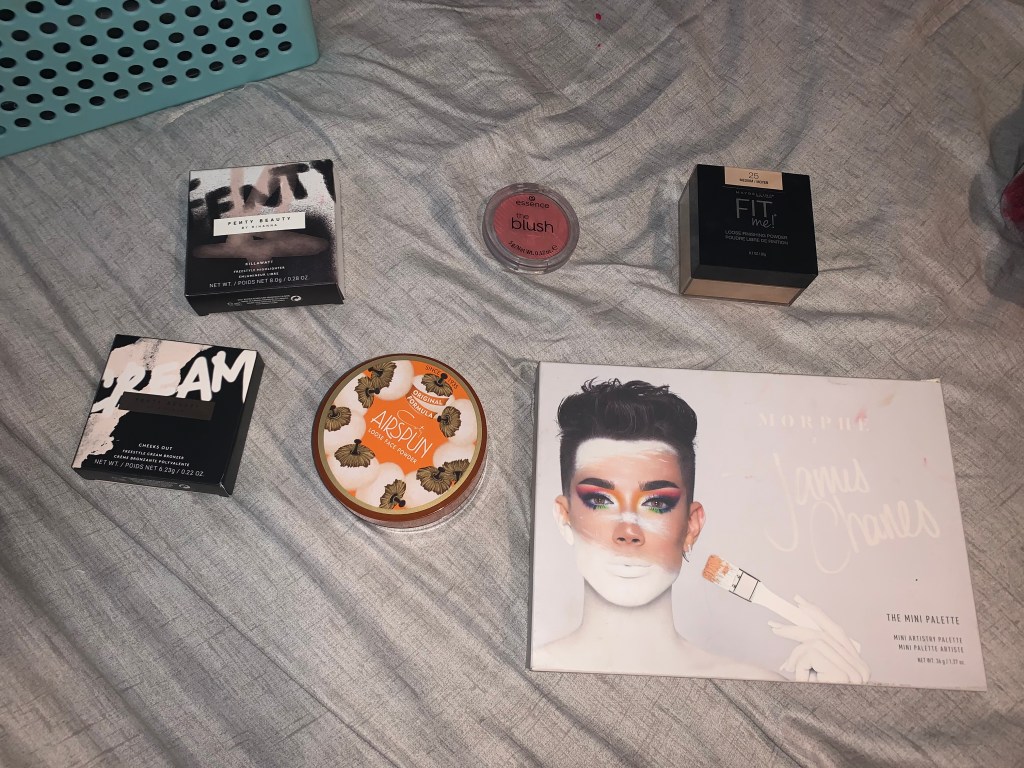
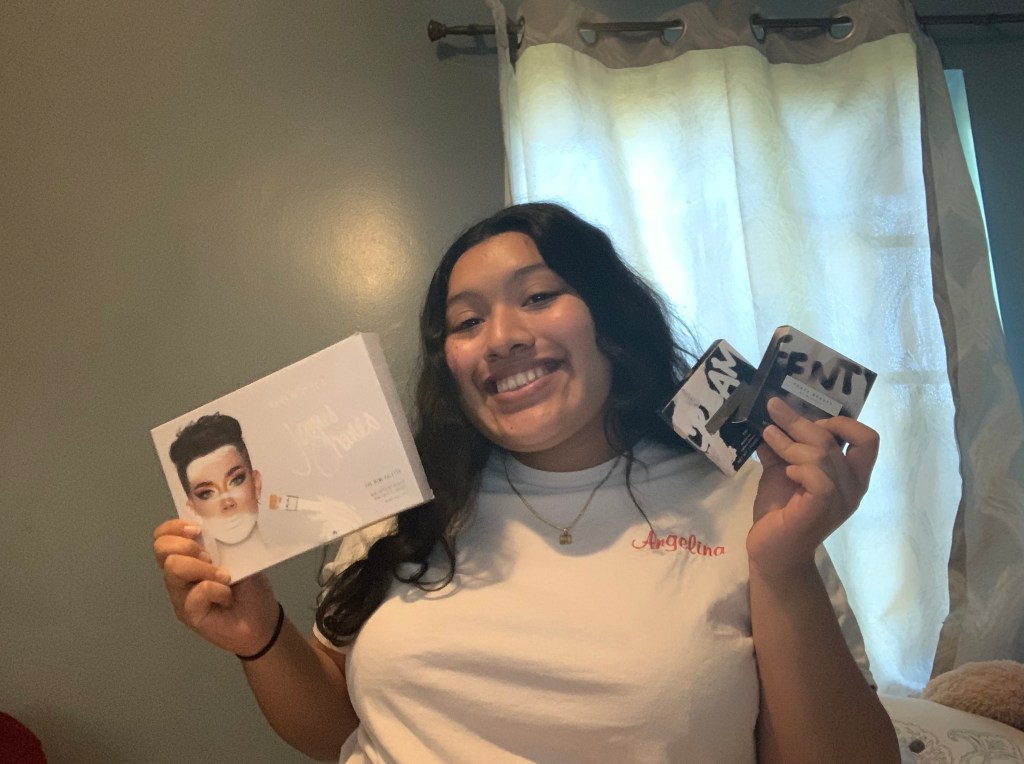
Hi everyone! I hope everyone is doing okay with all the things going on in the world right now. I hope that I can brighten some days with a brand new blog post! Online shopping is all I’ve been doing in this quarantine so today I want to share with you some items I have purchases so far!
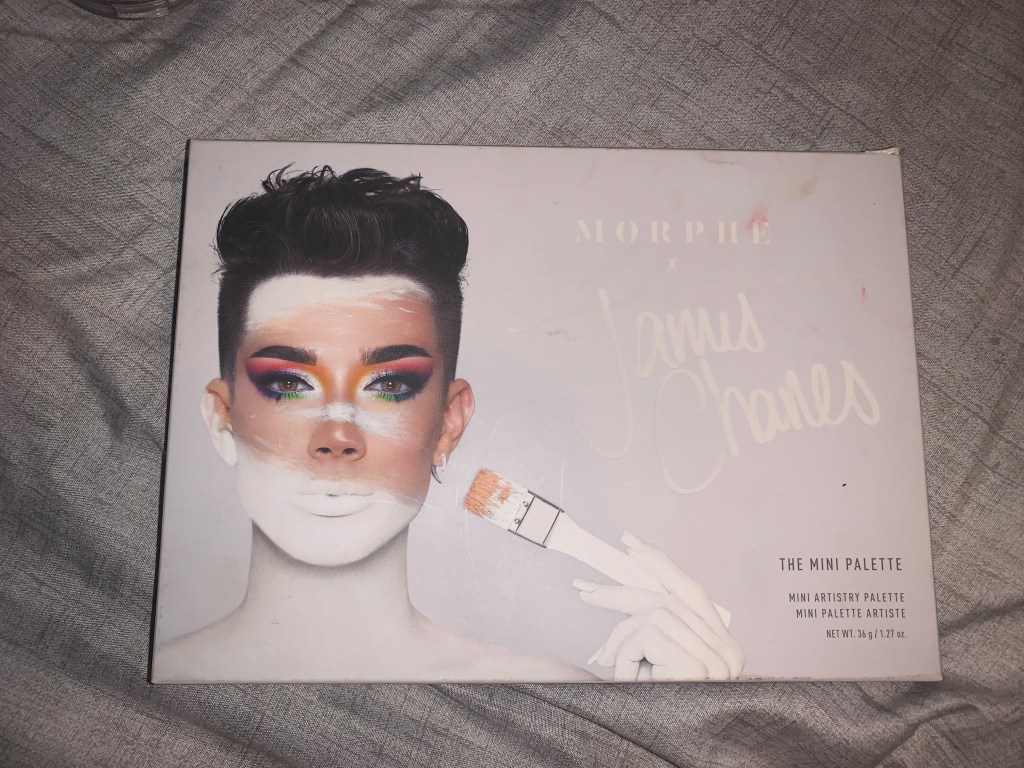
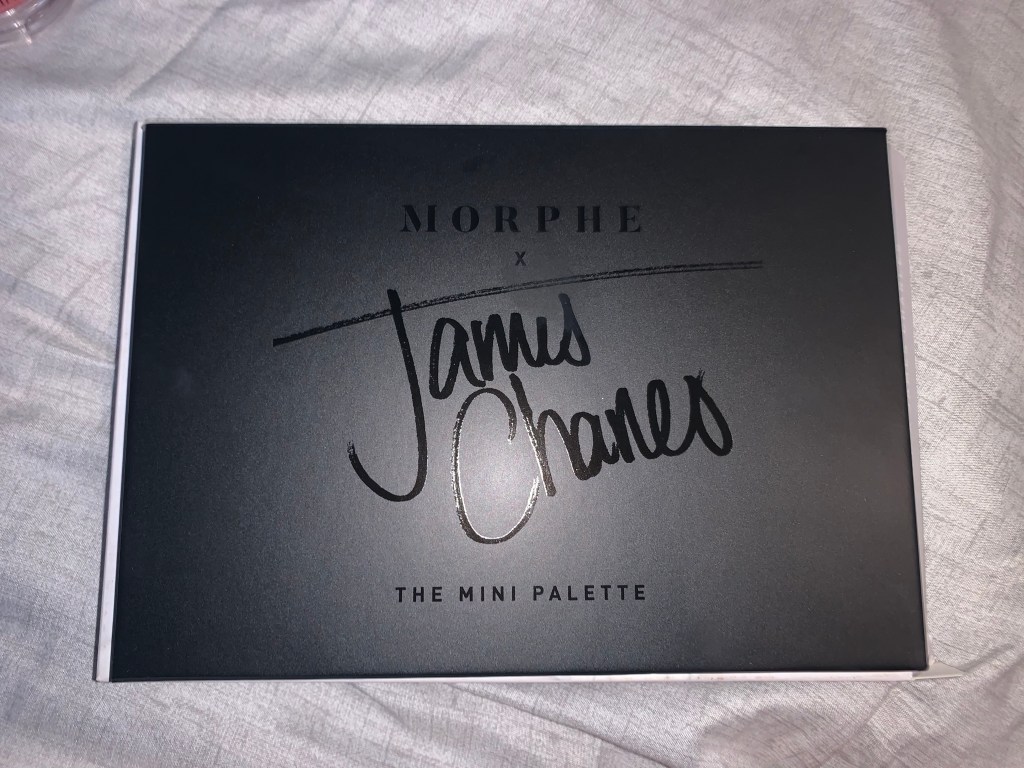
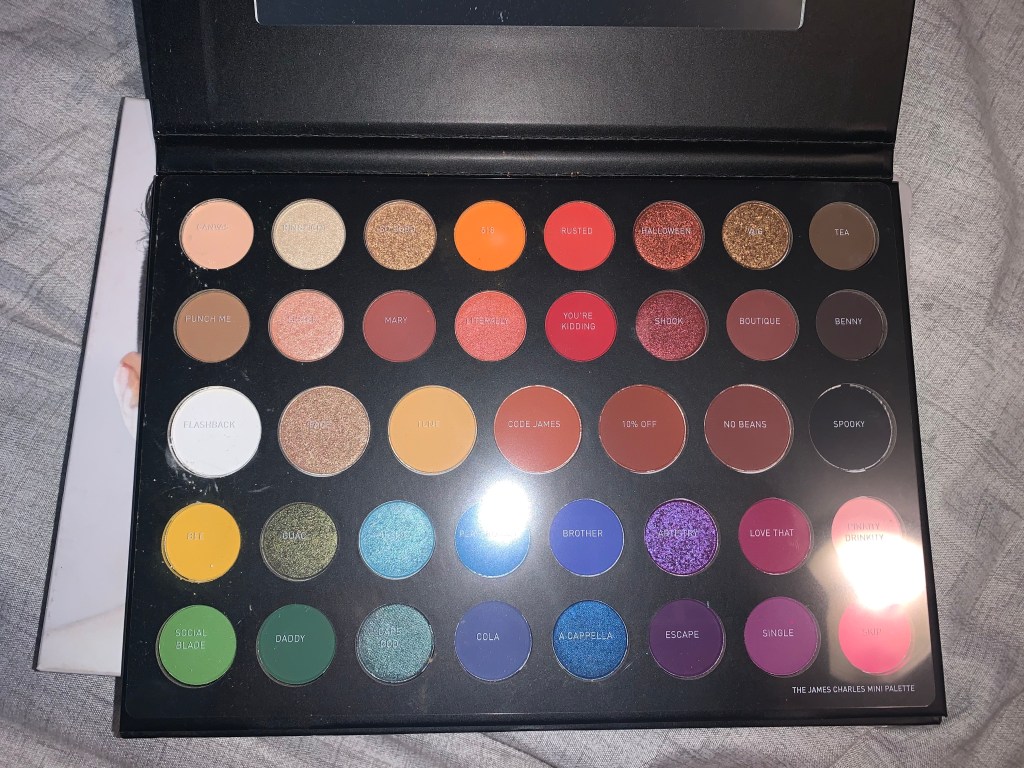
1. The James Charles Mini Palette
The james Charles Mini Palette is something I have been dying to get. With its 39 pigmented shades, it was one of the best selling eye shadow palettes of 2018. It is a collaborations between the beauty influencer James Charles and the make up company Morphe. It contains 1.27 ounces and smells just like make up. The pallete also retails for 26$ but luckily I got it on sale for 13$. I’ve tried it a few times but that review is for a seperate post!
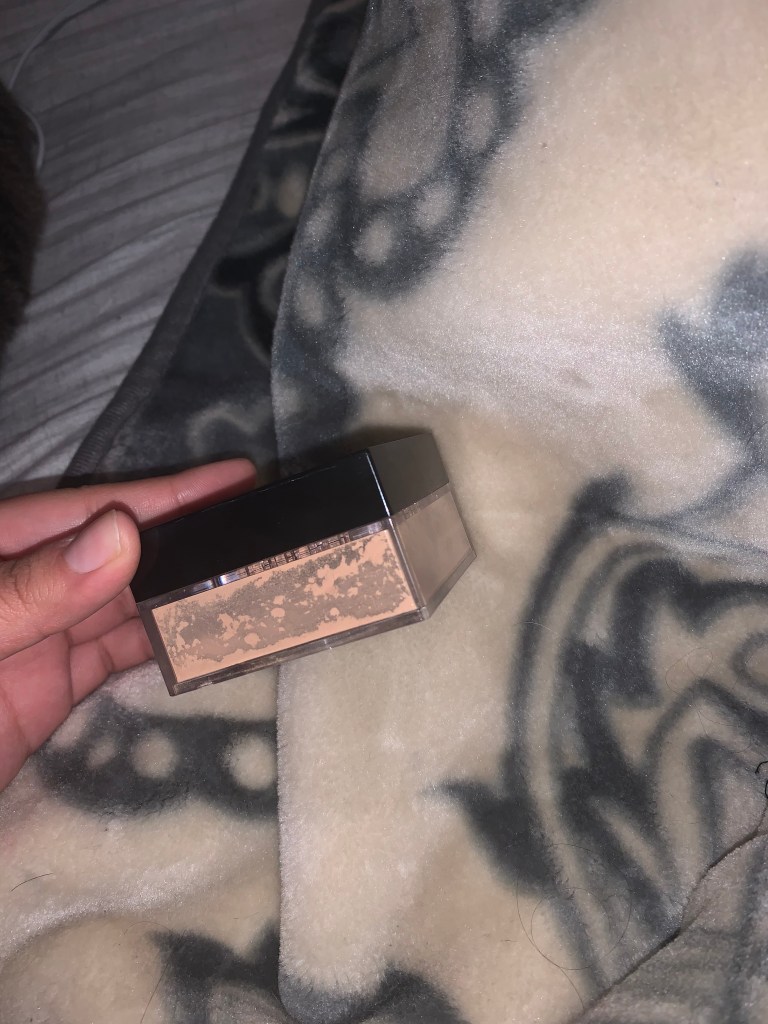
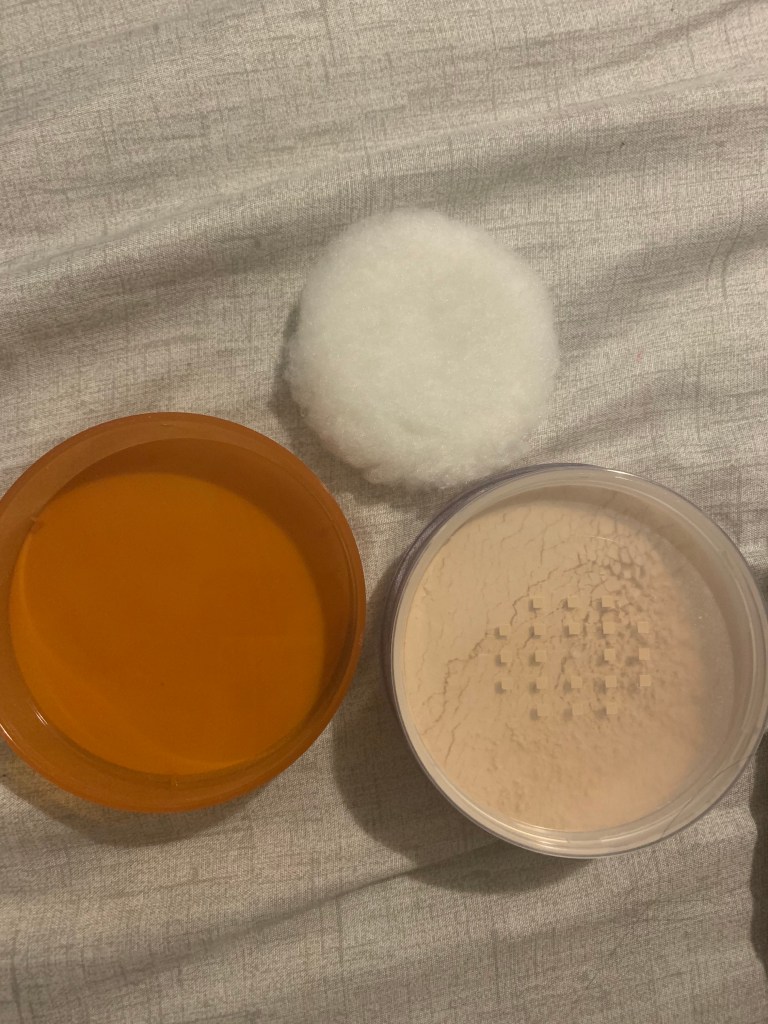
2. Maybelline Fit Me! Loose Finishing Powder
I actually have not tried this powder yet! But my last powder was actually on the brink of extinction meaning I was about to run out. So I went online at Ulta and saw this beauty and picked this up. It contains 0.7 ounces and is in the shade 25/Medium. The product retails for $7.99 and sadly I did not get a sale on this one.
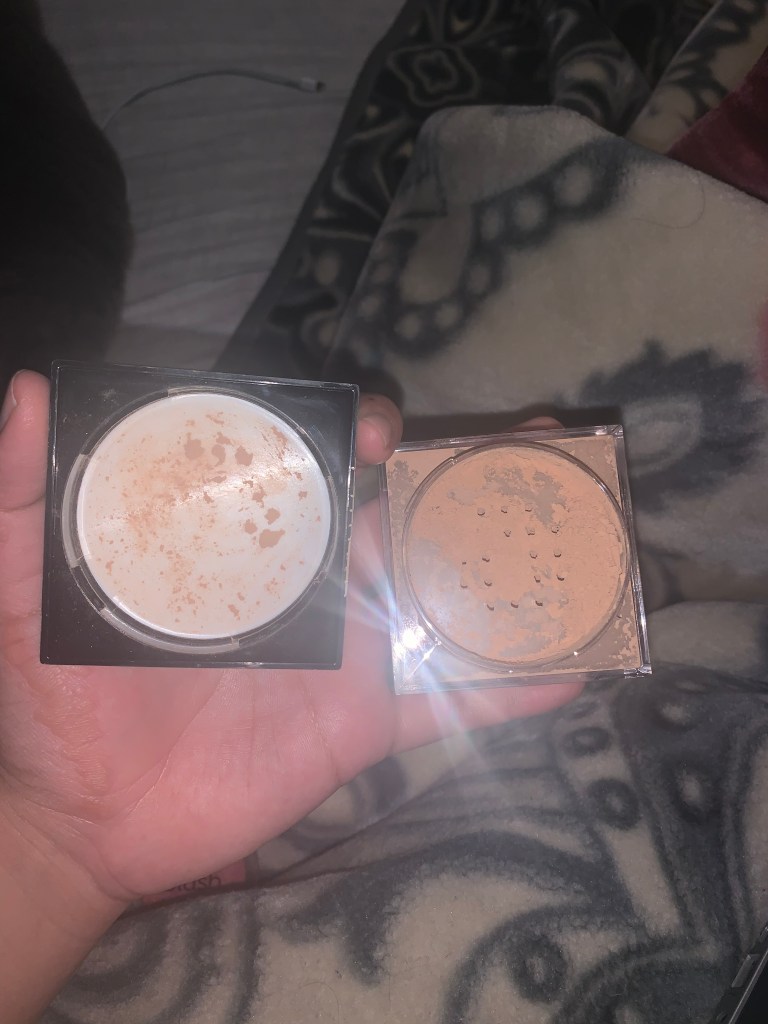
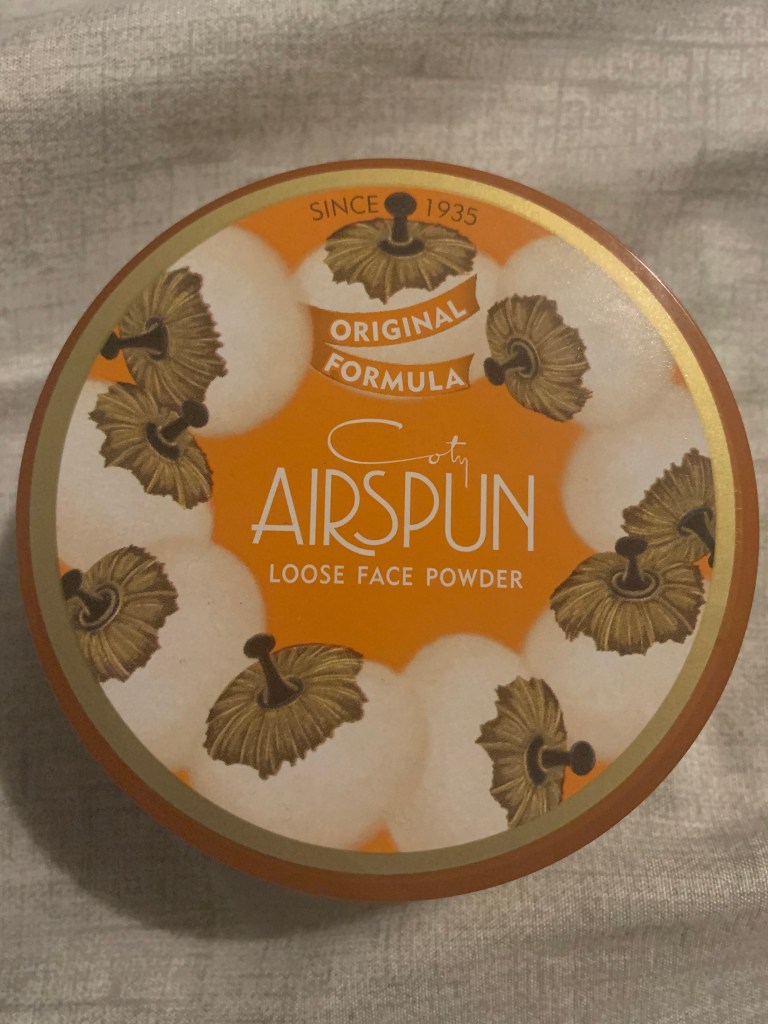
3. Airspun Loose Face Powder
This is actually the only item I did not get from Ulta but from Target! I still wanted to include it because it is a new product I have not tried. I’ve seen so many big make up artists on YouTube and in the industry use it and they have nothing but good things to say about it. It contains 2.3 ounces and retails for $5.99.
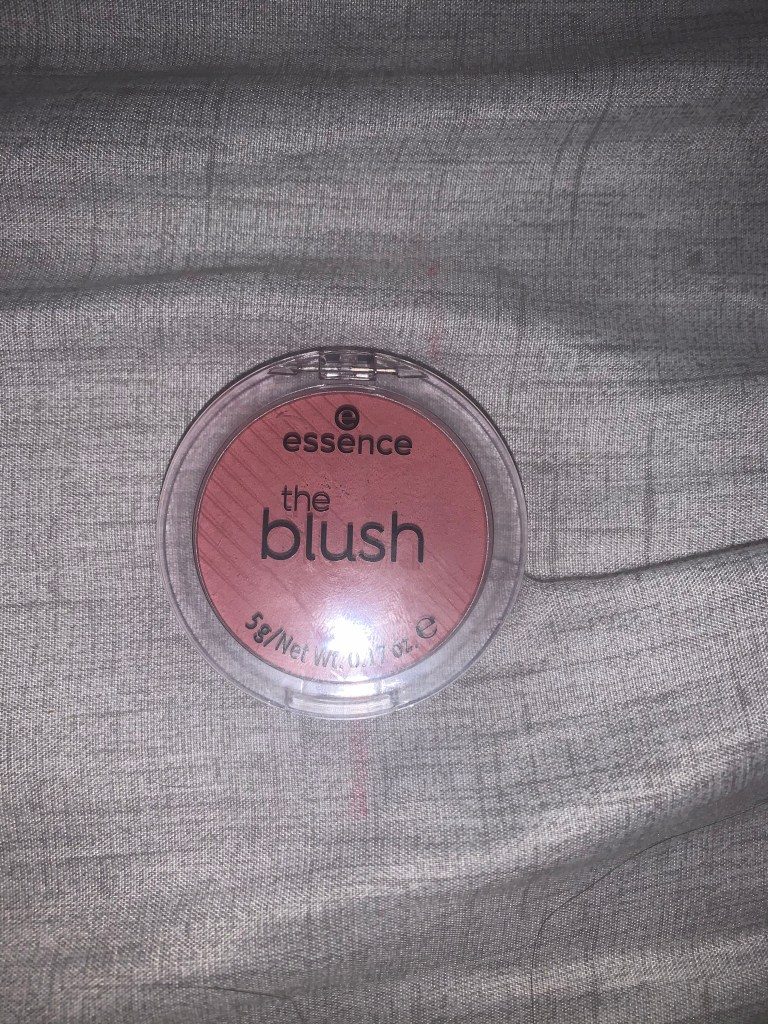
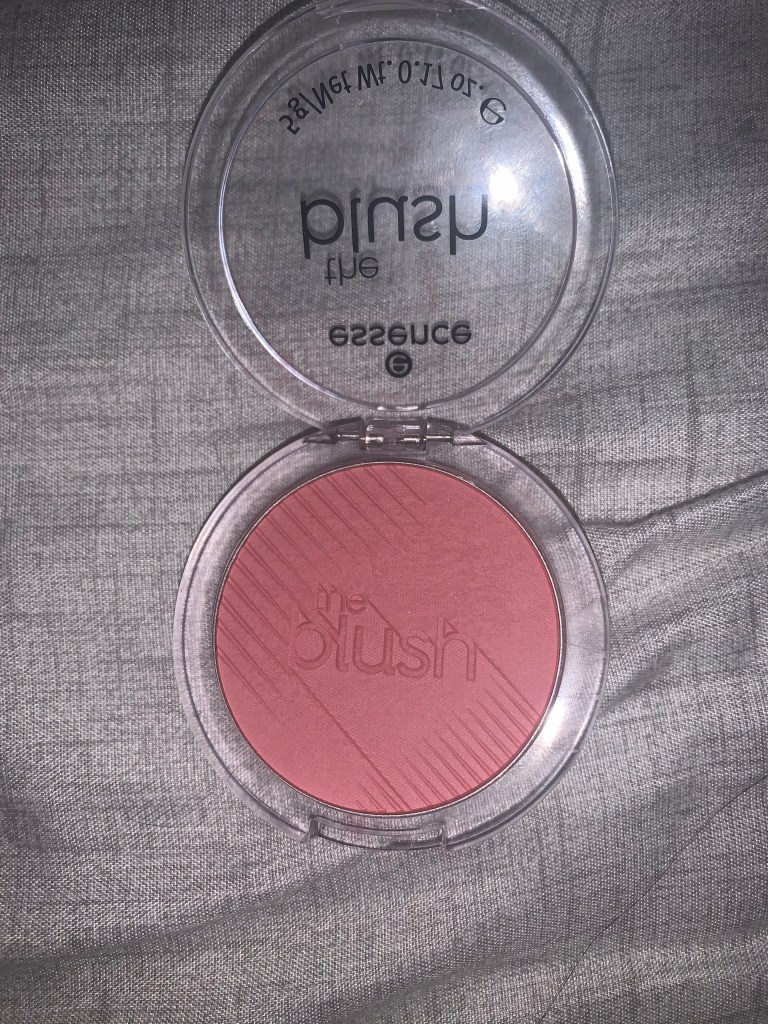
4. Essence the Blush
This blush is something I have been needing for a long time. Not only because it’s super cheap but it’s super pigmented too. The product contains 0.17 ounces and retails on Ulta for $2.99. SO CHEAP! I hope in the future to get a more expensive blush because they feel more luxury and have more payoff but for now this will do.
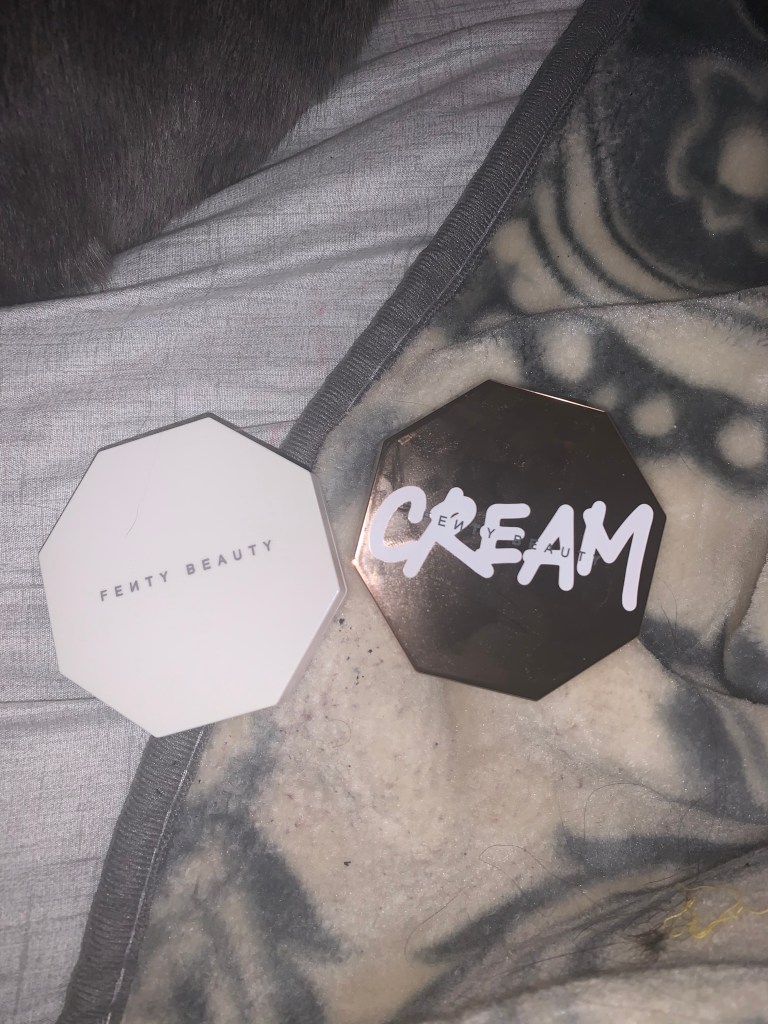
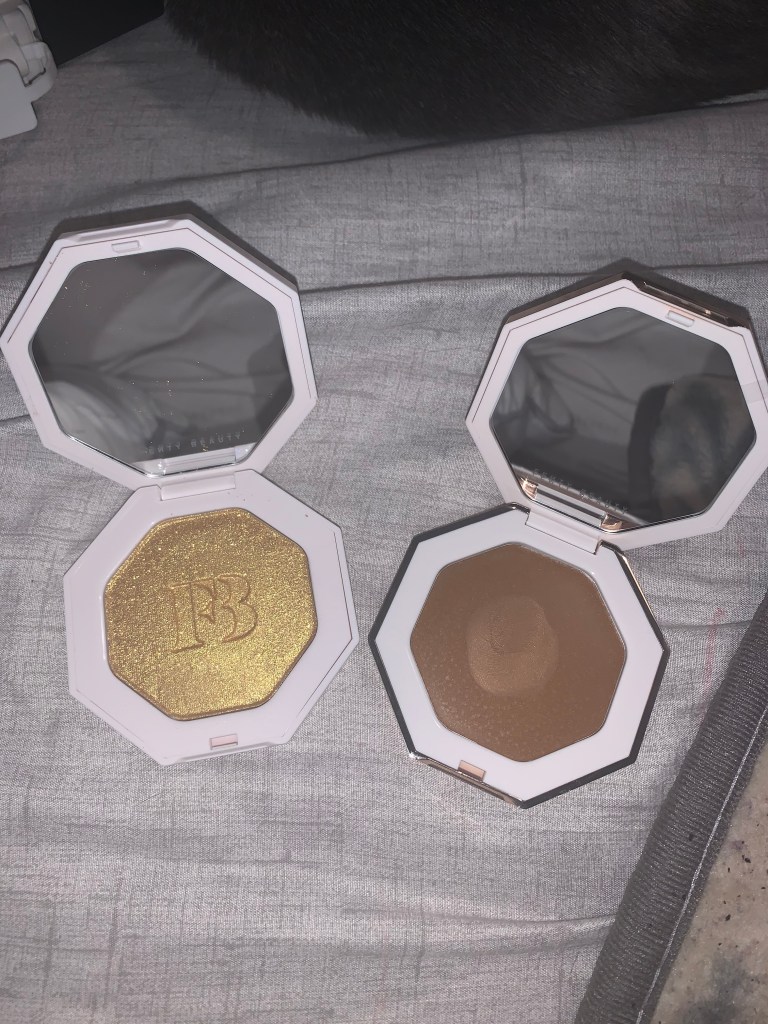
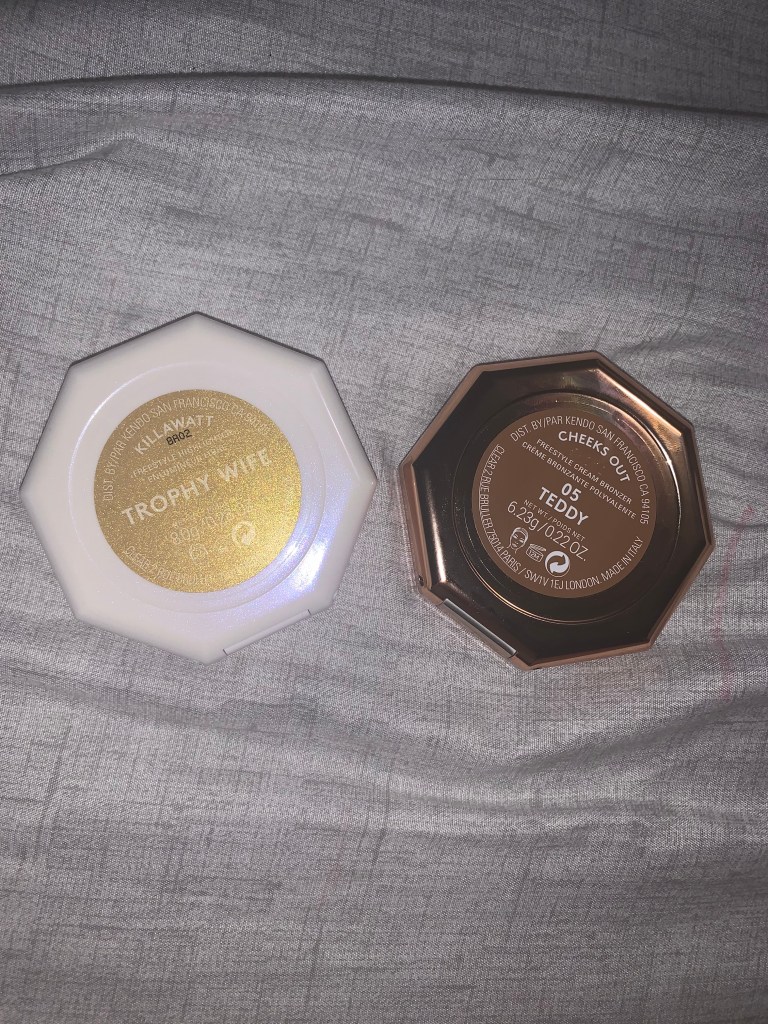
Literally this was such a deal. I didn’t get these items off of Ulta beauty, but I got them off of Fenty Beauty’s website. The reason why it was a deal was because with every purchase over $25, the Killawatt highlighter in the most popular shade “Trophy Wife” would only be $5. The cream bronzer retailed at $32 and the highlighter originally retailed at $36 but because of this deal, I purchased it for only $5! I WAS GAGGING!! The cream bronzer contains 0.22 ounces and the highlighter contains 0.28 ounces.
Hey everyone! I missed all of you! I’m back again sharing some stuff that I do when I’m doing beauty. Here are my top ten songs that I listen to when I’m going from wham to glam!
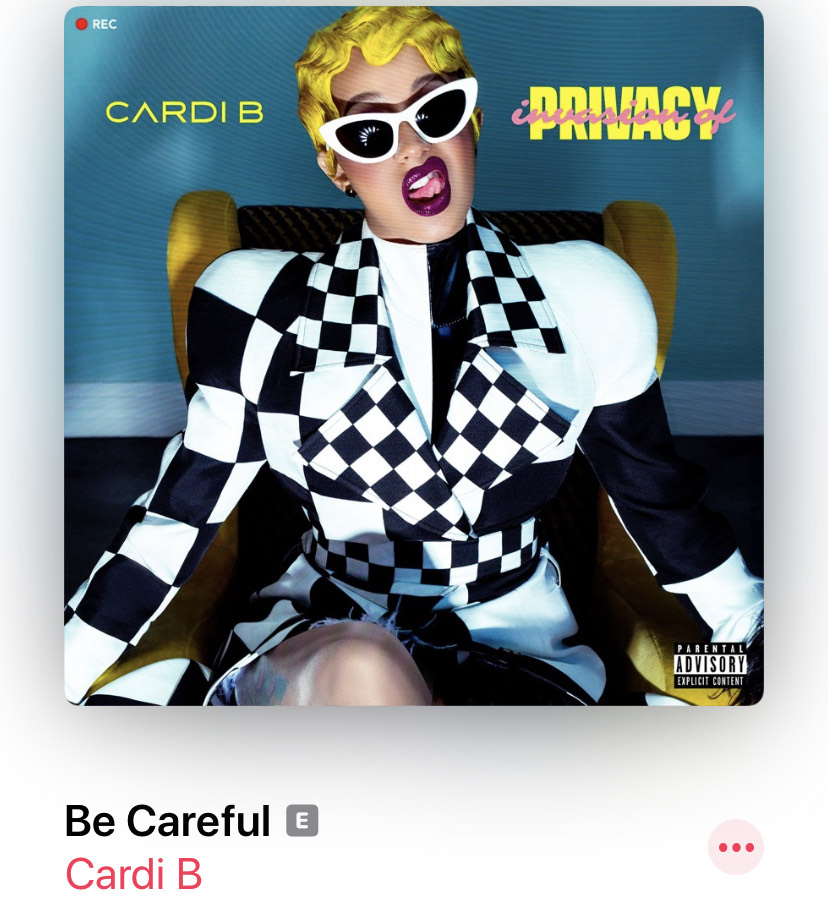
10. Be Careful – Cardi B
Image : Cardi B
This song is literally such a bop, but not only because of the smooth beats in the background, but because of the truth Cardi B speaks on it. It’s a very groovy and smooth song in my opinion but it is perfect for me to get ready to. It lights up my confidence and it reminds me how all men are trash. Just kidding! Or am I?
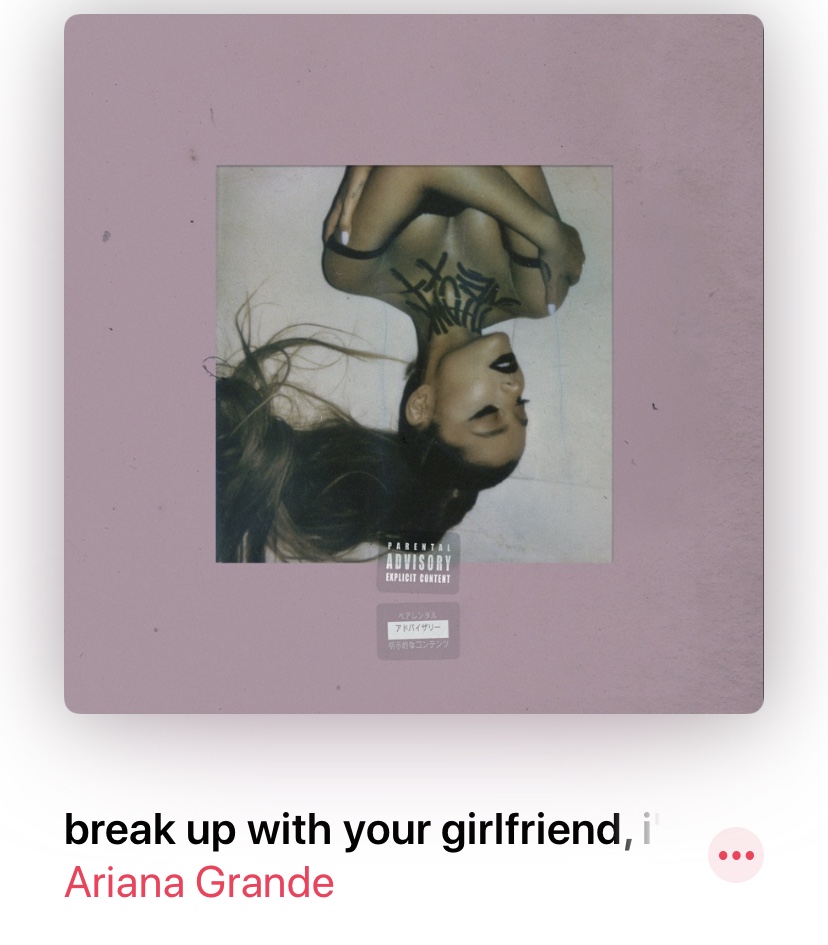
9. Break Up With Your Girlfriend, I’m Bored
Image: Ariana Grande
I don’t know what this list would be without Ariana Grande. She’s an icon and a wonderful feminist. She empowers me more than food at this point. I literally listen to her almost every single day and I could listen to this particular song at any point in my routine. She gives me energy and life and makes me feel like I can do anything.
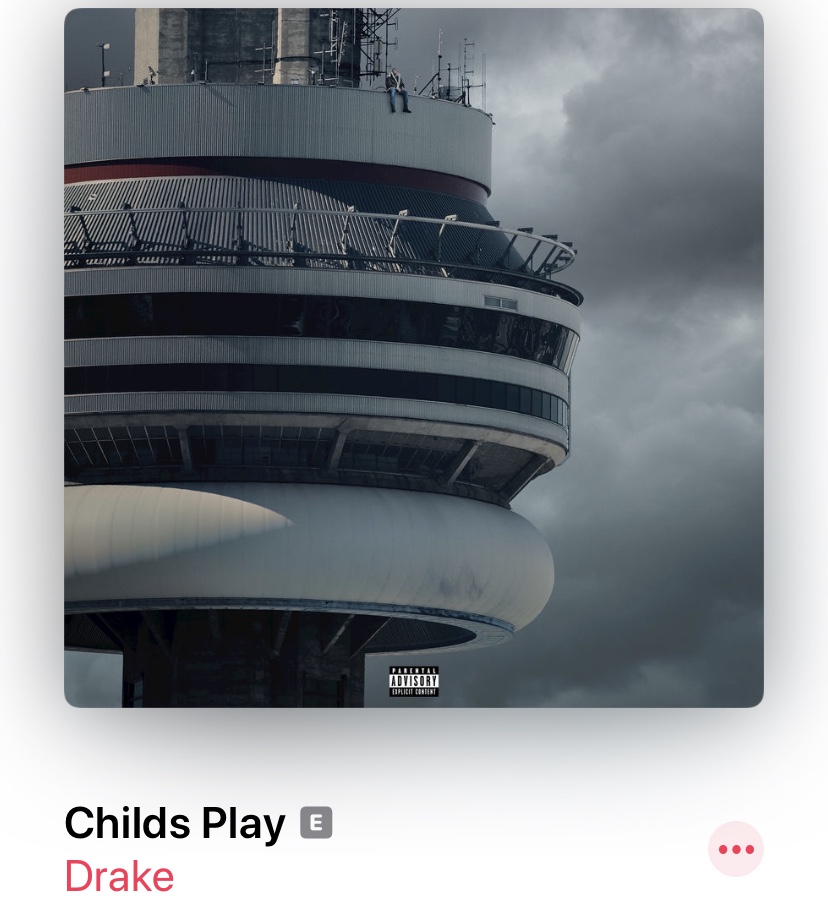
8. Child’s Play – Drake
Image: Drake
Drake pumps my head up so much and that is why he is on this list. This song is so powerful to me because it makes me feel so confident. The way that the beat drops in certain points and the rapping aspect brings a different vibe when I’m getting ready. I love the song and the lyrics are entertaining to me.
7. Forrest Gump – Frank Ocean
Image: Frank Ocean
Coming in at #7 is Mr. Frank Ocean. This entire album is a masterpiece but the reason this specific song is on my get ready playlist is because of how personal it is. I love listening to music with meaning, not to say all music doesn’t have meaning, but Frank does it differently. I have an obsession with slow songs because they just relax me.
6. Let Me Love You – Mario
Image: Mario
I don’t even have words for this song. Anybody who is ANYBODY knows this song and knows what a classic it is. It is the signature bad bitch song. You sing this song when you are divorced and rich, or so they say. I love this song by Mario because it empowers the inner woman within you because he is telling you that you know you are worth it. I love to listen to this song towards the end of my makeup routine because I feel pretty, I feel confident, and I feel like there’s people out there who know who you are.
5. Love. (Feat. Zacari.) – Kendrick Lamar
Image: Kendrick Lamar
I don’t know what it is about slow songs that truly attract me to them. This song by Kendrick Lamar is absolutely beautiful. It gives me that sleepy vibe where you could just go on a drive and listen to it. I love to listen to this song in the beginning process of my makeup because it starts me off on a good mood. The lyrics are really nice too and it makes me feel loved.
4. Sunflower (Spider-Man: Into the Spider Verse Soundtrack) – Post Malone & Swae Lee
Image: Post Malone & Swae Lee
This is a song that was stuck in my head for a very long time. It was such a bop when the movie Spider-Man: Into the Spiderverse came out and I listened to it for the first time. It has this happy warm feeling to it and gives me amazing vibes when I listen to it. The song includes a soft voice from Swae and a deep voice from Post Malone and it adds a perfect blend to the tune. I love listening to it because it puts me in a happy mood.
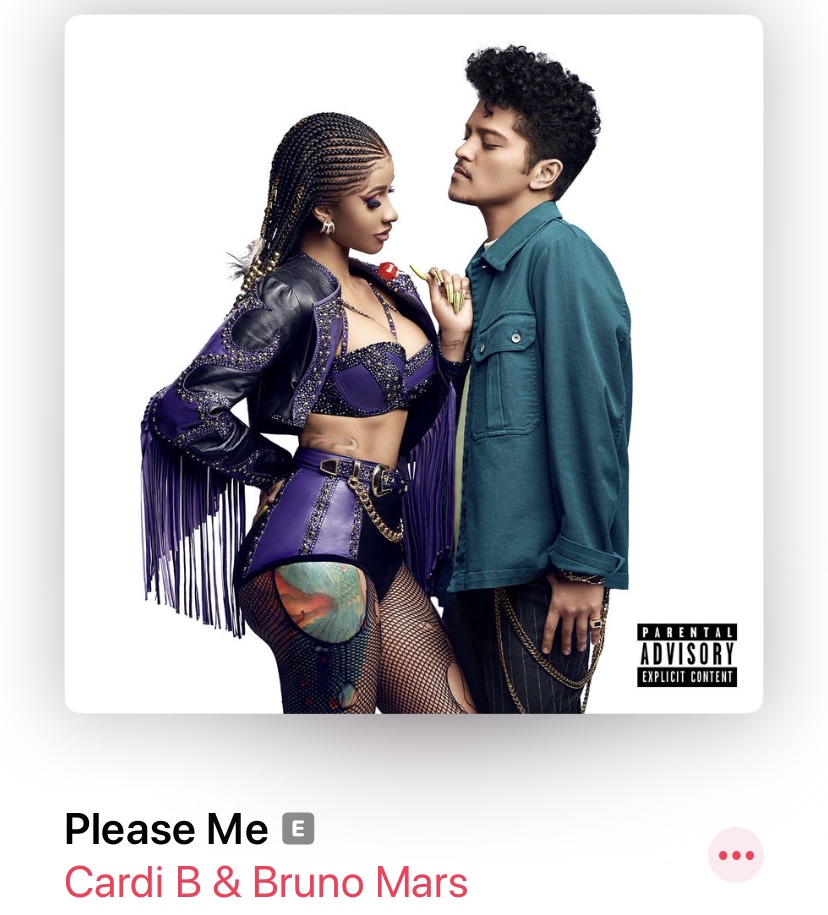
3. Please Me – Bruno Mars & Cardi B
Image: Cardi B & Bruno Mars
We all love sexy songs like come on. This song is beautifully sexy in its own way. I love the chemistry between Cardi and Bruno and their voices bring me to peace. I like to play this song when I’m getting ready to go out on a date or with my friend because it gives me a different vibe. It makes me want to feel sexy and feel prettier in that moment. Cuddos to Cardi B and Bruno Mars.
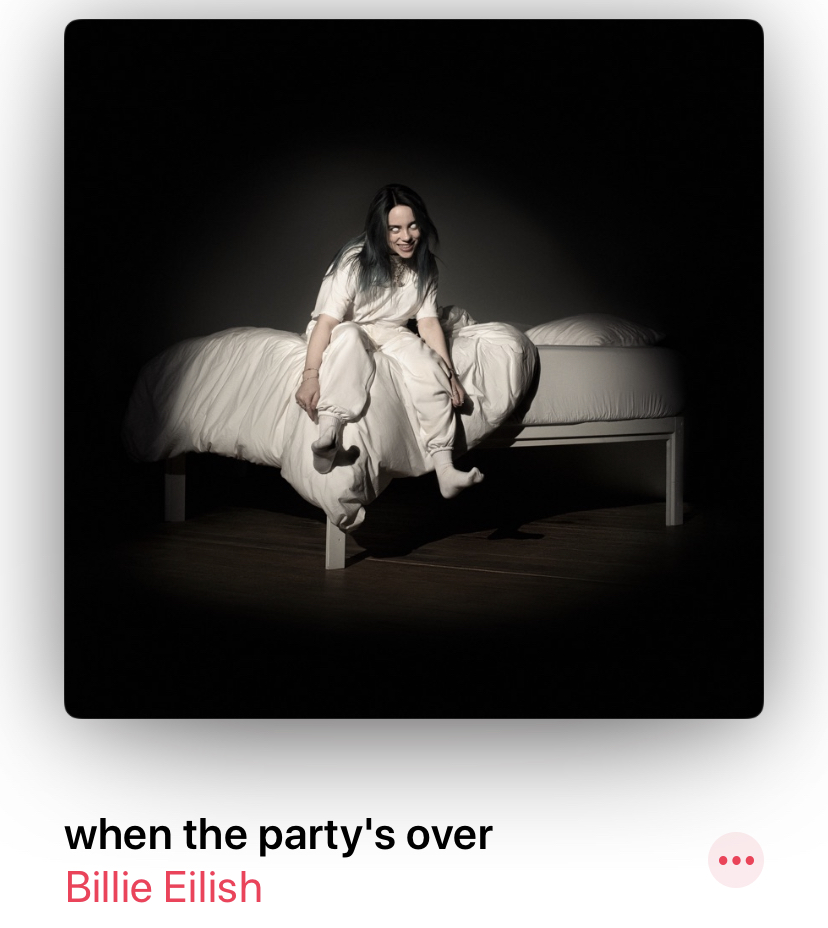
2. When The Party’s Over – Billie Eilish
Image: Billie Eilish
This song is absolutely great. It’s the perfect mixture of softness and depression. I was never really a big Billie Eilish fan until the 2020 Grammys when she performed this song. I love to listen to this song when I’m doing something that requires focus like eye shadow or highlight or even my hair. The song calms me down and reminds me to take life slow.
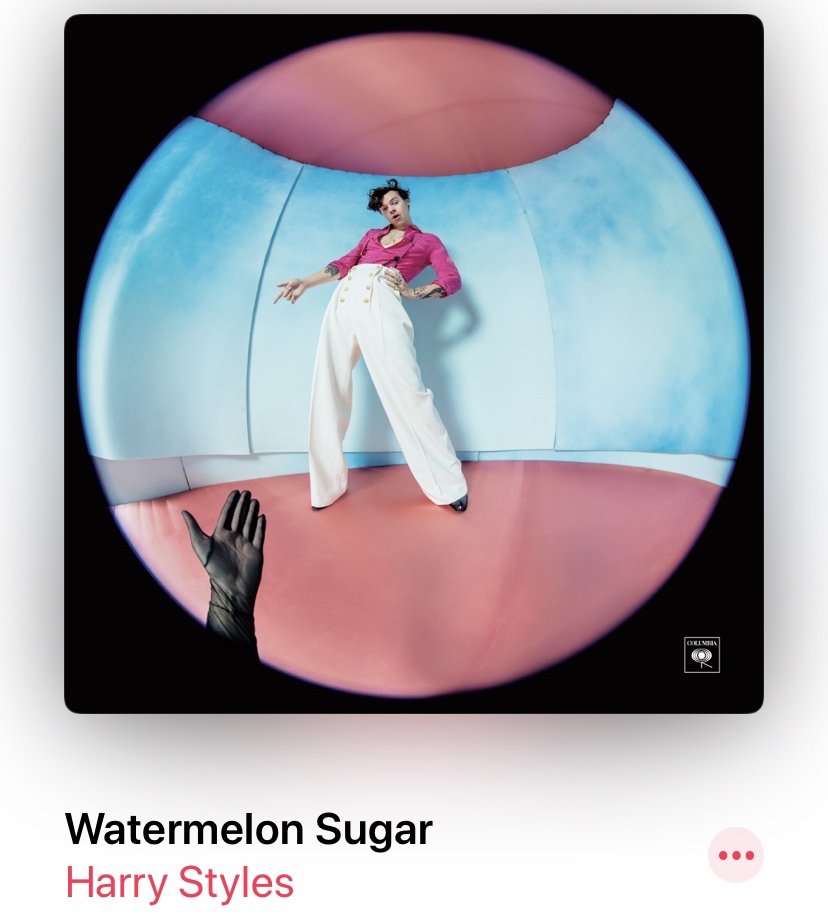
1. Watermelon Sugar – Harry Styles
Image: Harry Styles
Harry Styles is absolutely everything to me so it makes sense that he would be number 1 on my list. His music is literally so good but this song makes me feel some type of way. It’s very powerful and loud and also makes me feel alive. Although this song is about sex . . . it still makes me happy because of the upbeat attitude it has along with the empowerment behind it.
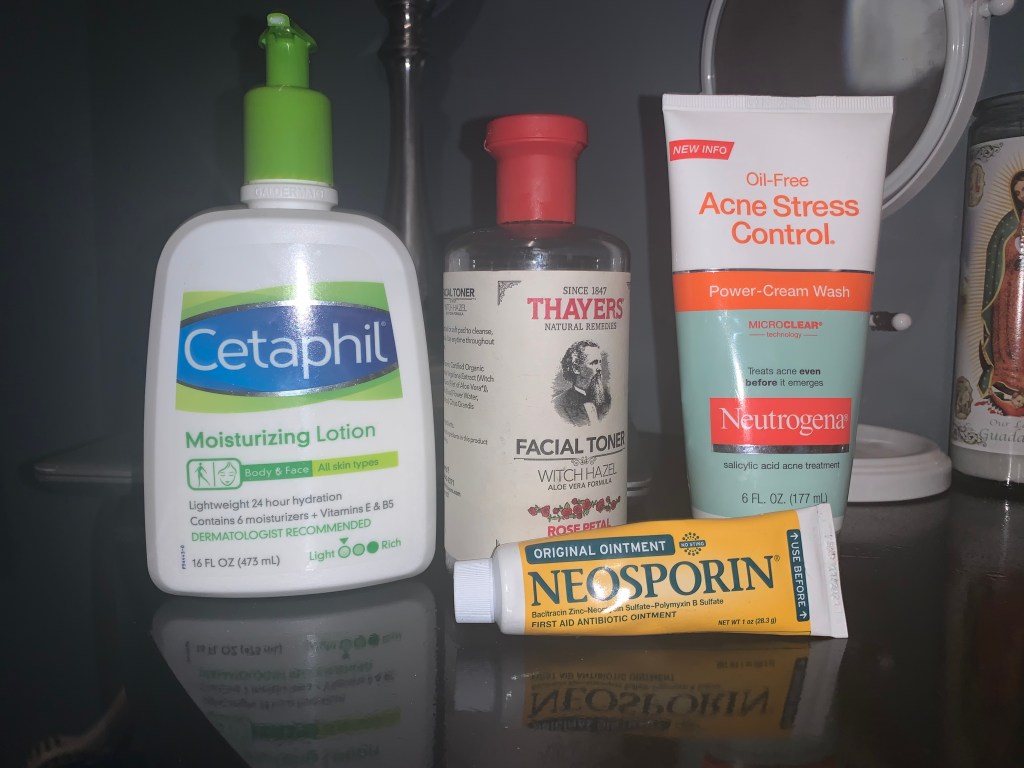
Hey everyone! Welcome to a little personal post about what I use for my day/night skin care routine. These are all products you can find in any drug store or Walmart or Target and all under $12. These are all approved by me and I use them every single day consistently. Here we go!
What are the products in my routine and how do I use them?
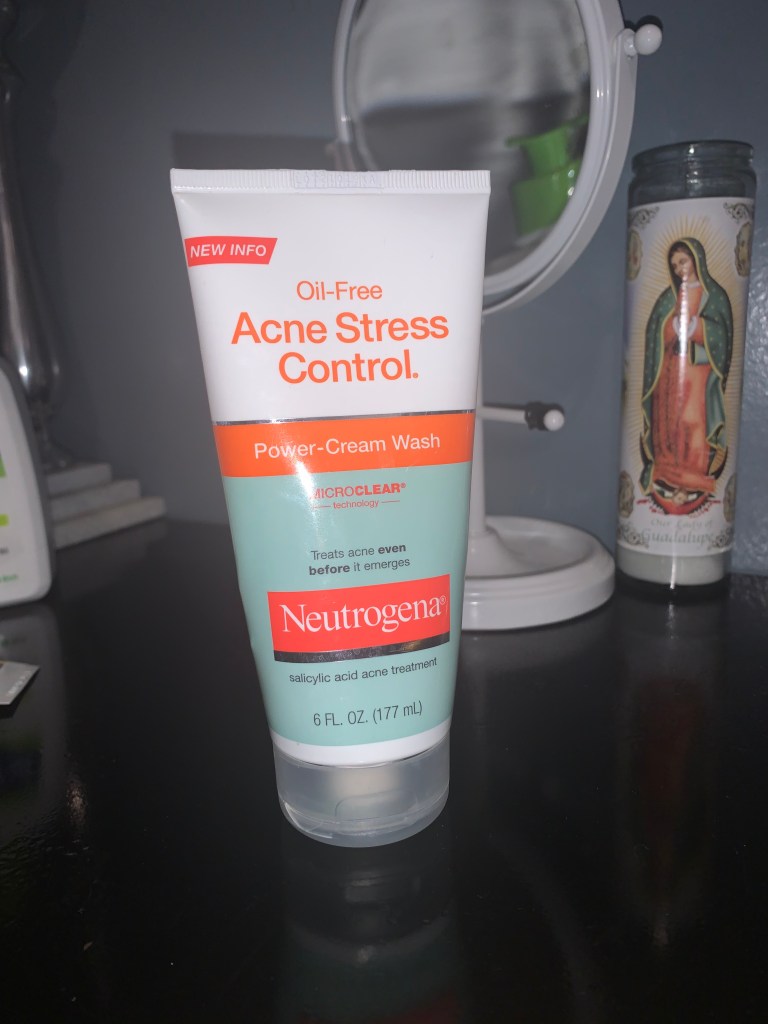
Image Credit: Angelina Mendez
1. Oil-Free Acne Stress Control by Neutrogena
I have been using this product for a very long time. About two years. When used properly, it is very successful on my skin.
The face wash is a “power-cream” wash that uses “micro-clear technology” to “treat acne even before it emerges”. The product is a creamy mint green but when rubbed onto the skin it becomes clear. It costs about $6-7. It is usually that price but varies to which store you go to. The product contains 6 fl. oz. ad contains 2% Salicylic Acid.
What I like about this product is that when I use it, usually acne that I currently have or that is slowly growing goes away and it takes the redness away. It says that it is for all skin types but I don’t recommend it for people with sensitive skin. It doesn’t use harsh ingredients but it does have a powerful impact on your skin once all mixed together.
The way I use it is I first wash my hands with soap then after I use water and lightly dampen my face. Then with my hands still wet, I put the product onto my skin and I rub it all over my face for about 20 seconds making sure that I tackle every single inch of skin on my face. Then, I wash all the product off of my skin with cold water.
2. Witch Hazel Facial Toner by Thayers
This is literal stuff from the gods. And by that I mean one of the most important steps in my routine.
Toner is supposed to clean your face, tighten your pores, and tackle acne that you have. Sometimes when people wash their face, they don’t wash it correctly so that is why toner is very beneficial because it takes off dirt and oil that was left over. Then it targets acne and reduces it and its redness.
Thayers is a popular, kind of luxury, brand among skin care products because it is kind of expensive. It costs $10 per bottle. But it does contain 12 fl. oz. which is a lot of product. You can make it last if you use it properly.
The way I use it is I take a cotton ball and I apply enough that would cover my face. Just enough and not over because too much toner can make your skin sensitive or burn.
This is a product I just started using in about December 2019 but has made my skin look amazing. You can go to my previous posts and look at my skin and judge for yourself.
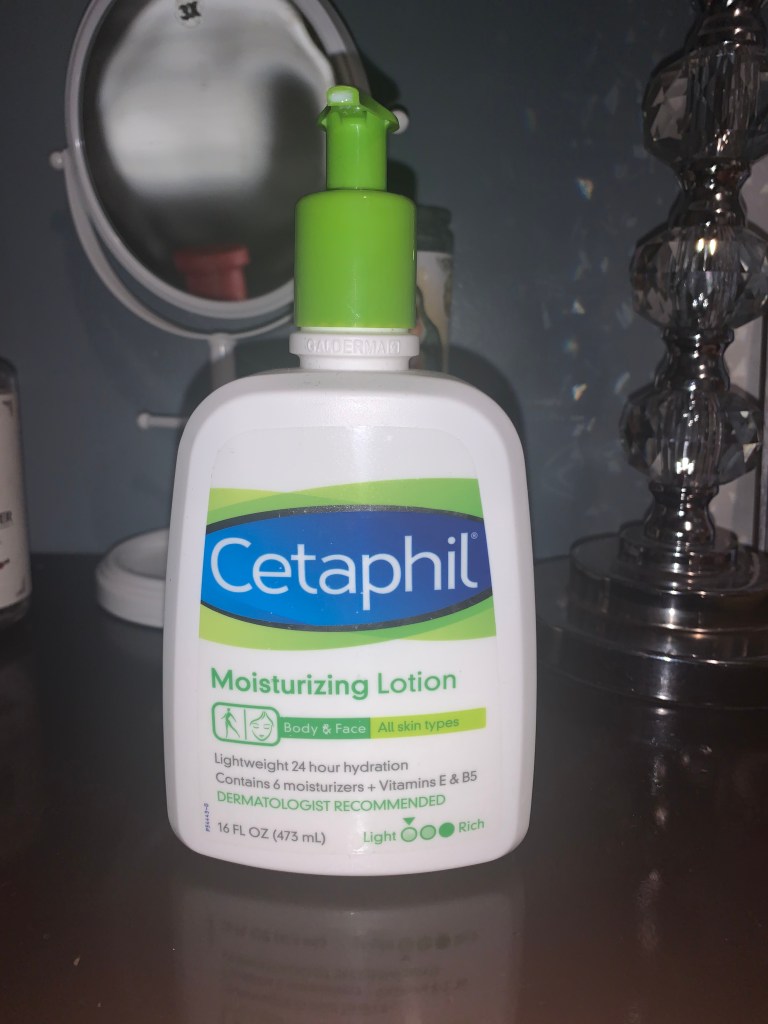
3. Moisturizer
Moisturizer is very important is well because this keeps your skin hydrated. Its main purpose is to keep skin replenished, feeling soft, and protected by sunlight.
Moisturizing Lotion by Cetaphil is for the body and face and meant for all skin types. It says it provides 24 hour lightweight hydration. It contains 6 moisturizers + Vitamins E & B5. It also says that dermatologist recommended.
The price is $10 as well which isn’t bad because the product contains 16 fl. oz. I just started using this product in January 2020 and it has made a difference on my face. I put it on after the toner on my face and apply an amount to cover my entire face.
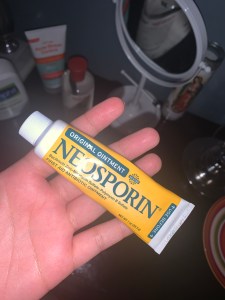
4. Neosporin
Image Credit : Angelina Mendez
This isn’t a step I always use but is sometimes necessary.
Neosporin is a first aid ointment that is used on cuts or any minor injuries. The product contains 1 fl. oz. and costs about $6-10 in stores. Depends on where you buy it.
But the reason I use this last sometimes is because it literally gets rid of scars. Sometimes I pop pimples and they leave nasty scars but if I apply this right after and I keep applying it to the spots every morning and night. This step is only necessary when I have a bleeding pimple.
Thank you for reading along and I hope you learned something about me and skin care products!
Hey everyone! I hope everyone is doing okay with what is going on. This week, I decided to do something a little different. In today’s blog post, I wanted to share my favorite Tik-Toks that I have saved on my phone that I really like.
If you don’t know what Tik-Tok is, what rock are you living under?
Tik-Tok, which was originally named Musical.ly, launched in 2014 and was founded by Chinese entreprenuers Alex Zhu and Luyu Yang. It is a platform where people can make short videos ranging from 5 seconds to 1 minute about anything. From dancing videos, to make-up videos, to cooking videos and to ranting videos. Here are a couple of videos related to my blog and what it is about:
Some of these are more for me but if any of you are interested in these little hacks or work out routines, I highly encourage you to try them out! I’ve kept them in a little folder on my phone and I’ve been wanting to try them and buy stuff to do them but now that the COVID-19 has affected all the stores and everything, it has been really difficult.
There is absolutely no excuse for the gym one though LOL.
Thank you for reading along and wishing love to everyone in this time.
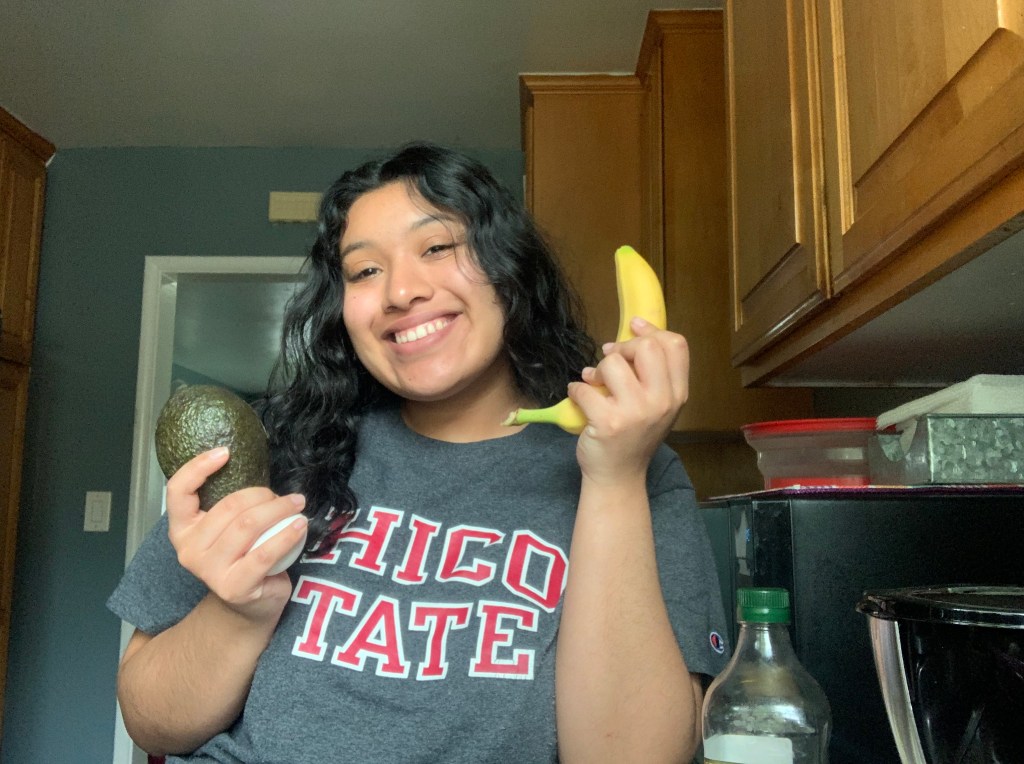
My hair and I have been at war since middle school because I decided to bleach it 6+ times. Since then, I have used countless products and methods to attempt to bring it back to its former thick glory but I haven’t been that successful, but one method that does help put ideas into my head is YouTube.
I’ve been searching for many product reviews and hair care methods and when I came across BiancaReneeToday’s channel, it felt as if I hit a jackpot.
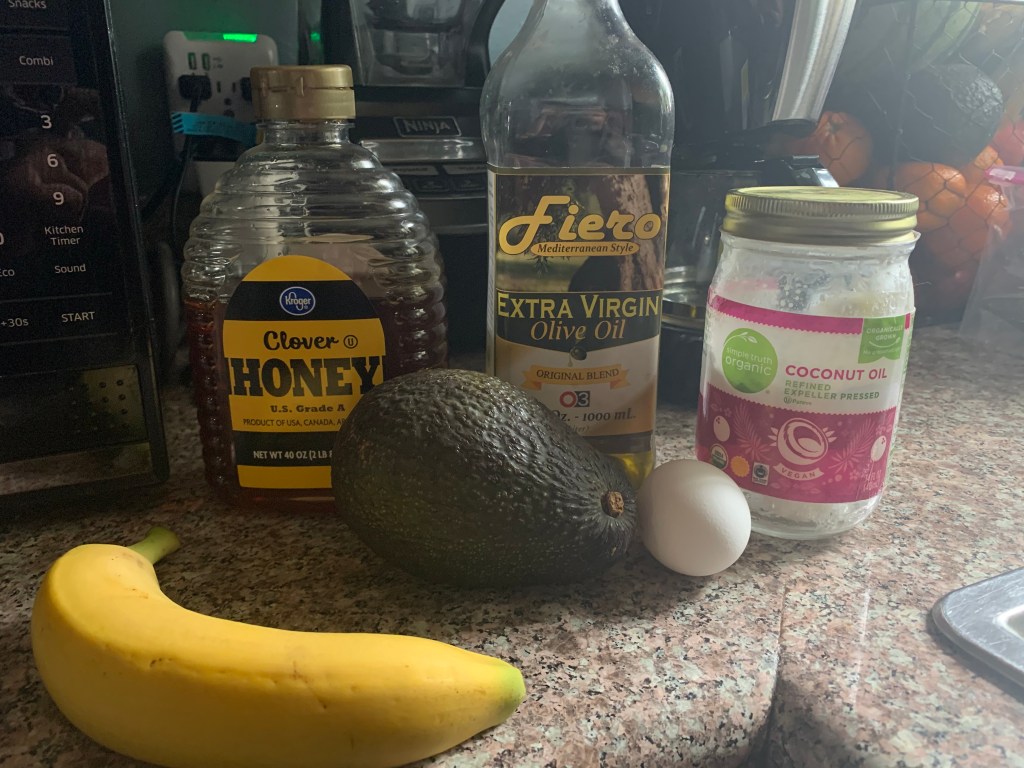
BiancaReneeToday is a beauty/health/hair YouTuber that posts many videos about trying out products and taking care of your hair. I discovered the video above and decided I wanted to try it out because the ingriedents she used were all natural and nothing unsafe for me.
What exactly is the DIY Hair Mask?
In the tutorial, Bianca explains to us what this hair mask is and its exact purpose for it. “This mask is going to do wonders for you hair, no matter what hair type you have. It provides nutrients and extra growth and shine,” Bianca said in her video.
The ingredients that are provided in the video are:
– 1 egg (to make your hair shinier and prevent hair loss and also includes vitamin A which prevents breakage.)
– 1/2 of an avocado (full of oils, proteins, and will smooth and moisturize the hair.)
– 1/2 of a banana (will smooth frizz, prevent hair loss, and soothe an itchy scalp)
– 3 spoonfuls of coconut oil (adds shine to hair, moisture, and detangles hair.)
– 3 spoonfuls of honey (encourages hair growth and softens the hair)
– 2 spoonfuls of extra virgin olive oil (promotes a healthy scalp and strengthens and softens the hair)
I tried my hardest not to eat all the ingredients while making this hair mask because everything smelled so good LOL.
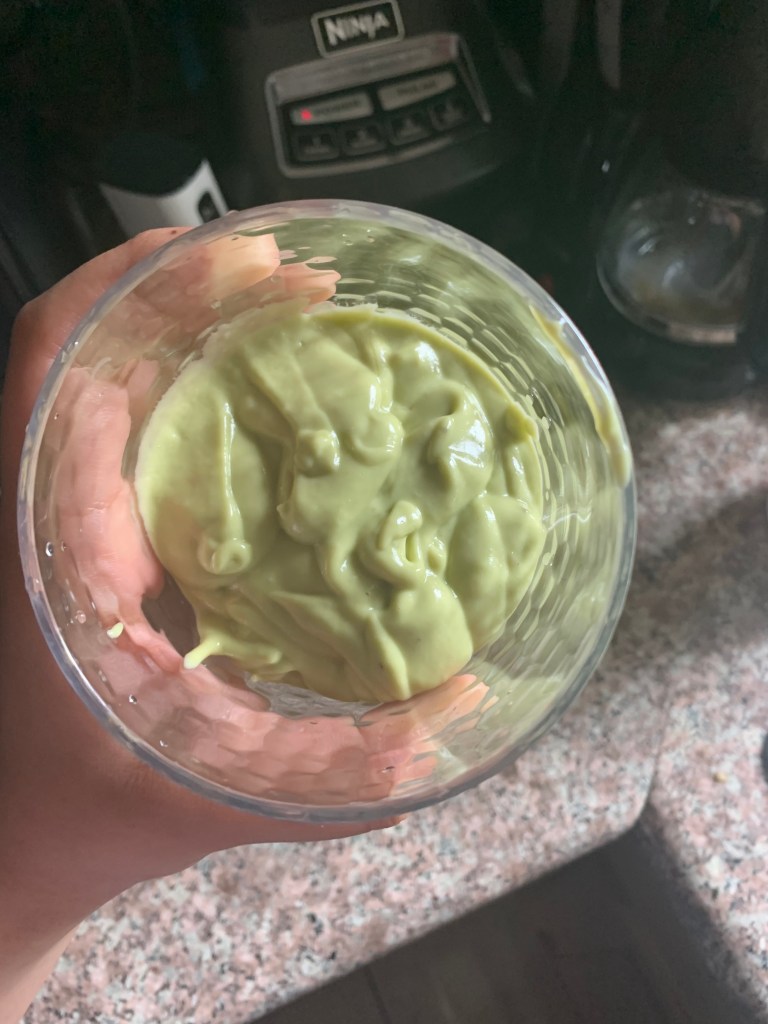
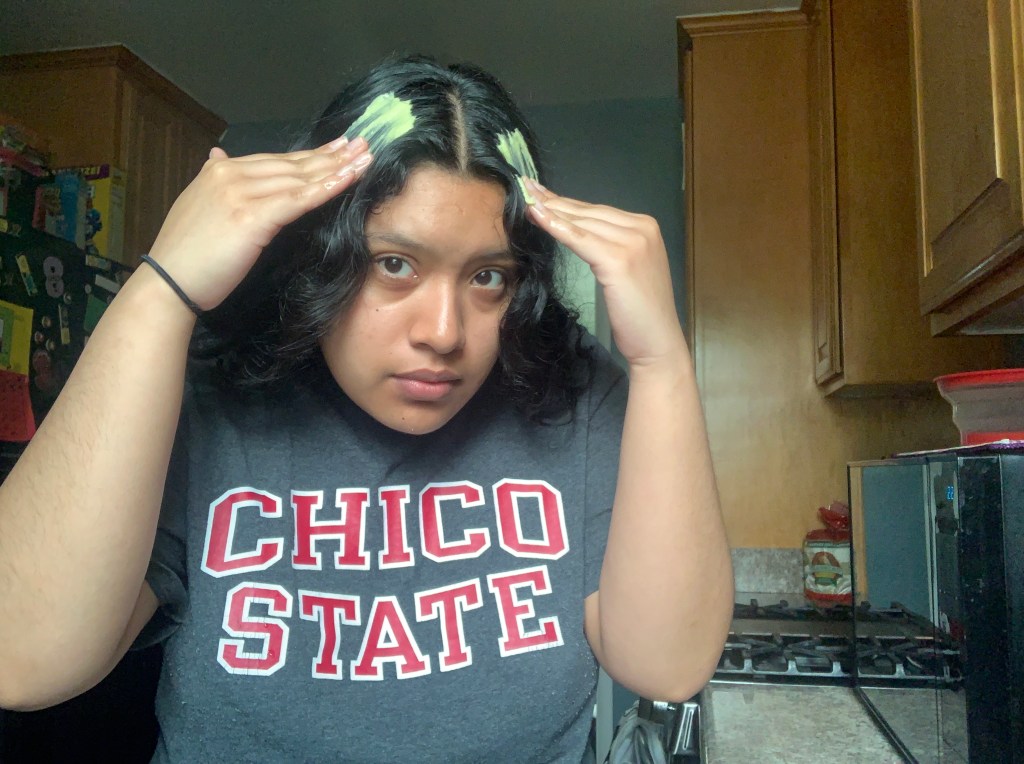
In the video, she uses a fork to mix everything together then puts that mixture into a blender to make sure it comes out as blended as possible. After we have our blended hair mask, Bianca tells her audience to apply the entire thing from your scalp to your roots.
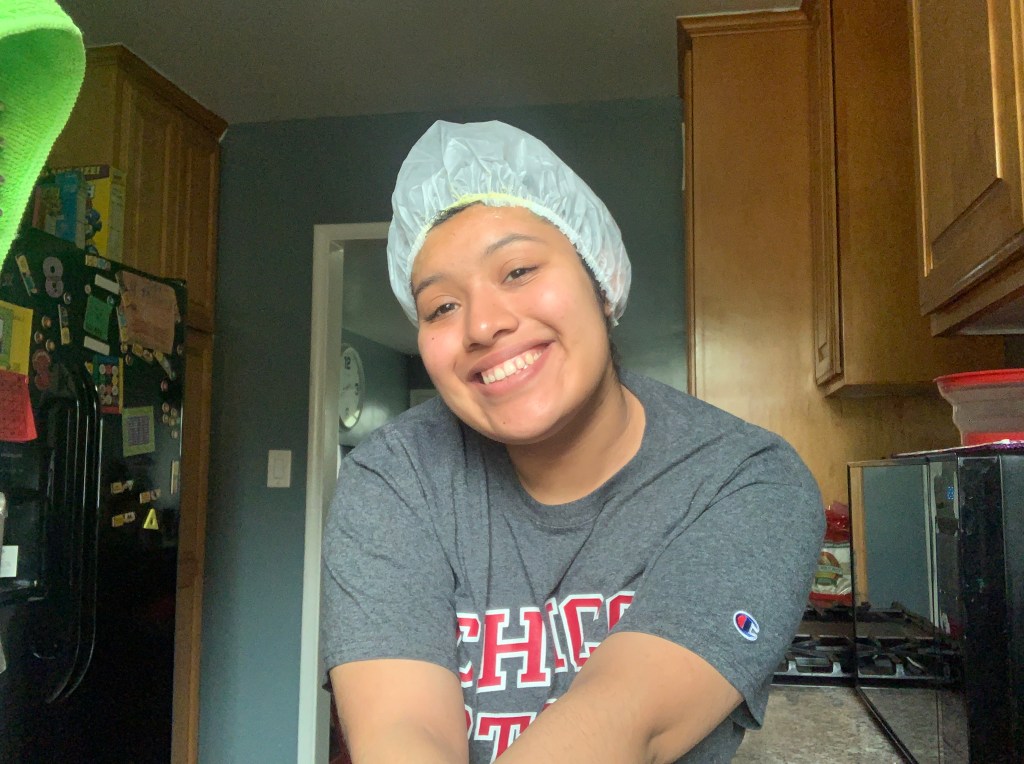
The mixture was very creamy but again smelled really good. I applied it to every inch of my hair and along my scalp. I then used a shower cap to lock in the hair mask. Bianca recommends to leave the hair mask in for a minimum of 30 minutes. She didn’t provide a maximum time for said that she would leave it in for an hour. I decided to leave the mixture in for one hour. Let’s see the results!
What are the hair mask results?
I did this on a day where I wash my hair. I wash my hair every three days because I’ve read online on multiple beauty sites that it is bad to constantly wash your hair. It has worked for me in the past and as soon as I started washing my hair every three days it became for healthy.
After I took my shower and washed the mixture out of my hair, it smelled amazing and felt so different. It didn’t look entirely different, it was my first time trying this mask out, but I could tell there was a slight difference in the strength of my hair from before until now.
In the video, Bianca said that she recommends to do this mask and use it on your hair only twice a month. I will do it again later this month and provide the rest of my results! For now, I rate this mask a 9/10. It left my hair feeling and looking very soft and shinny. I recommend this to my audience! Thank you for reading along!
Hey everyone! How are we all doing? I apologize if anybody is going through such a hard time right now because of the COVID-19 (Corona virus) , but I hope I can lighten up some spirits with a new review!
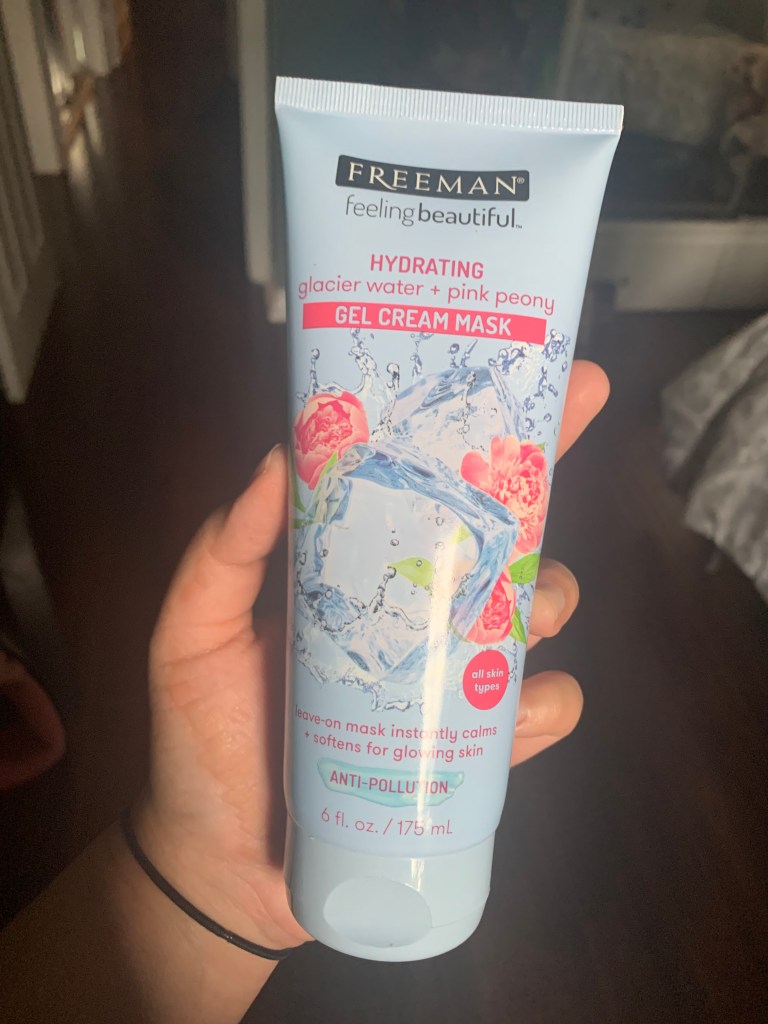
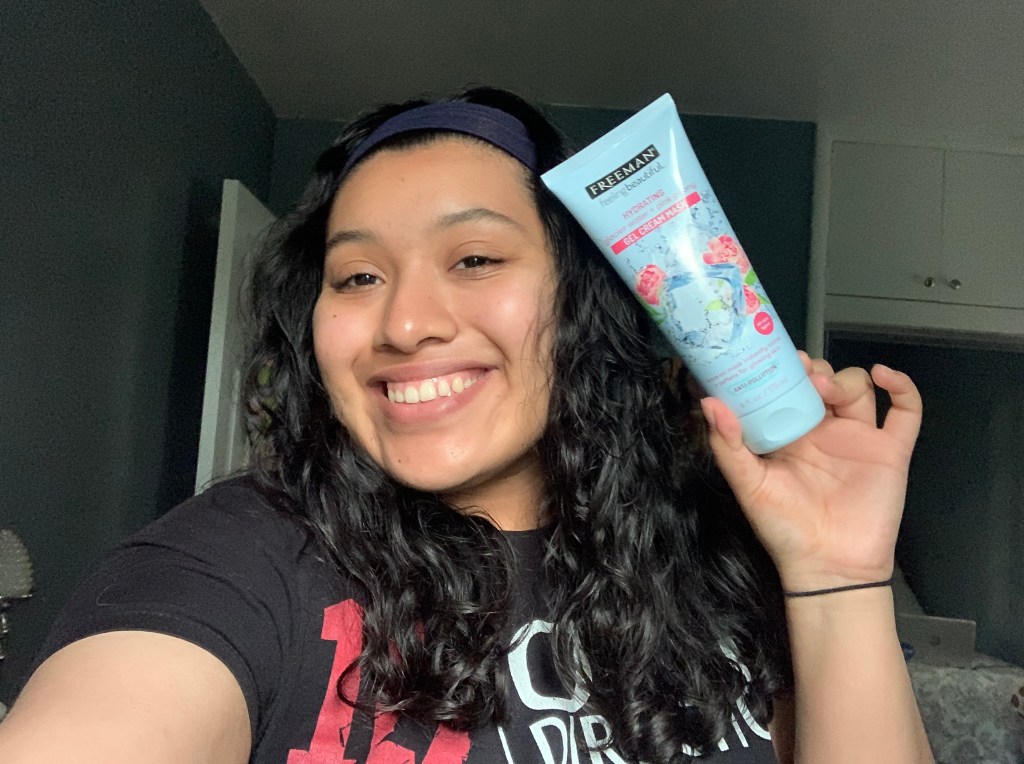
Here I am back again with another Freeman Beauty Review! The last face mask I tried from the brand was an absolute success and for background information about the brand, you can check it out here! https://angietips.fashion.blog/2020/02/20/review-2-freeman-beauty/
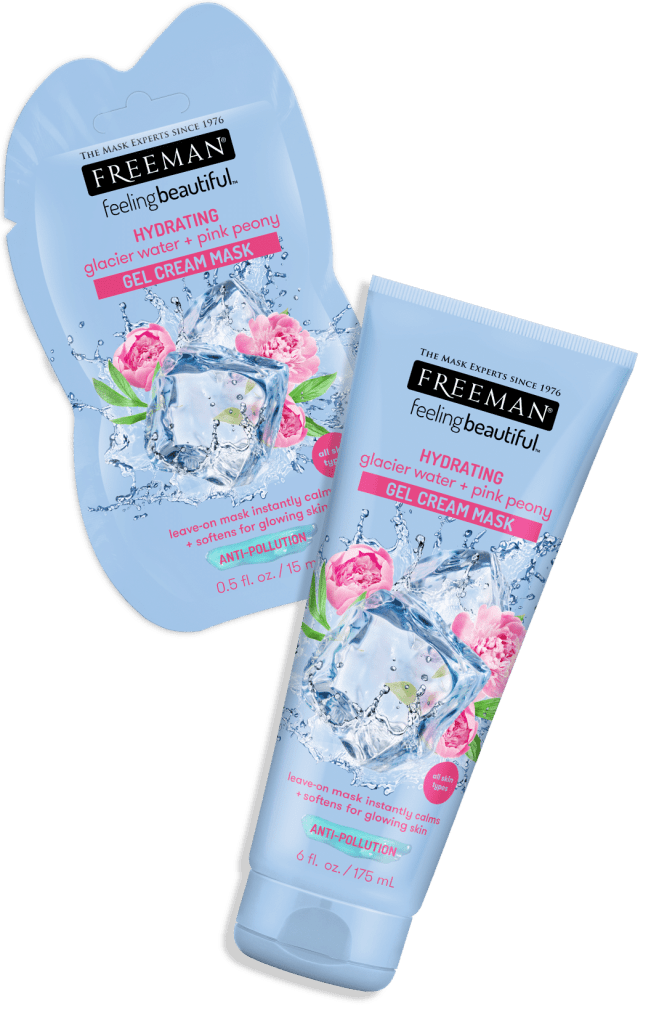
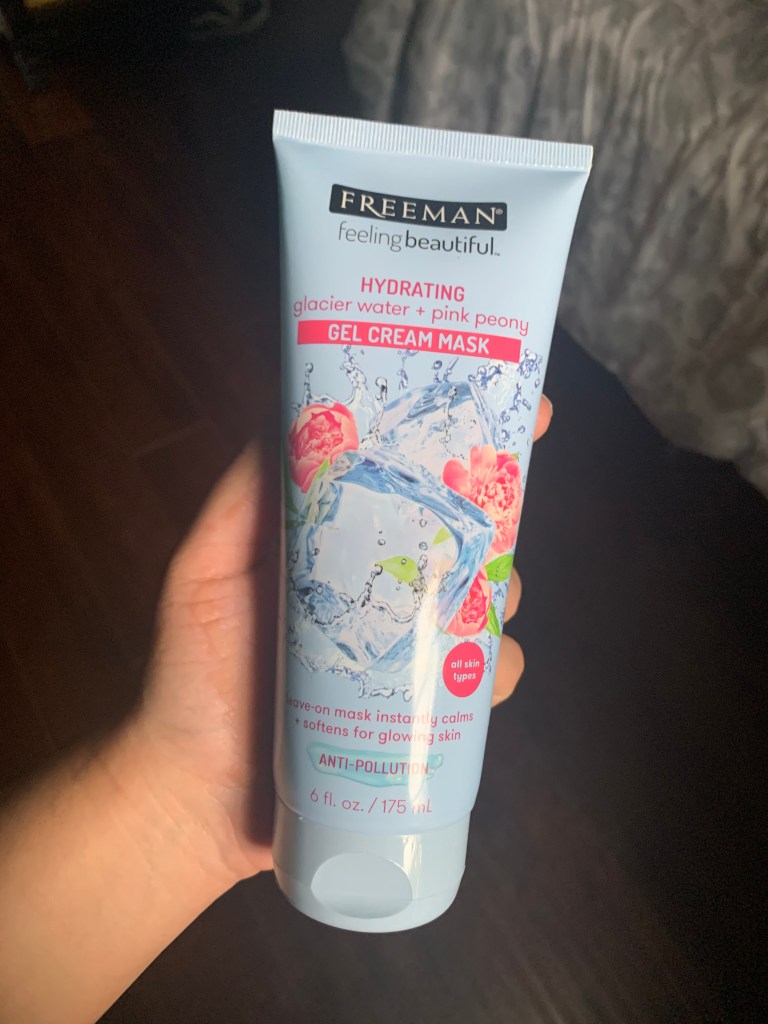
What is the Gel Cream Mask?
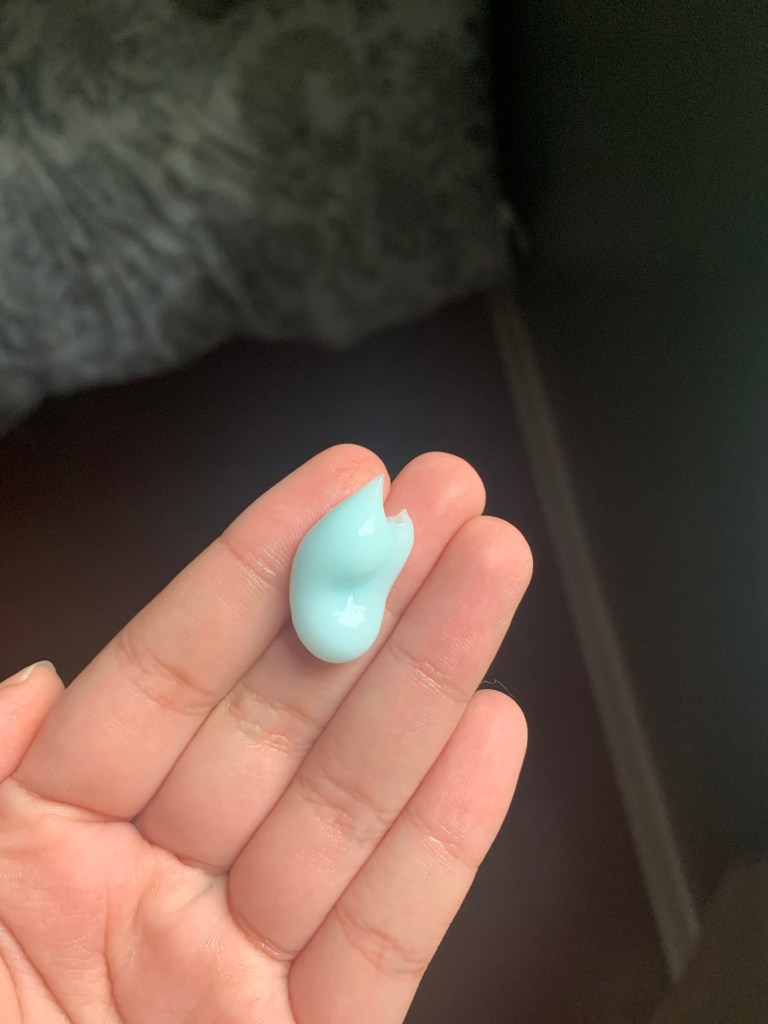
The name of this product is hydrating glacier water + pink peony gel cream mask. Wow that is one tongue twister. The purpose of this mask is to “instantly calm + soften for glowing skin”. From the description on the back of the bottle, it seems like the mask is more for people who have dry skin. “Refreshing glacier water replenishes dry skin while soothing Pink Peony, the “queen of flowers”, delicately calms for petal-soft skin,” said in the description. The bottle contains 6 fl. oz. and the main ingredient is Glycerin.
The directions say to apply to a clean face and neck, with of course avoiding the eyes, and you can leave it on for 10 to 15 minutes, all day, or overnight.
Wait what?
OVERNIGHT??????
I read further to see an explanation. “The gel cream absorbs into the skin with no need to rinse, and no need to worry with getting onto your pillow. Use twice a week or often as needed.” That is crazy to me but I will see how it feels after 15 minutes.
The packaging was absolutely stunning to me and instantly caught my eye. It looks so beautiful and I couldn’t wait to try it out.
Let’s try the product out!
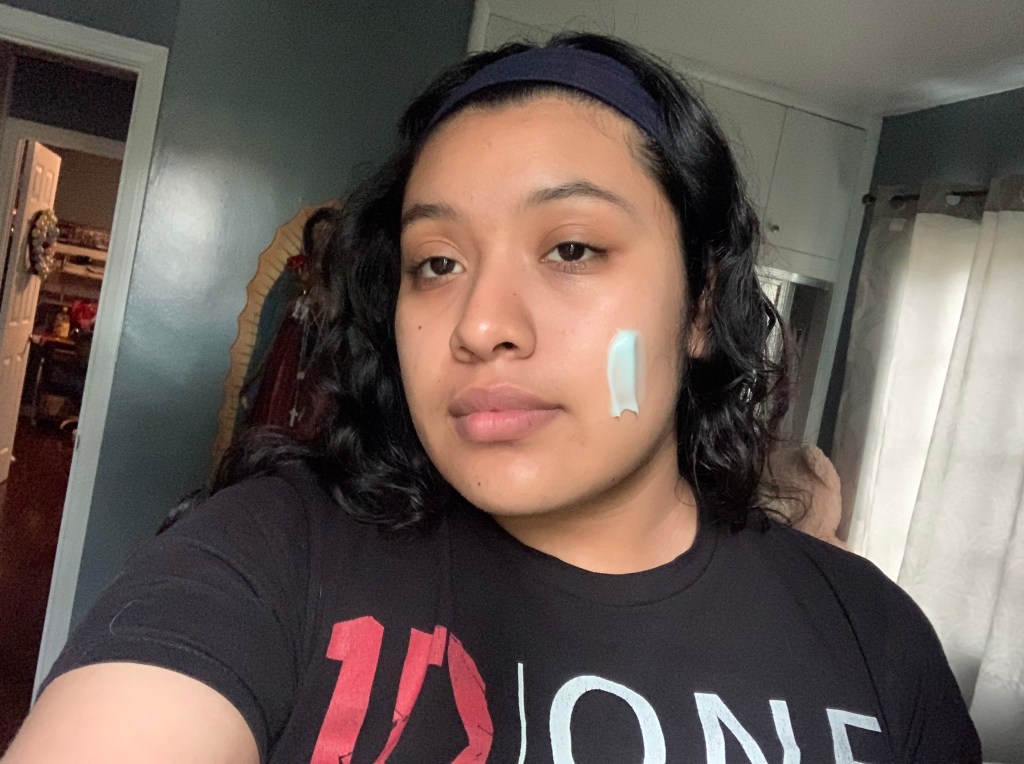
I was a little sad when I rubbed the mask in all over my face to watch it become clear. I guess it was kind of obvious because it is a gel cream mask so it would apparently be clear. It did feel nice to rub into my skin and it smelled great. It had a floral sent and of you are sensitive to scents then this might not be for you. I took the mask off after 15 minutes because I didn’t feel comfortable leaving it on all day but after taking it off, my skin felt so soft. My skin felt refreshed and so soft but I didn’t see a glow as promised LOL. I would rate this mask a 7/10. It gets the job done but not in some ways that I would like.
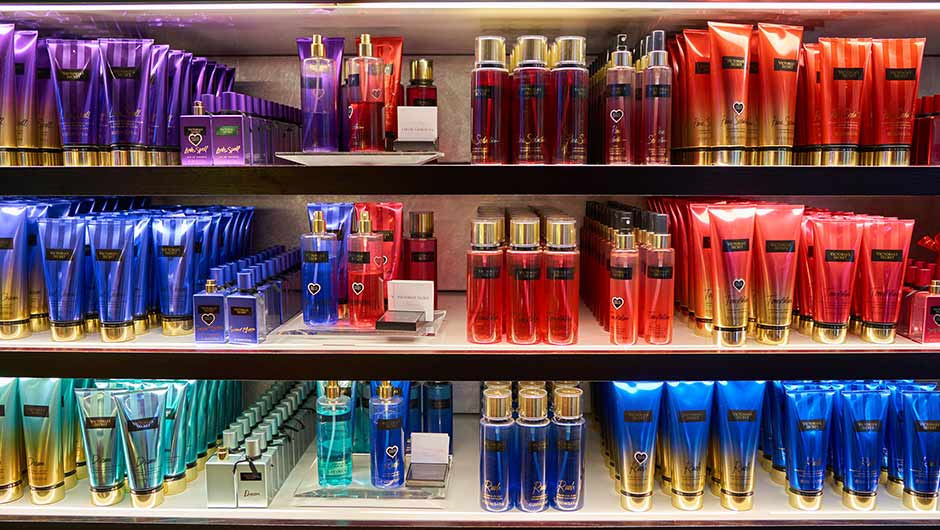
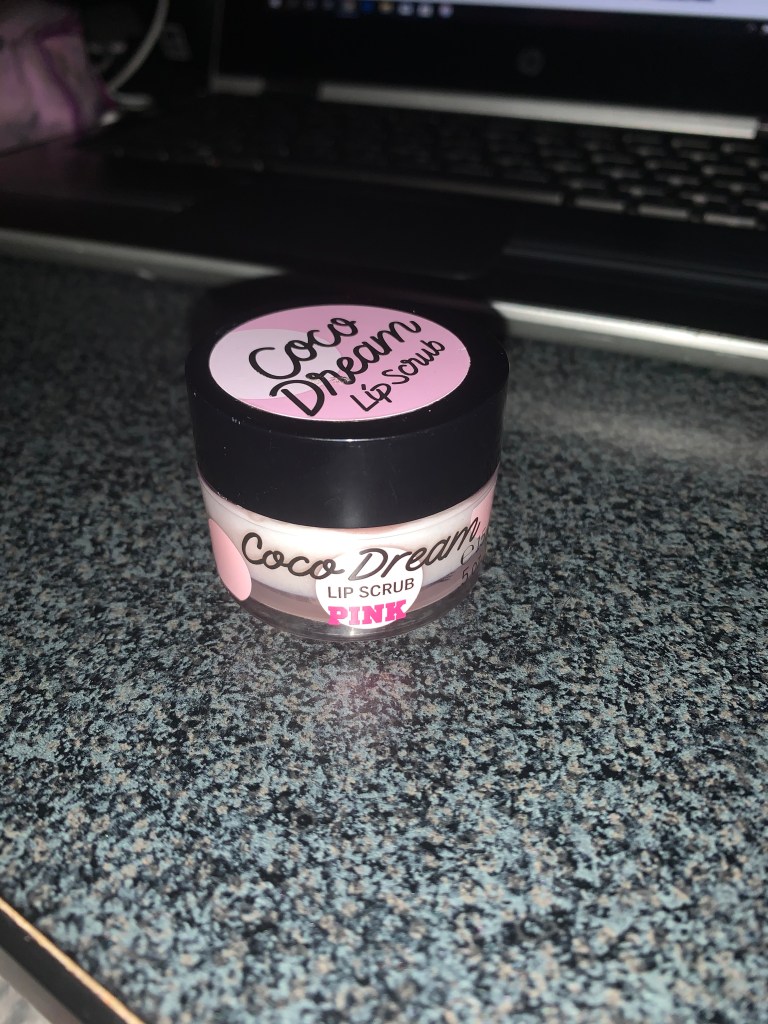
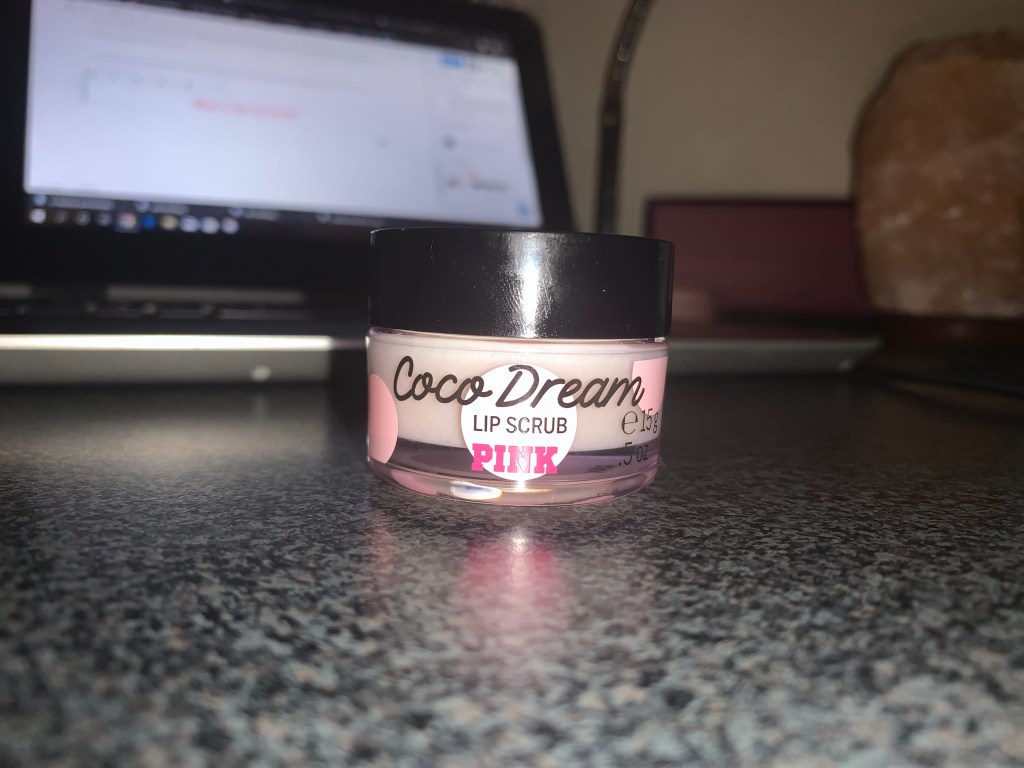
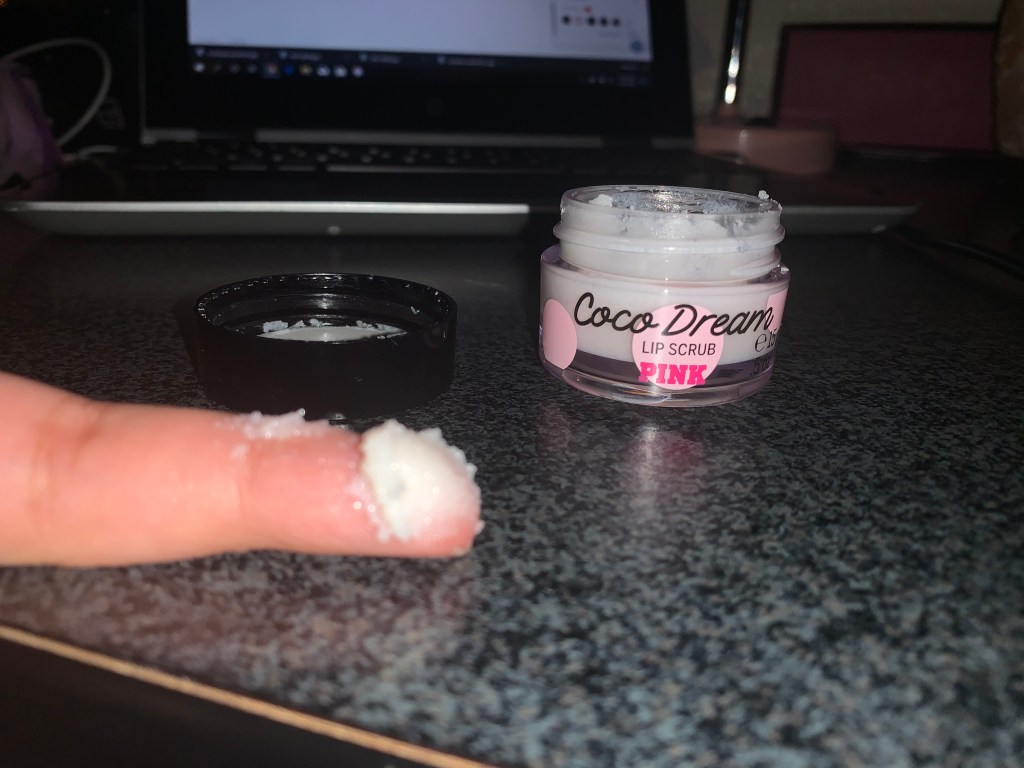
PINK is a sister bran by Victoria’s Secret. It is mainly targeted to the youth women from ages 15-24 and provides a variety of products such as undergarments, fragrances, clothing, and beauty products. According to LBrands’ website, they explain what Victoria’s Secret, “These stores feature a wide assortment of its signature bras, panties and sleepwear, as well as the brand’s popular fragrances, body care and athletic line, Victoria Sport. These stores are now debuting in cities all over the world.” PINK offers many beauty products from lotion, perfumes, essential oils, makeup such as lip gloss and lipsticks, and lip care.
During a sale last week, I picked up this lip scrub because I always wanted to try one! Here we go!
The lip scrub is the color white and contains 15 grams which is equivalent to .5 ounces. The main ingredient to the lip scrub is coconut. For those of you who don’t really know what the purpose of body scrubs are, it’s supposed to exfoliate and remove your dead skin cells. Scrubs in all forms are very nice and super good for the body. If you’ve seen my previous review, I tested out a face scrub and it has the same purpose as this lip scrub, to make my skin softer and smoother. It’s also healthy because by removing the dead skin, you are making room for growth. T
he instruction on the side of the lip scrub case say, “Buff on lips. Rinse off. Pucker up.” Thank you Victoria’s Secret. I now know how to pucker up. It doesn’t say how long to keep the scrub on but according to an article published on the website Honestlywtf titled “DIY Sugar Lip Scrub”, it says to keep the scrub on for 1-2 minutes. Alrighty, let’s try it out!
Let’s test the product out!
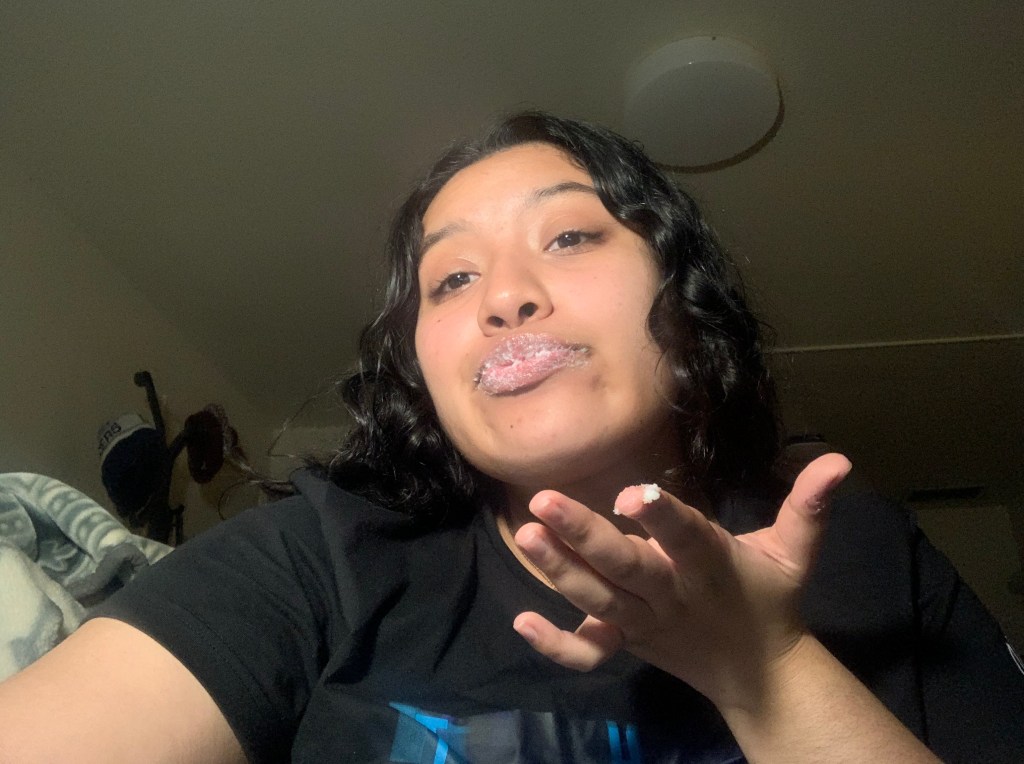
First thing I thought of when putting on the scrub was damn you smell good. LOL. But the scrub had a very nice and soft coconut fragrance to it. It wasn’t very heavy or over powering but just right. When I opened the product, I felt it with my finger and it felt very dry. I decided to coat my finger in water and dip into the product. Once I placed it on my lips, I began to rub it in a circular motion and covered the entire area of my lips. It honestly was a little too rough for my opinion. It could’ve been softer in some way but it was okay to me. I left the scrub on my lips for 2 minutes max then wiped it off with water.
Final thoughts?
It left my lips feeling smoother than a baby’s bottom. I do recall having sections on my lips were that contained dead skin and the scrub removed it right off. My lips also felt very hydrated and new. I would rate this product an 8/10 ! YAY! It is approved by me. The only thing I would say that could be improved is to make it a little less harsher but it got the job done! Thank you for reading along!
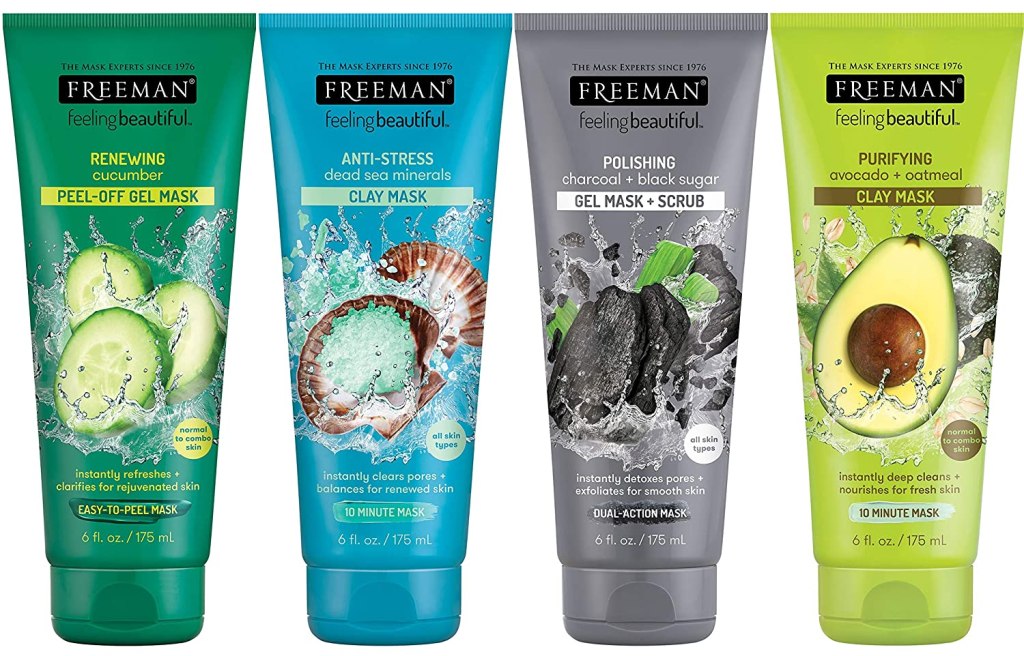
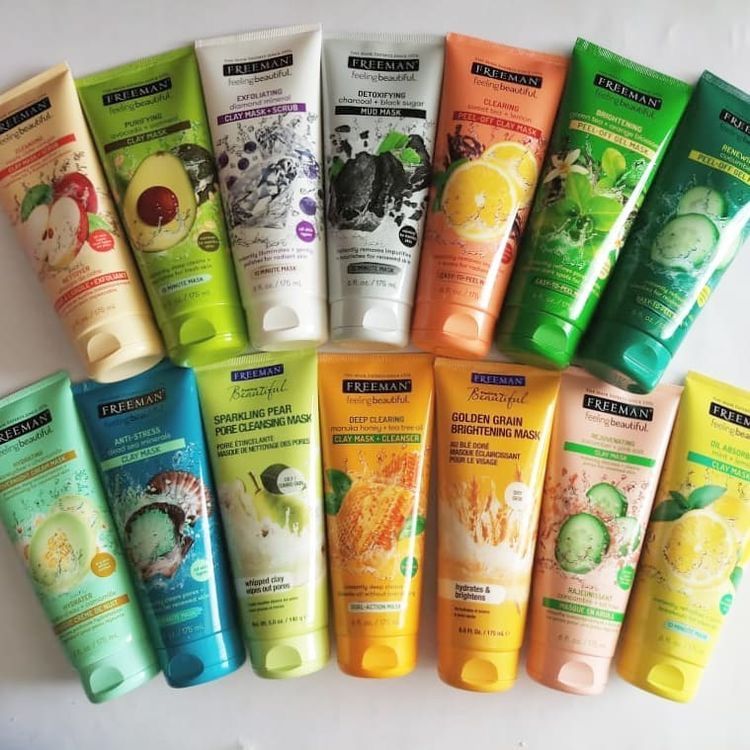
Freeman Beauty was launched in 1976 in Los Angeles for hair, skin, and foot care products, according to Freeman Beauty’s website. “Freeman Beauty had a vision to provide nature inspired hair care. facial masks, and bath and body essentials,” the website read. They also explained how some of the main ingredients that they use in their famous products are avocado, cucumber, papaya, oatmeal, and baking soda.
Let’s get real here.
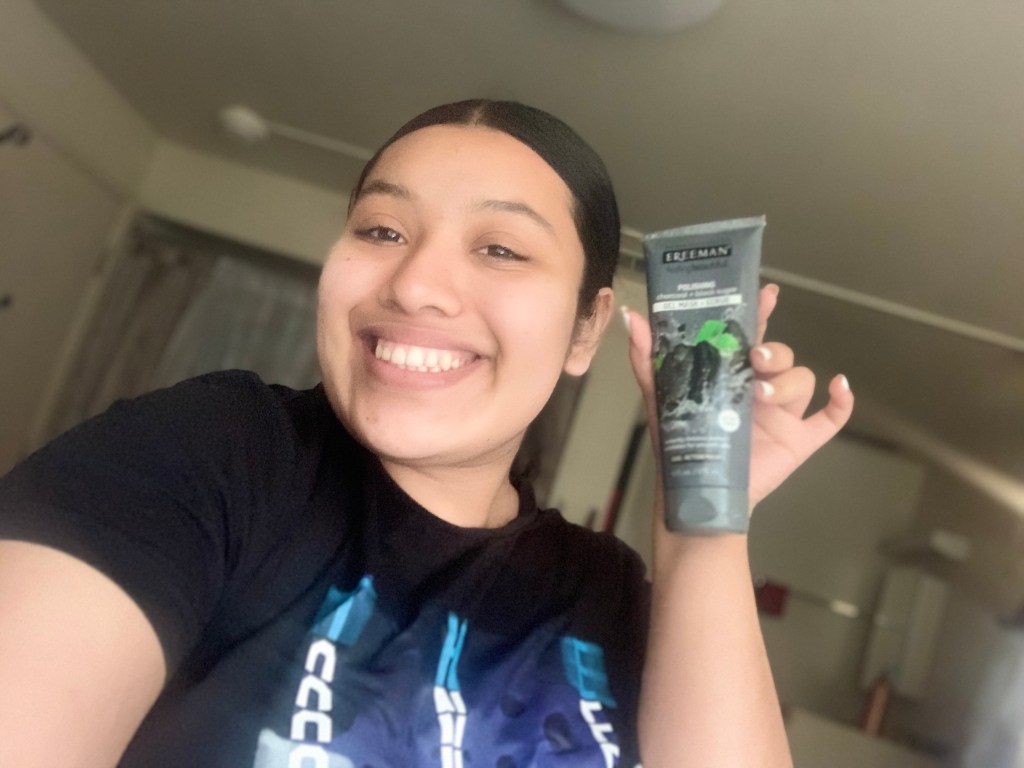
If you are into beauty and all things skin care, you know what Freeman’s Beauty is. They are wildly famous on social media for being known for their life changing face masks as well as having a wide variety of health products. I’ve always wanted to try their masks because who doesn’t love a good face mask? I went for a Walmart run to repurchase my products that I use for my skin care routine, which, let me know if y’all would like to see that, and what do you know, I see a wide variety of Freeman Beauty products and the infamous charcoal face mask I’ve been dying to try.
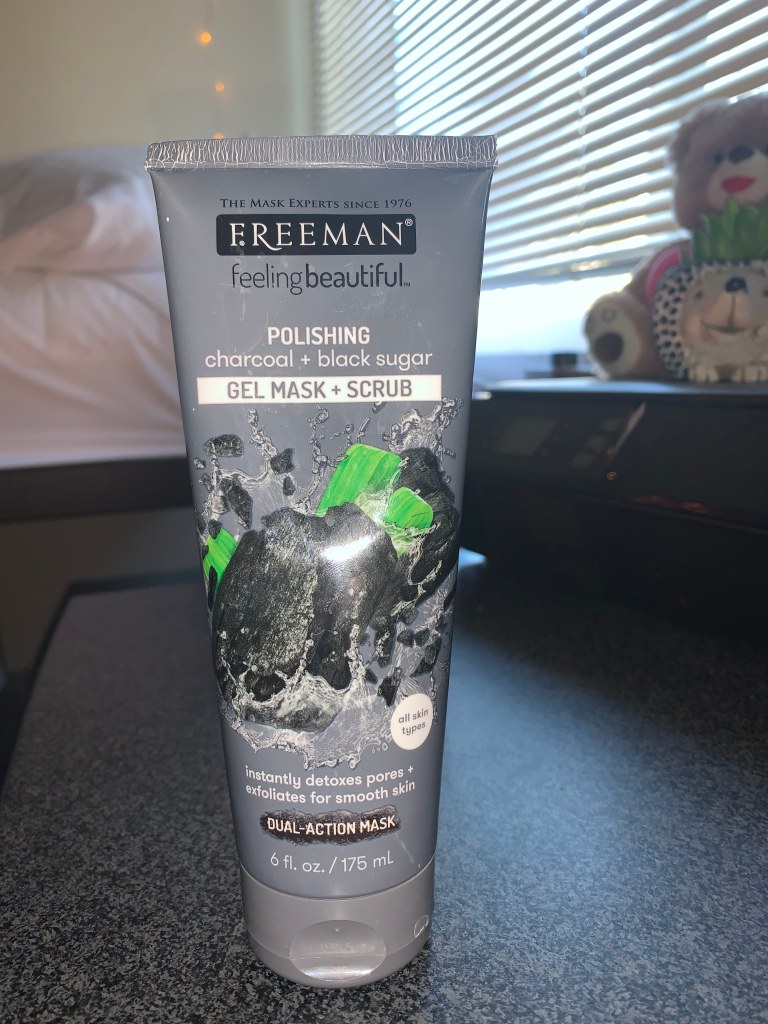
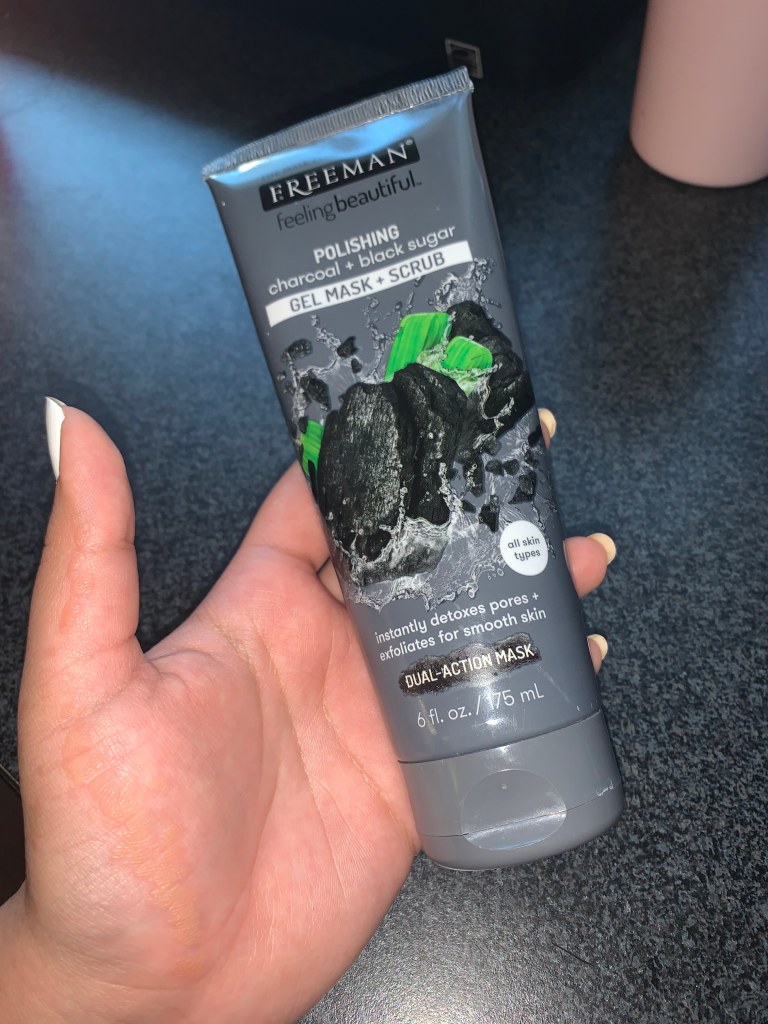
What is the Gel Mask + Scrub?
The title of the product is Polishing charcoal + black sugar, gel mask + scrub. The description of the product on the front said that the product could be used on all skin types, and instantly detoxes pores + exfoliate for smooth skin. It also said that the mask was dual-action. The mask contained 6 fluid ounces and one of the main ingredients is activated charcoal. Activated charcoal is really good for your skin because it minimizes pores, it reduces the oil on your skin, treats acne as well as cleanses the skin. It also soothes and heals bites, and cuts and skin irritations. “Black sugar helps exfoliate away dulling skin cells for softness and clarity. Perfect for all skin types,” read the back of the bottle. Charcoal overall is a very healthy product for you which is why I’m very excited to try it out !
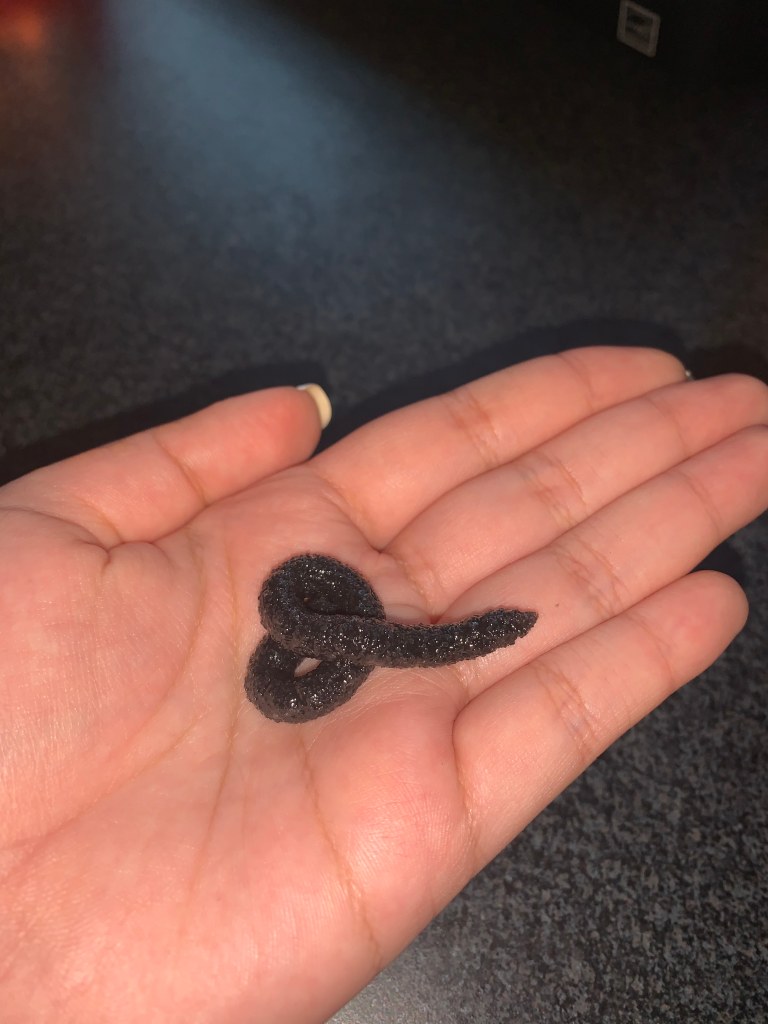
Let’s try the product out!
On the back of the bottle, it provided a clear set of instructions. “Apply mask to damp face and neck, avoiding contact with eyes. Leave on for 5-7 minutes. Add warm water and massage gently to exfoliate, then rinse. Use twice a week or as often as needed.” I read in a beauty article online that exfoliating three times a week is best for the skin, so the pictures above are from the third day that I was exfoliating. I applied it to my face and left it on for 7 minutes. It felt very sugary in the sense like it felt like I was rubbing wet sugar all over my face. It wasn’t harsh at all or made my skin irritated. Afterwards, it left my skin feeling very smooth and refreshed. After three uses I did notice a huge change on my skin, it was smoother and more clear. I give this product a 10/10 and I do recommend it to my audience!
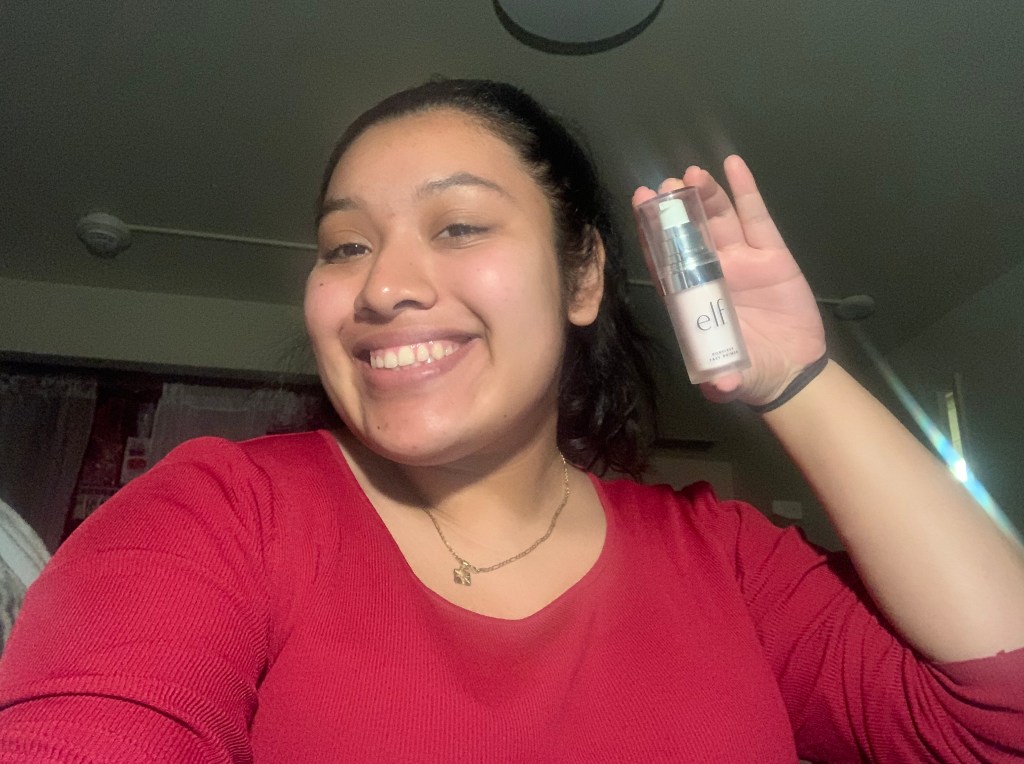
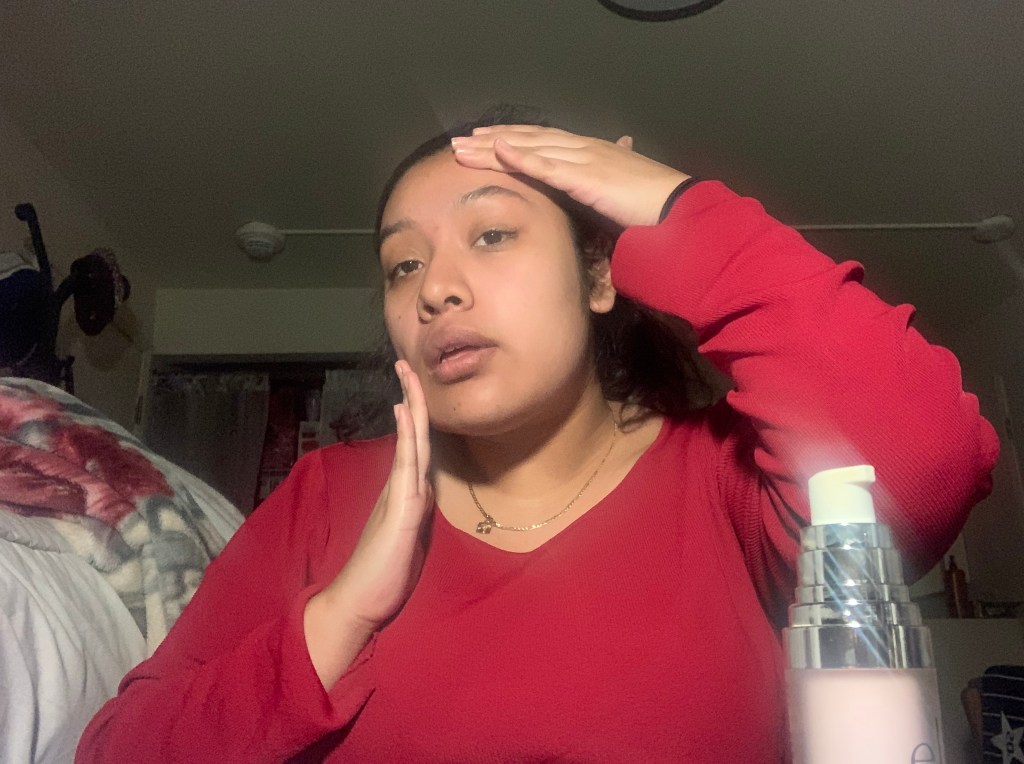
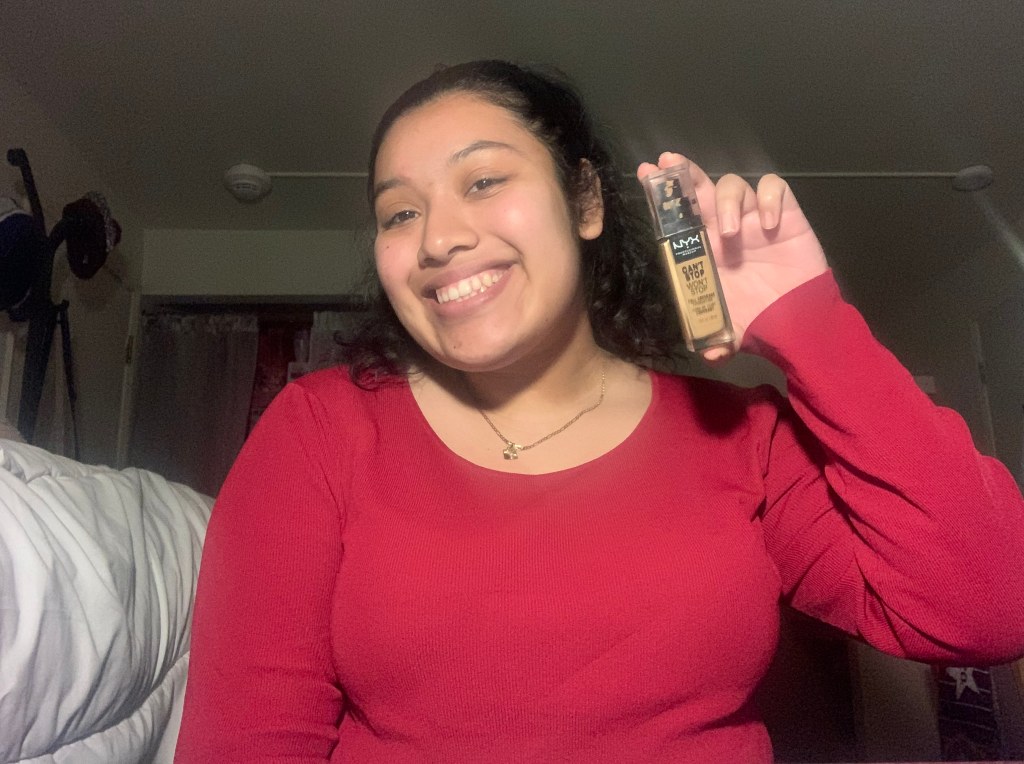
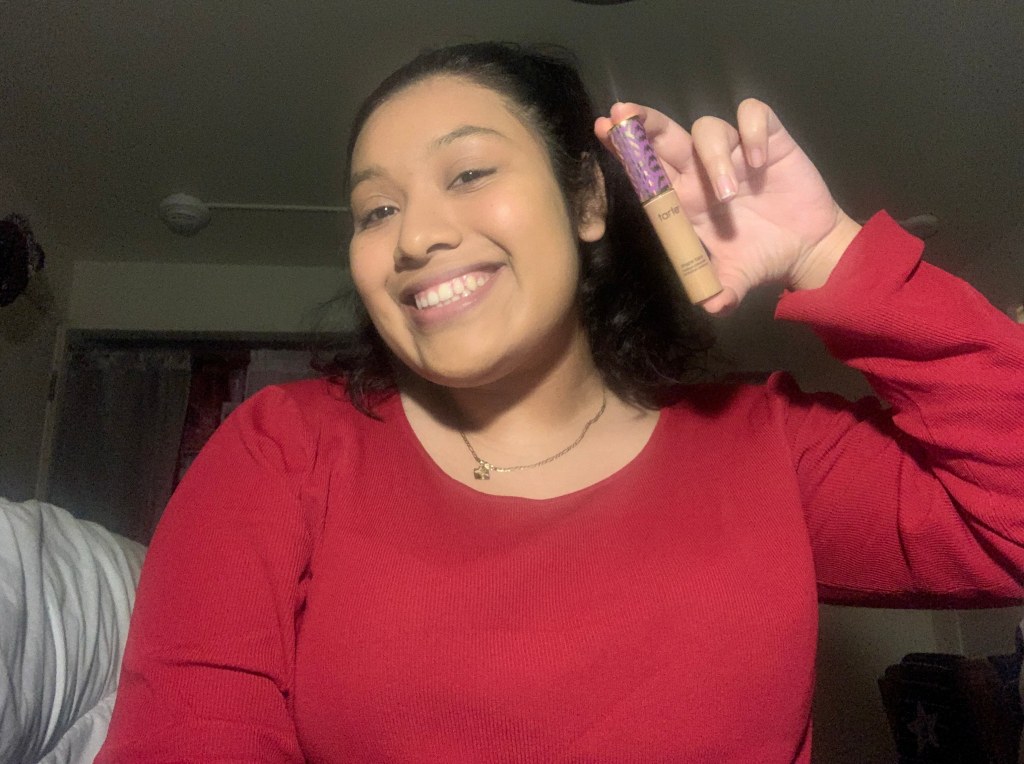
Hey ya’ll! It’s Angie here and today I’m going to talk about and show you my soft glam make up look that I do every time I have a special outing or occasion!If you’ve been reading my previous posts, you see me explain my passion for make up and beauty products and when it started. But here you will see me explain a step by step process I go through in order to perfect my make up look that I think suits me! It’s not for everybody! But I truly believe it is simple enough for anyone to achive on their own! The products I mention in my description below are pretty pricey, I’m sorry :(, but if anyone asks me for dupes that I could provide, I will surely do that in a post in the future!
I think this make up look is important to me and other people because make up is a huge component in our appearances today and it makes us feel and look good! I very much enjoy it because I love dressing up and it boosts my self confidence! It is a huge and popular topic within our youth today, so it’s a great way to bond with other people as well as learn new things. I also want to share tips and tricks I use so other people can learn! Without further ado, here is my 12-step soft glam look!
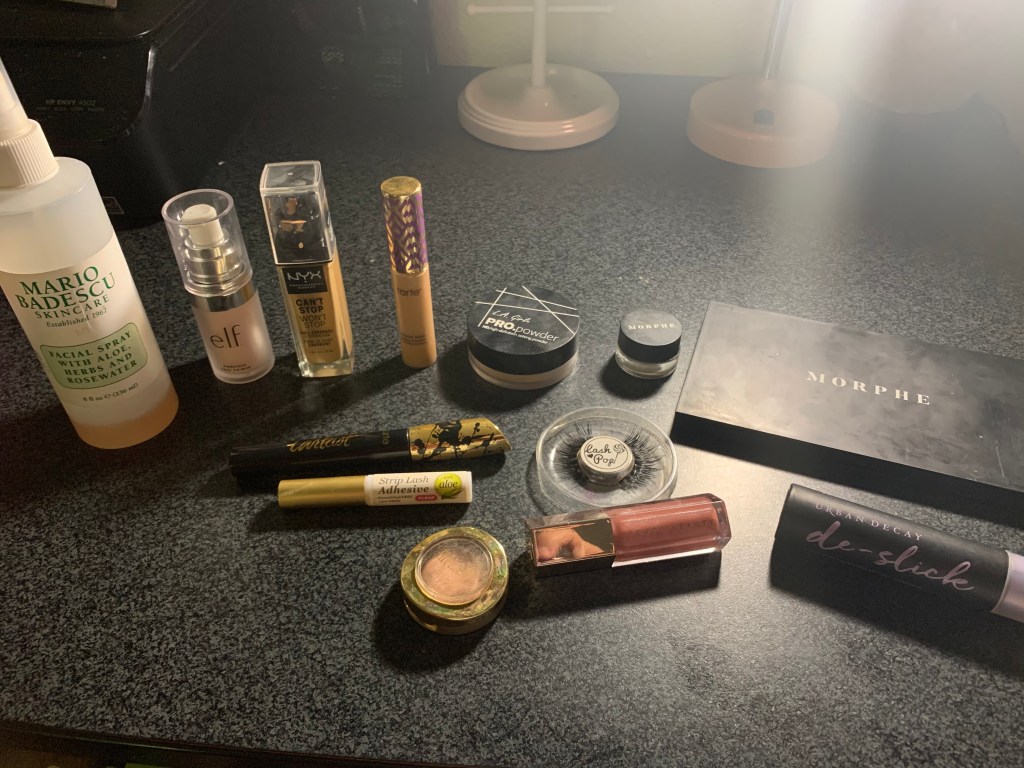
Make up products I use in my Soft Glam look
Mario Badescu – Facial Spray with Aloe, Herbs and Rosewater
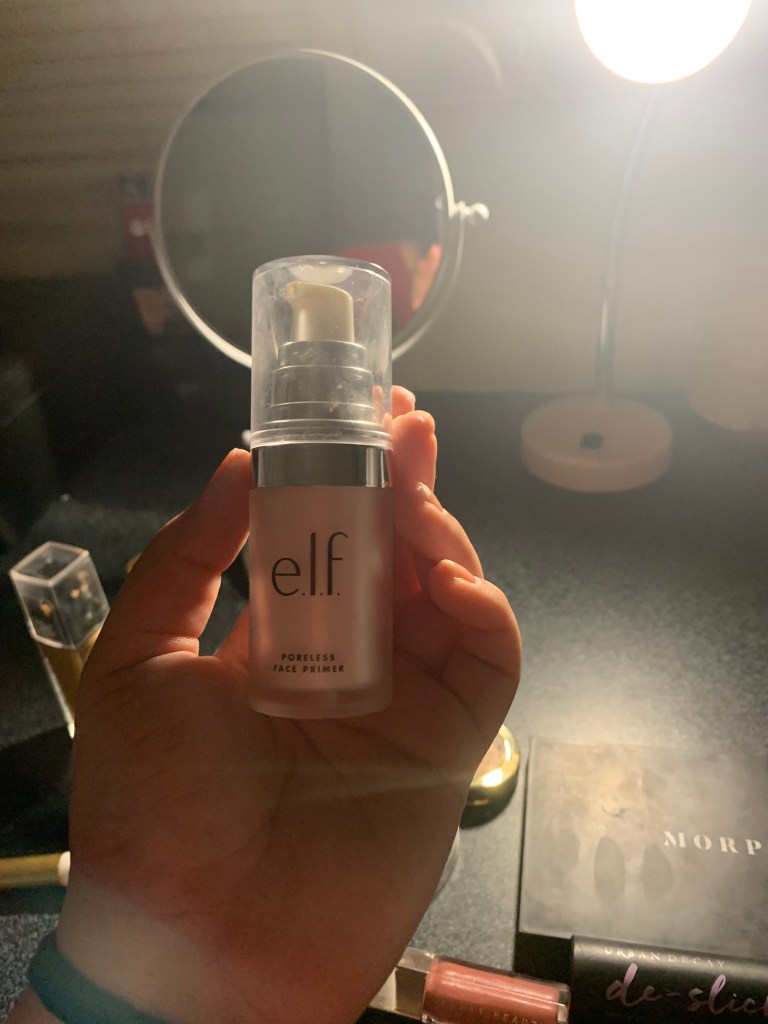
Elf – ‘Poreless Face Primer’
NYX Professional Makeup – ‘Can’t Stop Won’t Stop’ Foundation in the shade ‘Neutral Tan’
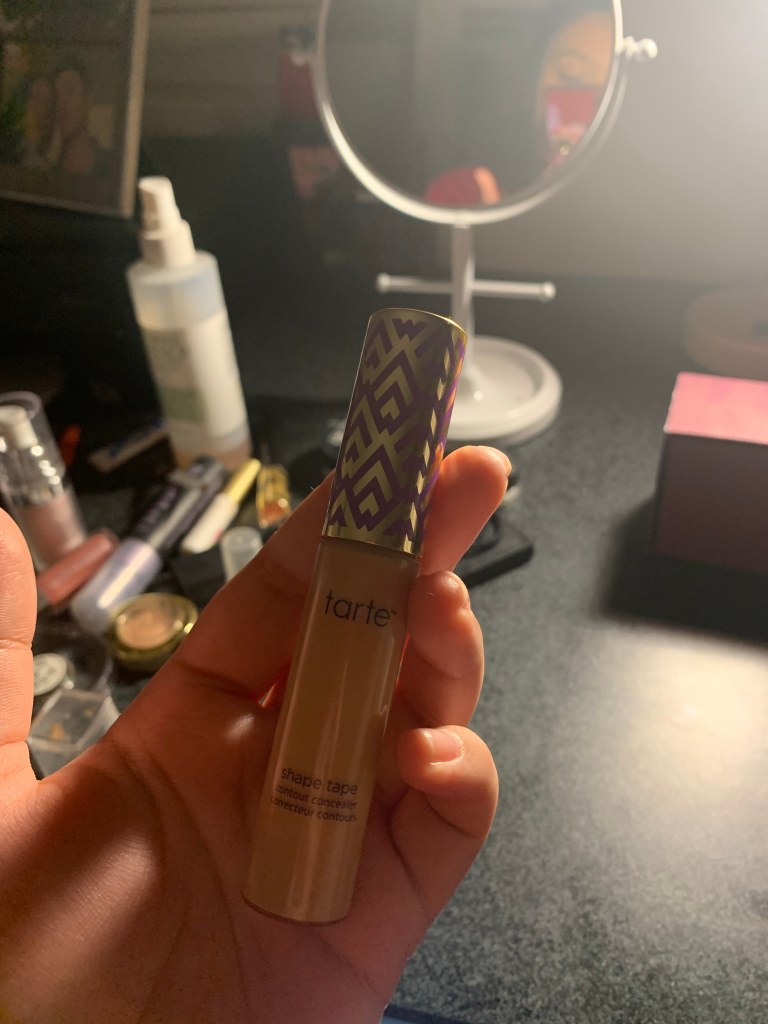
Tarte – Shape Tape Concealer in the shade ‘Tan Sand’
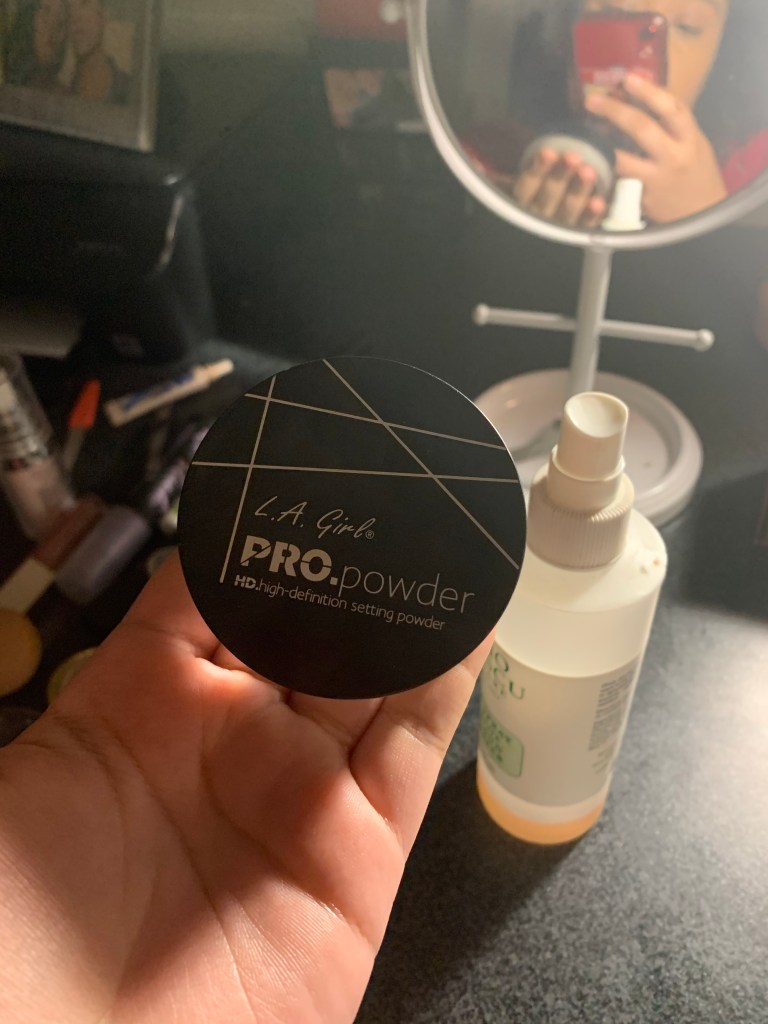
L.A. Girl – Pro HD High Definition Setting Powder
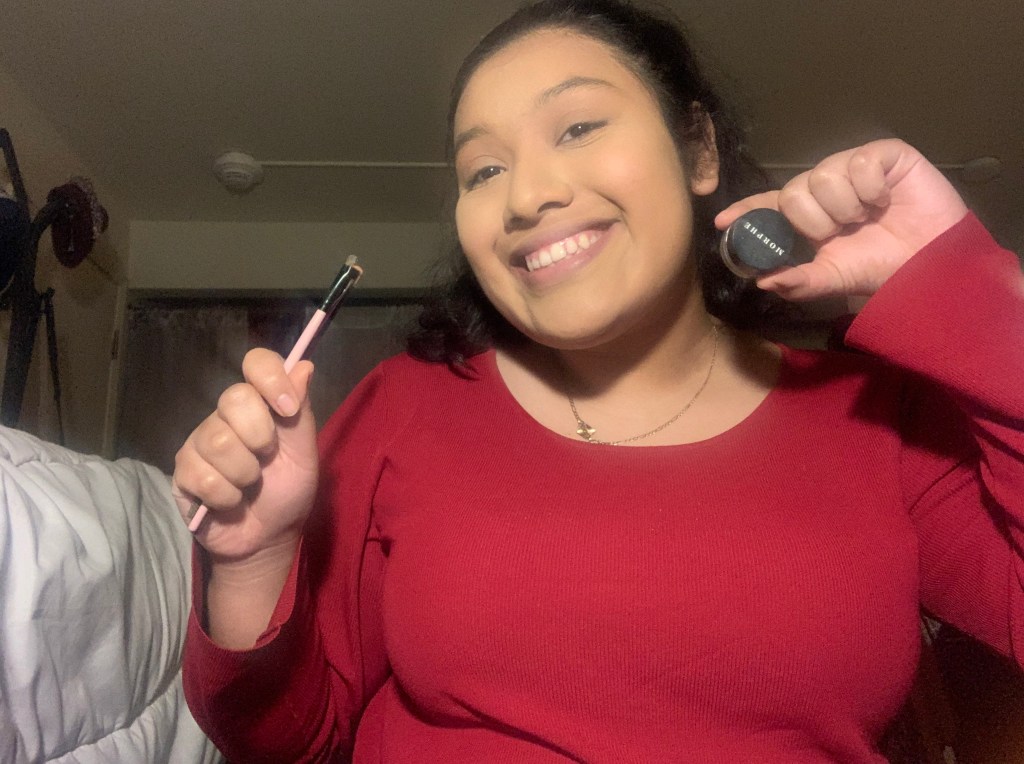
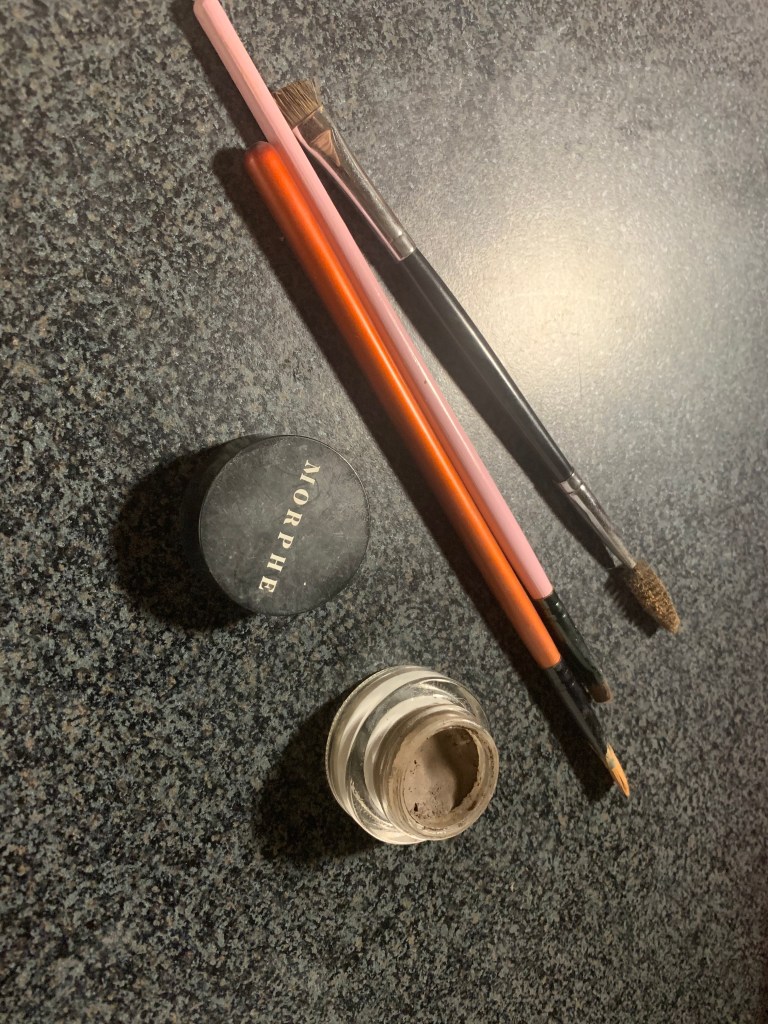
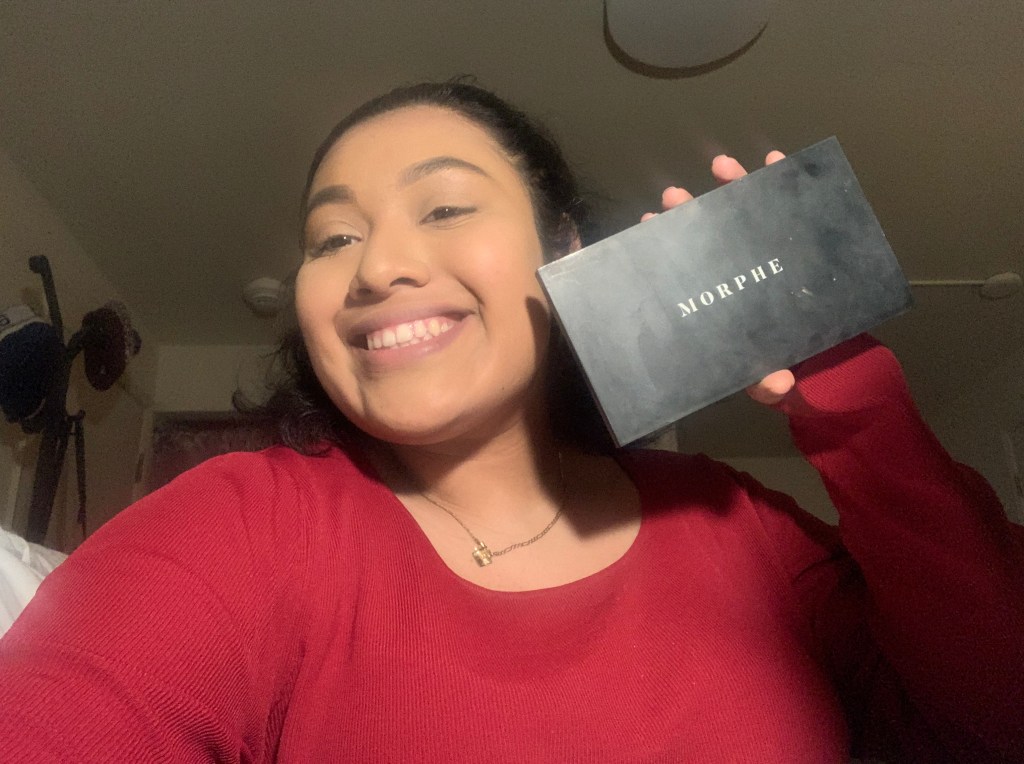
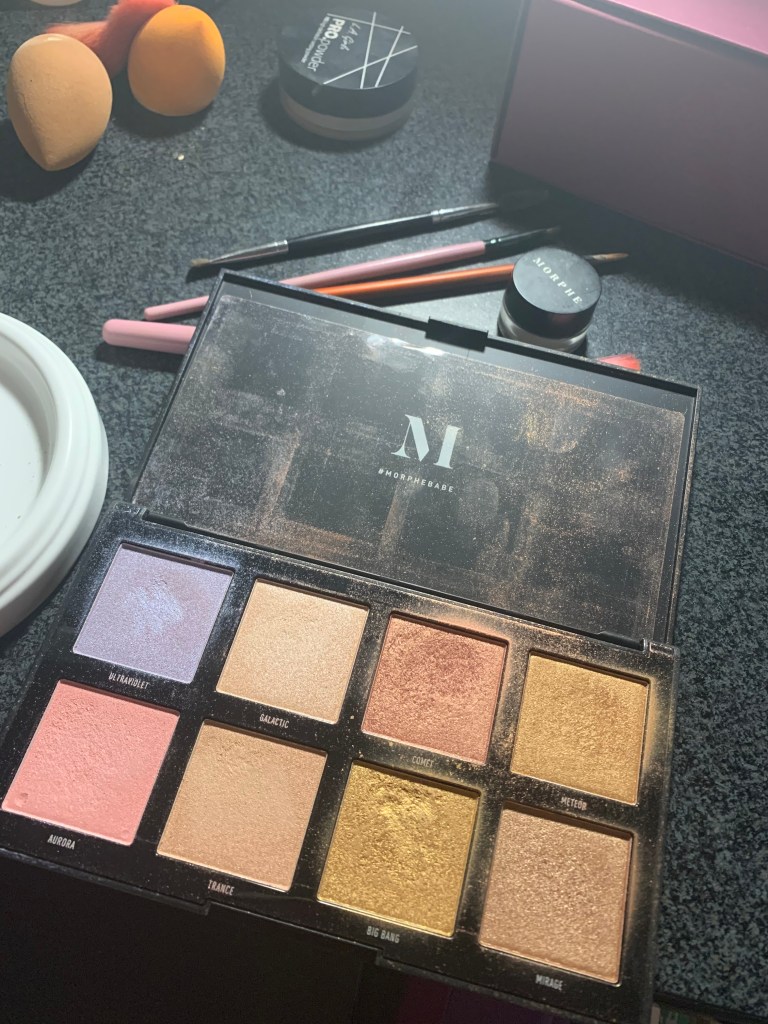
Morphe – Brow Cream in the shade ‘Java’
Morphe – Highlighter Palette ‘8S Stellar Impact’
Milani – Eye shadow in the shade ‘Bella Champagne’
KISS – Strip lash Adhesive
Lash Pop – Eyelashes in the style ‘Send Nudes’
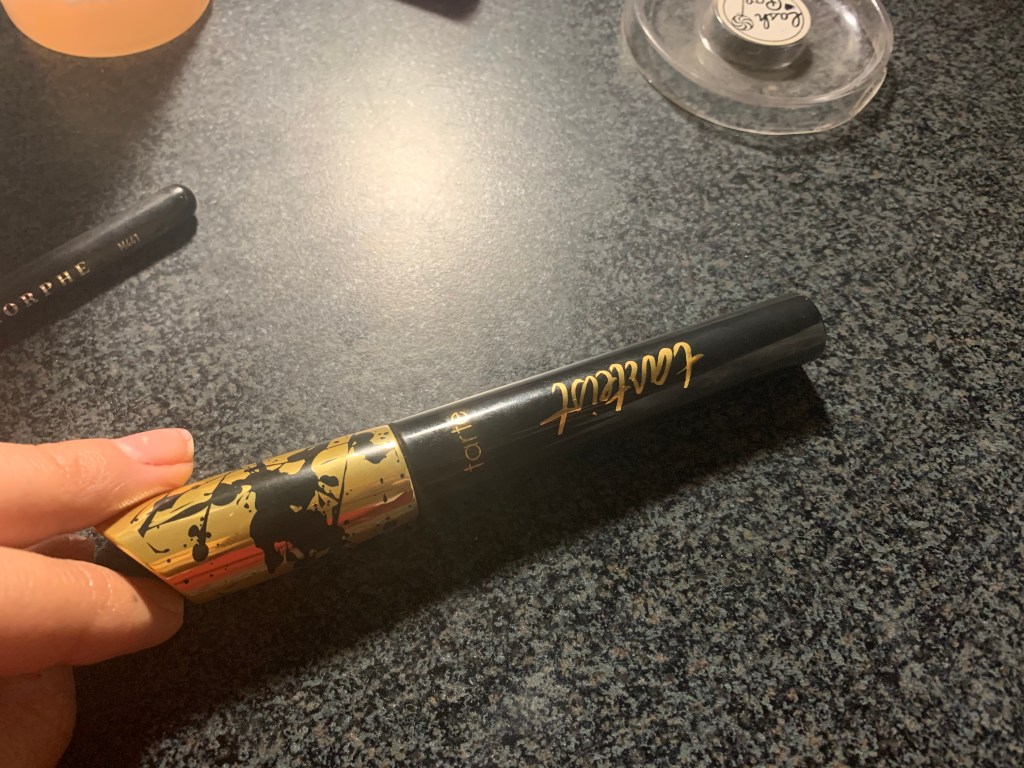
Tarte – Mascara
Fenty Beauty – Lip Gloss in the shade ‘Fu$$y’
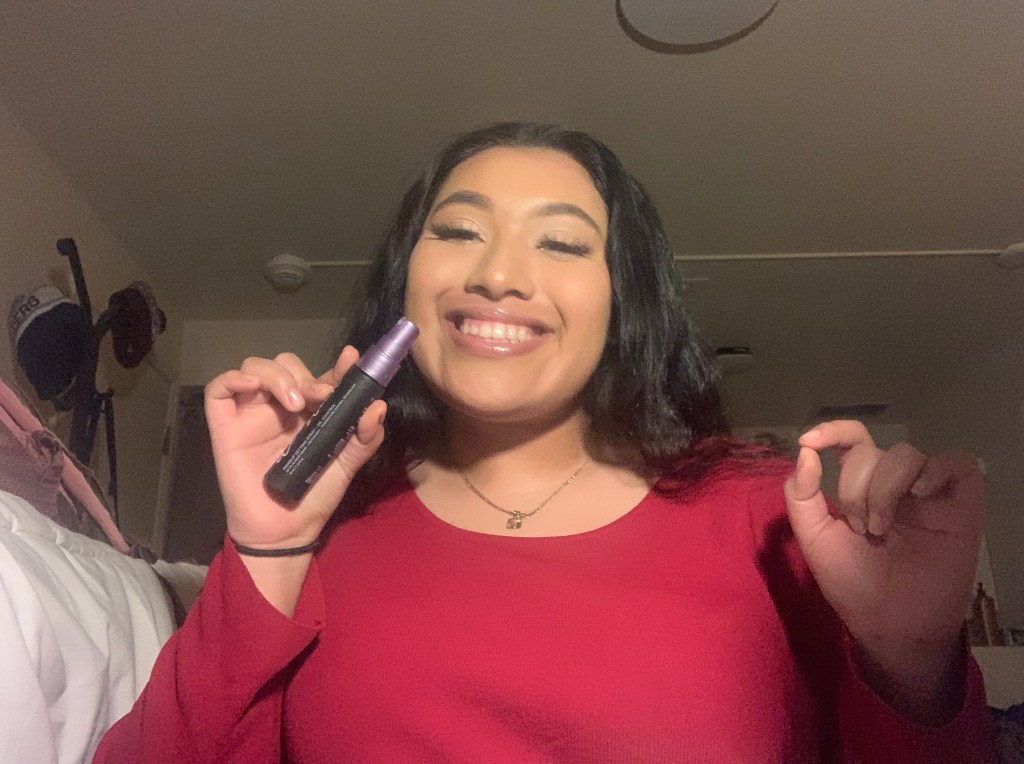
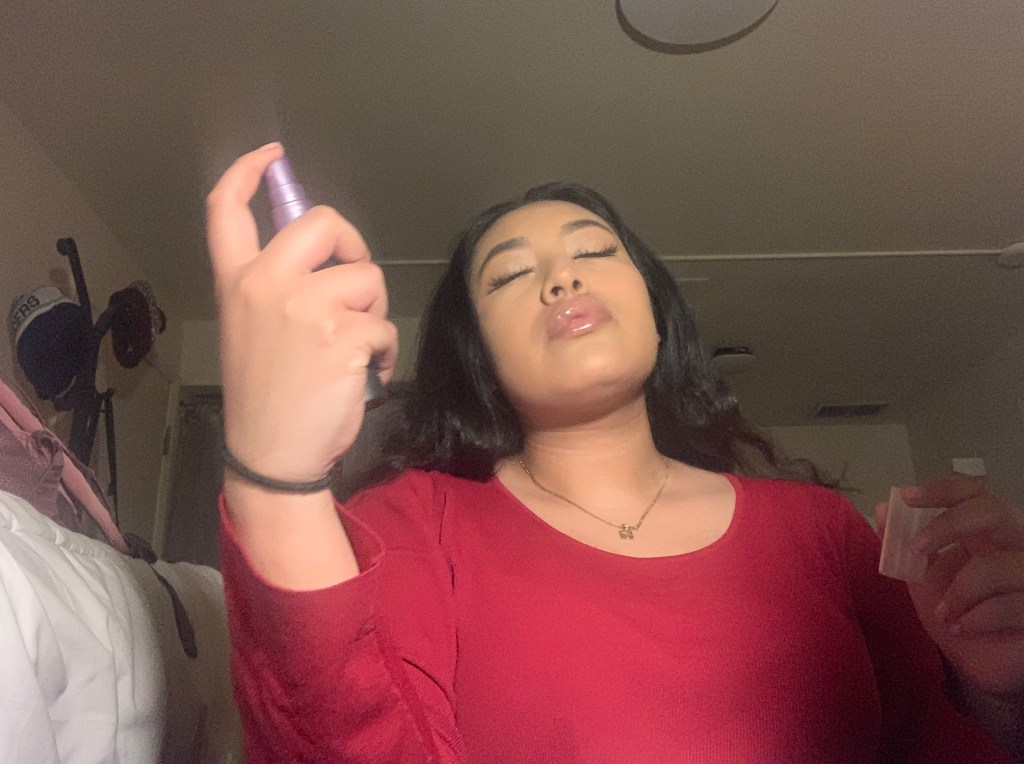
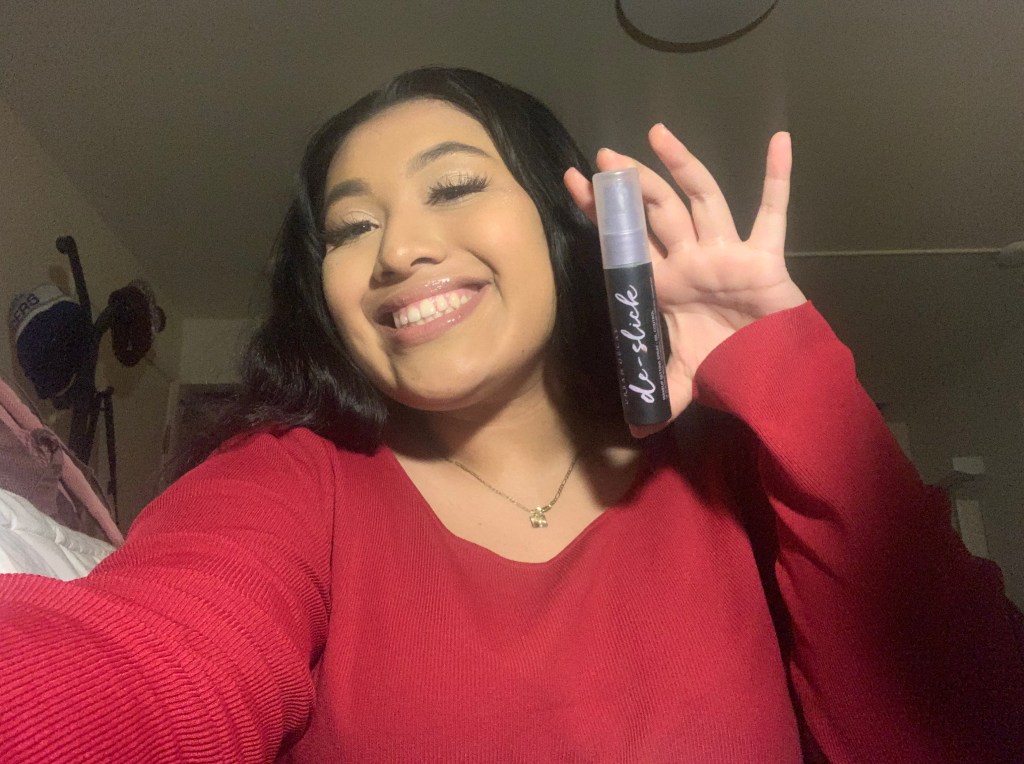
Urban Decay – Setting Spray named ‘de-slick’
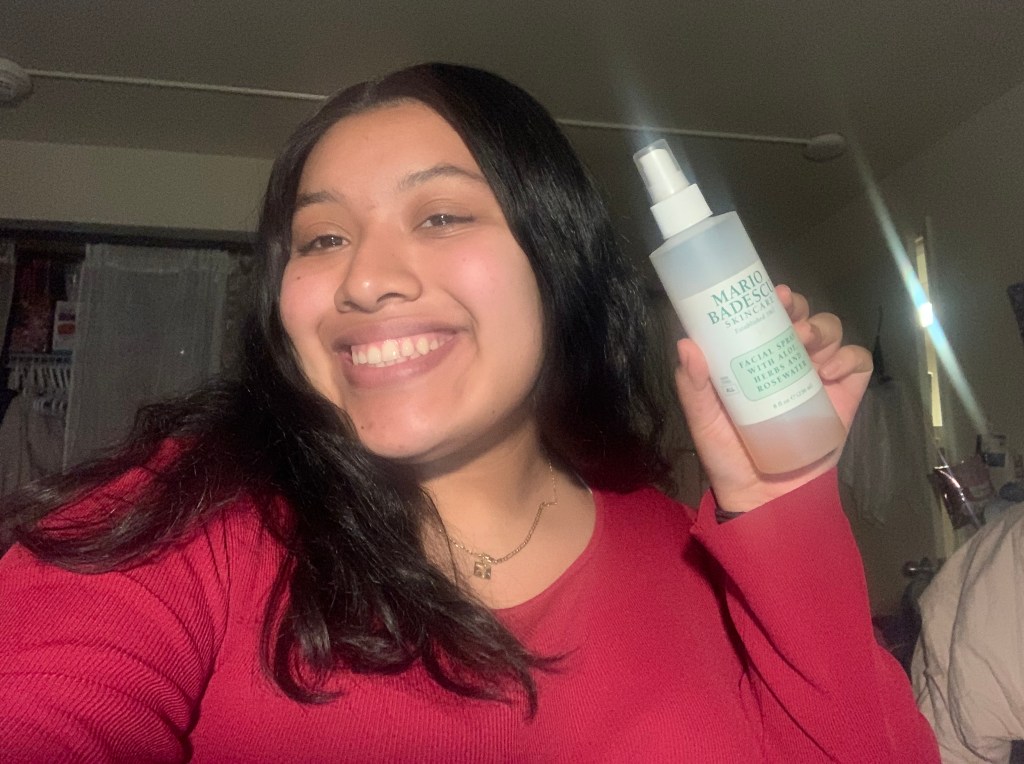
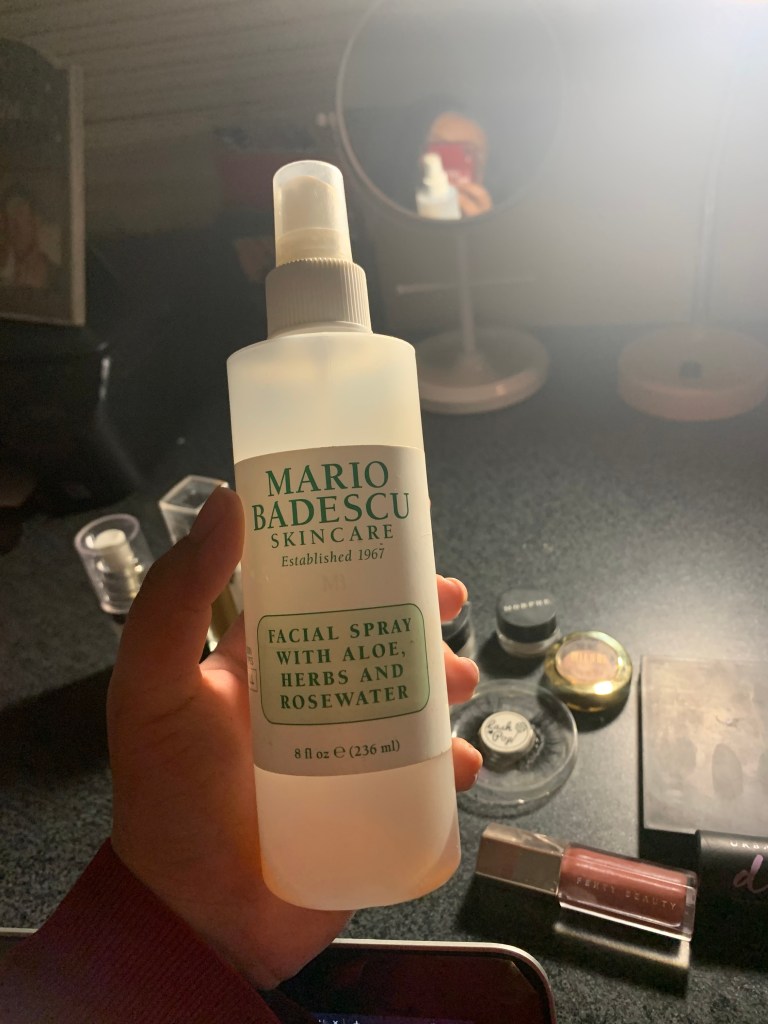
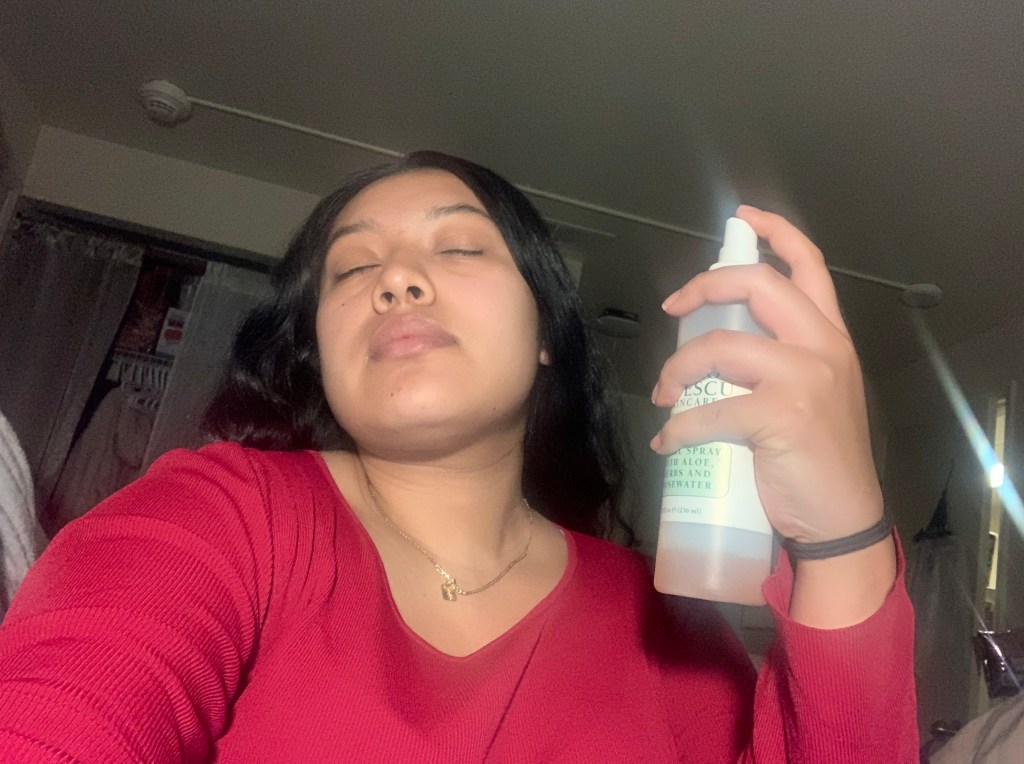
Step 1: Prep with face spray
This is my very first step before I ever do my make up. This spray is a 3-in-1 and by that I mean it has three uses in 1 product. It can prep your skin which means it can hydrate your skin and give it some moisture before adding any product. Second, it can set your makeup which means that when you’re finally finished with your look and you spray this on and it will set your make up in place for a good chunk of the day .
So what you do is take the cap on and spray a light amount all over your face. Make sure you spray it all over the area that you will be placing any product.
Step 2: Primer
I’ve always loved Elf primer because it is super cheap and actually works! What face primer is supposed to do is fill in your pores so when you put on any type of makeup product, it doesn’t get into your pores. When makeup seeps into your pores it tends to cause face problems such as oily skin, dark patches, or acne. Primer is very good in protecting your skin as well as keeping it hydrated underneath the layers of makeup I’m about to put on.
You apply 1-2 pumps onto your hand and you rub the product all over your face and in the areas in which you will be applying your makeup. I tend to rub a little more product on my eyelids and my nose because that is where I am mostly oily.
Step 3: Foundation
Foundation is literally a gift from the gods because it gives me 3D plastic surgery skin! LOL! I absolutely love foundation because it gives your skin that smooth matte finish and makes you look like you don’t have any flaws and you are living and enjoying it.
I will be using tools and brushes in this tutorial and the reason I didn’t include them in the beginning was because they were all gifts and not things I purchased. But I will discuss them in my steps.
What you need to do is open the foundation bottle and put 1-2 pumps on your hand and use a wet beauty sponge, and by wet I mean use the prep spray I mentioned in the first step so that you won’t have a dry beauty beauty sponge because then that will soak up all the product. Then once you put the foundation on the beauty sponge, you spread it all over your face. Use until you are satisfied with how your skin looks.
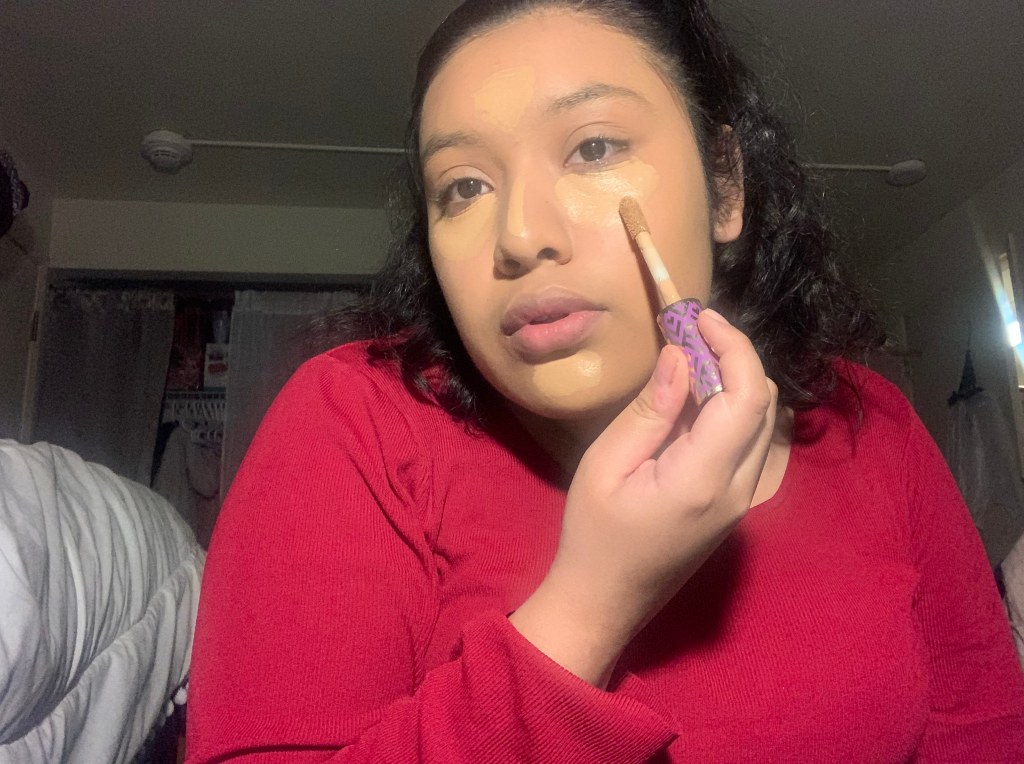
Step 4: Concealer
As you see my desk will get messier throughout the tutorial, so bear with me.
But concealer is amazing because it covers up the dark parts of your face such as your under eyes. It also brightens up your face and makes you look more alive. It all depends on the kind of concealer you get but the Tarte one has a fluffy end which makes it very easy for application.
All you need to do is apply it to the areas that you would like to hide. In my case, I put it in the lower middle of my forehead because there is a pimple scar there, I put it underneath my eyes to conceal my eye bags, I put it on the top of my nose to make my nose look more snatched, and I put it on my chin because I have some acne scars there as well that the foundation couldn’t cover up all the way. Then you use a wet beauty sponge and you just blend! Blend until needed.
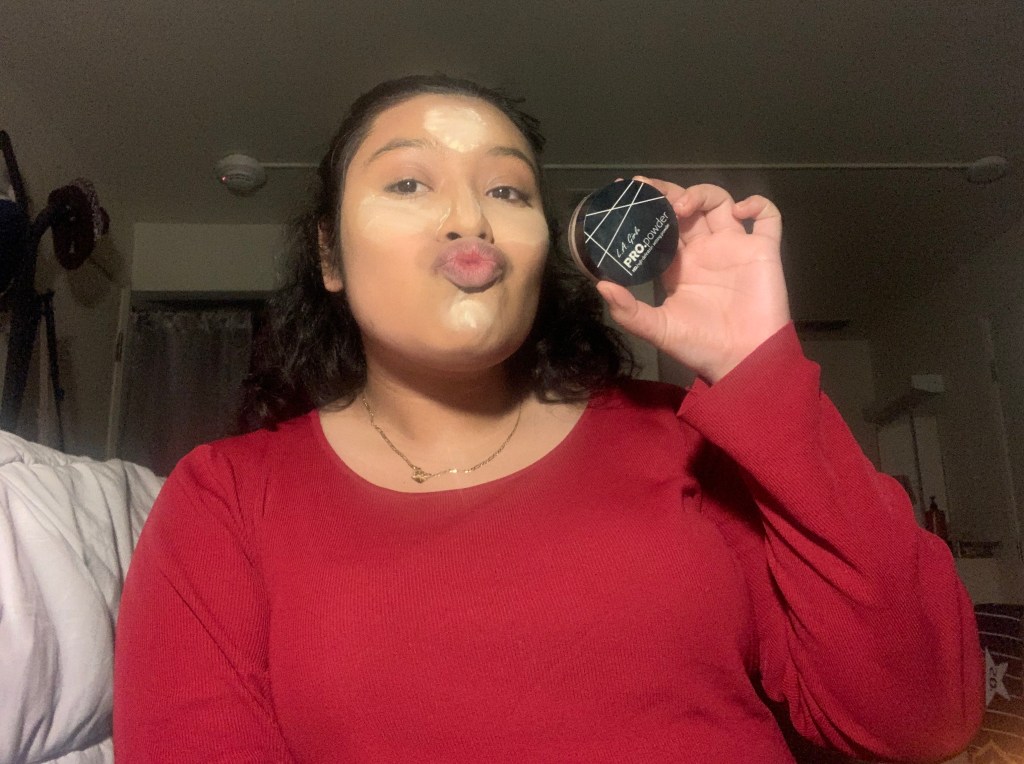
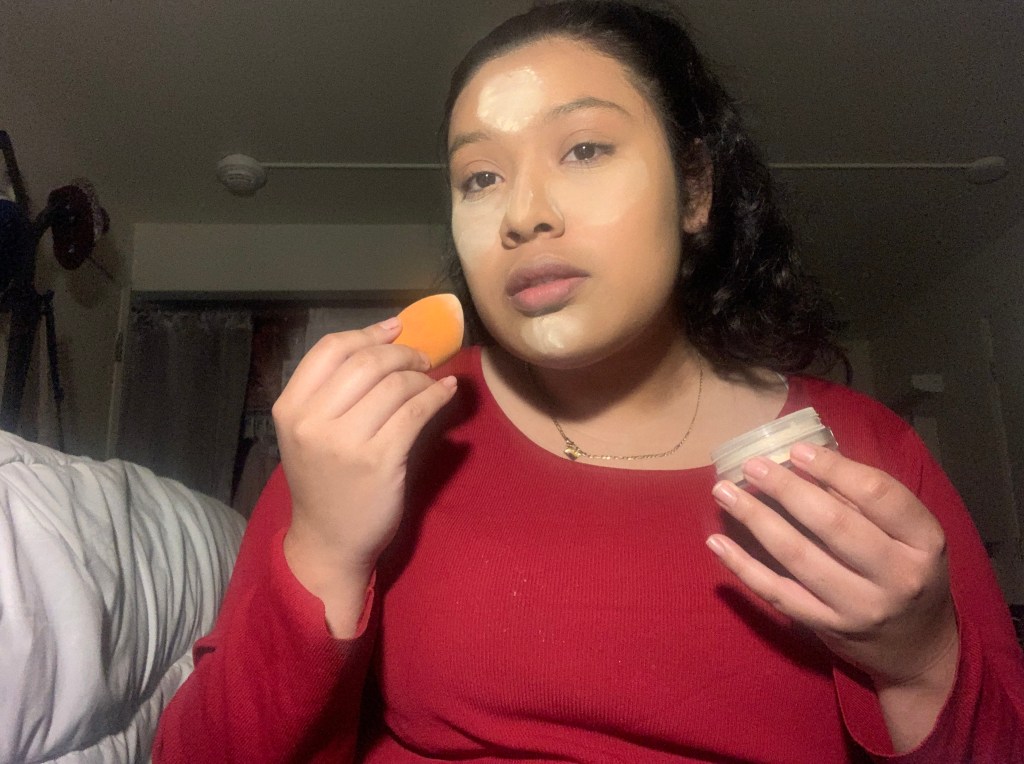
Step 5: Set the concealer
Setting powder is another gift from god because it is what keeps your concealer in place. My makeup type is matte, which means I like my make up to look very set. I don’t like my makeup looking wet or oily. This helps bring that smooth finish to your face and it makes sure that the product underneath won’t move.
I take a wet beauty sponge and I dip into my setting powder and I apply it to the places where I put my concealer. Then you do what we makeup lovers call ‘bake’. What this means is you leave the setting powder on the areas you applied it to for 10-15 minutes. After that you can use a nice powder brush to brush off the powder.
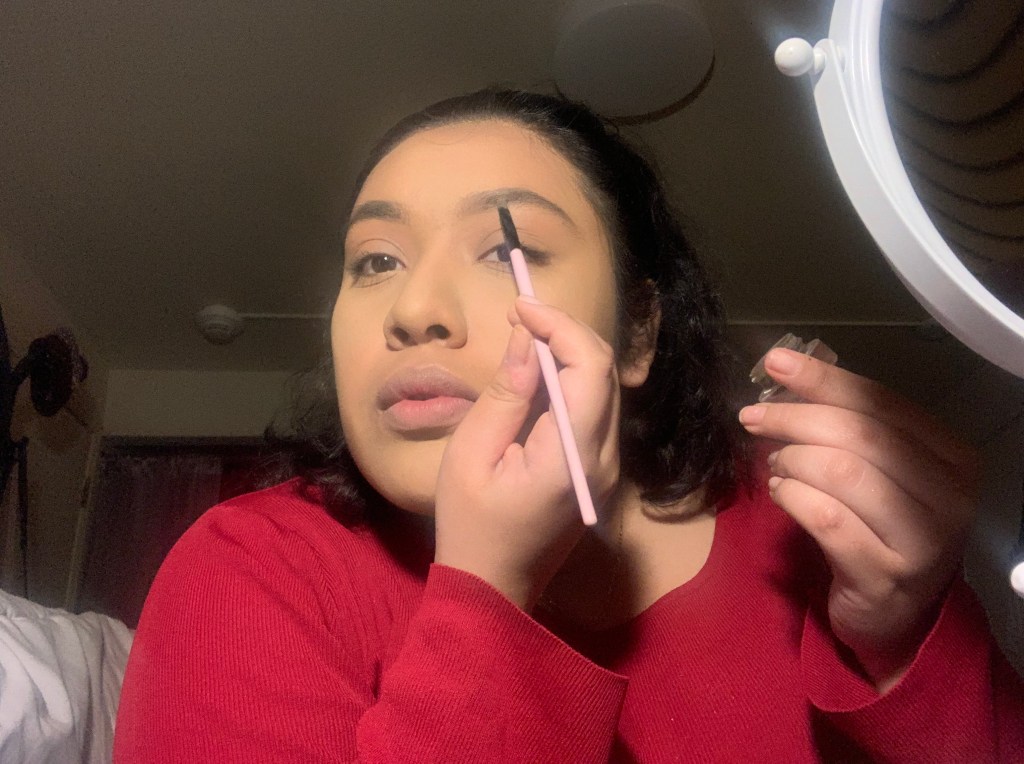
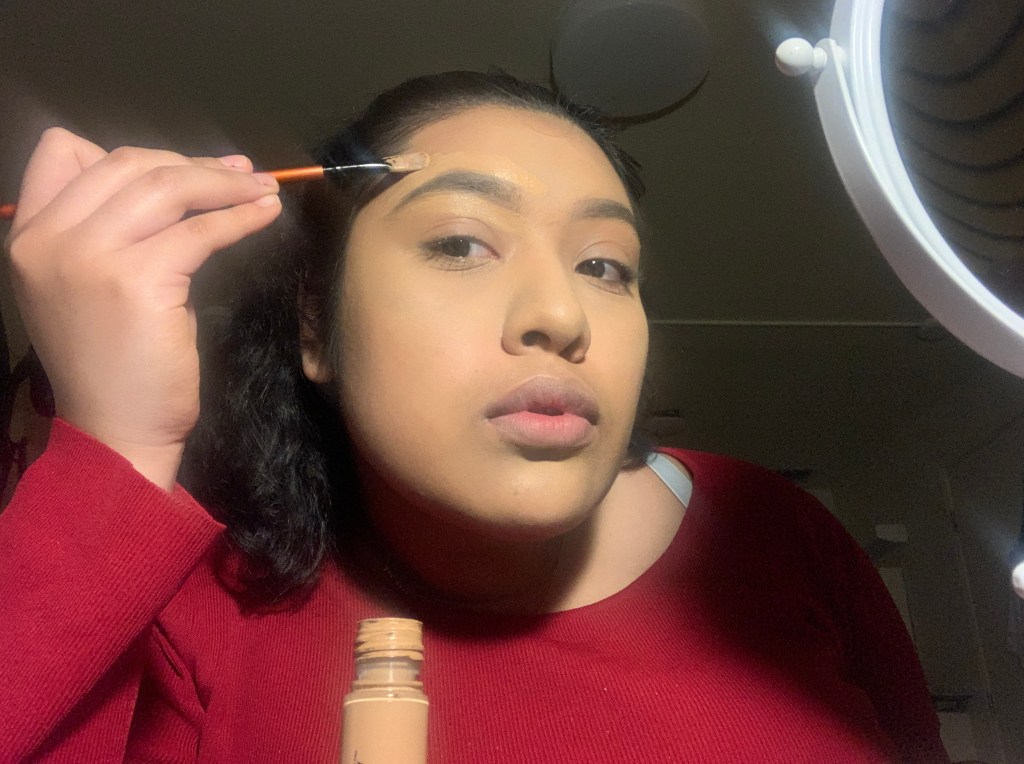
Step 6: Brows
Brows is one of the most important steps because they literally define your face. Brows have always been difficult for me because of my thick eyebrow hair and the struggle of drawing them on. This was kind of difficult to do because right now I have very thick eyebrows and I usually get them done but I haven’t found a good place in Chico to get them threaded, which means cleaned up.
So here is how you do your brows: first you have three tools which is a concealer brush, a spoolie, and an angled brow brush. The brushes are pictured above. The concealer brush is the orange flat round brush, then there is the pink brush which is the angled brow brush, then there is the spoolie which is double sided and has a brush to brush my eyebrows on one end and an angled brush on the other end.
You take the angled brush, doesn’t matter which one out of the two but I use the pink one because it is thinner than the spoolie, and you wet it with the setting spray pictured in step 1. You dip into the brow powder and you draw a line on your eyebrow following the shape. You are basically outlining your eyebrows right now. You outline the shape then you just fill in. I usually don’t fill in the beginning of my eyebrows to give off a faded effect. Then you just get concealer and you outline the outside of your eyebrows to make them look sharp! I have examples provided above!
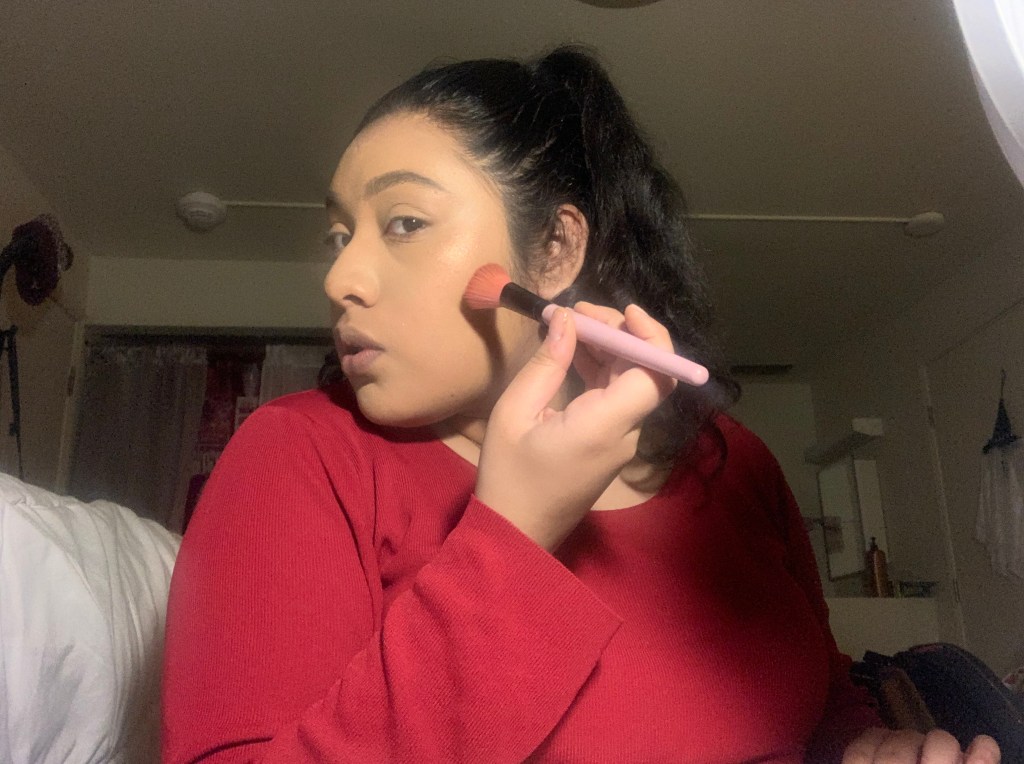
Step 7: Highlighter (my fav step)
Highlighter makes you look like a queen. I adore highlighter because it shines parts of your face like your nose and your cheekbones and also on your eyebrow bone. A lot of people and beauty influencers use it to shine parts of the faces they prefer. I
have a large brush that is fluffy and angled. I wet the brush with the setting spray mentioned in step 1 and I drip into the highlight color of my choice and I spread it across my cheekbones.
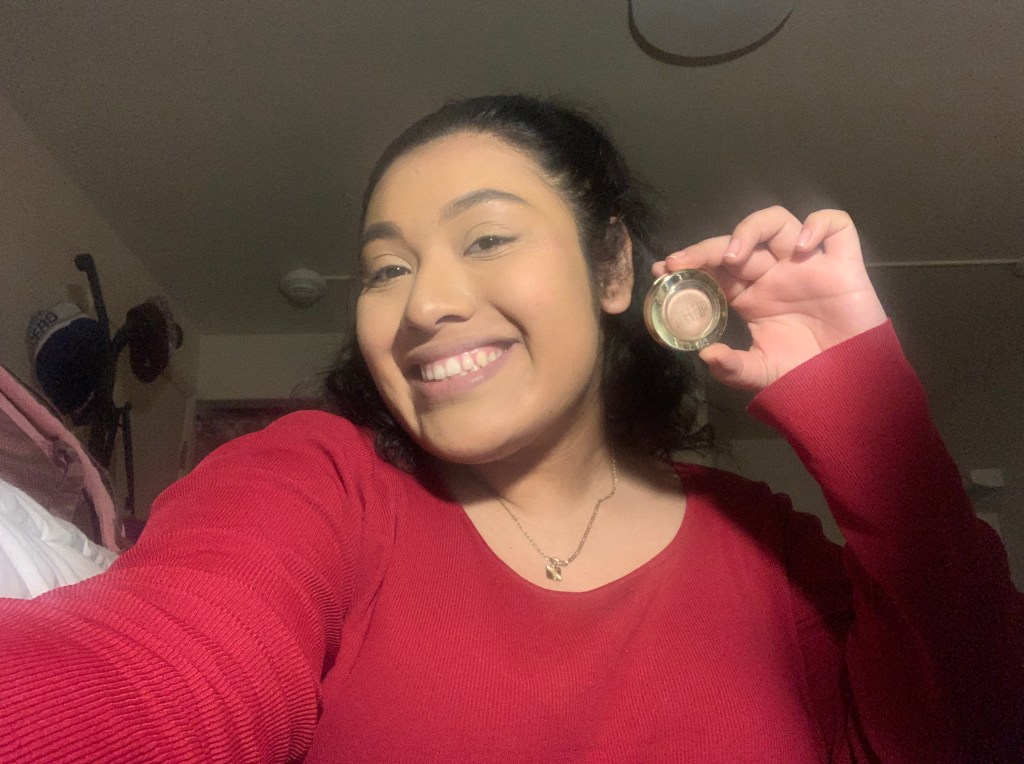
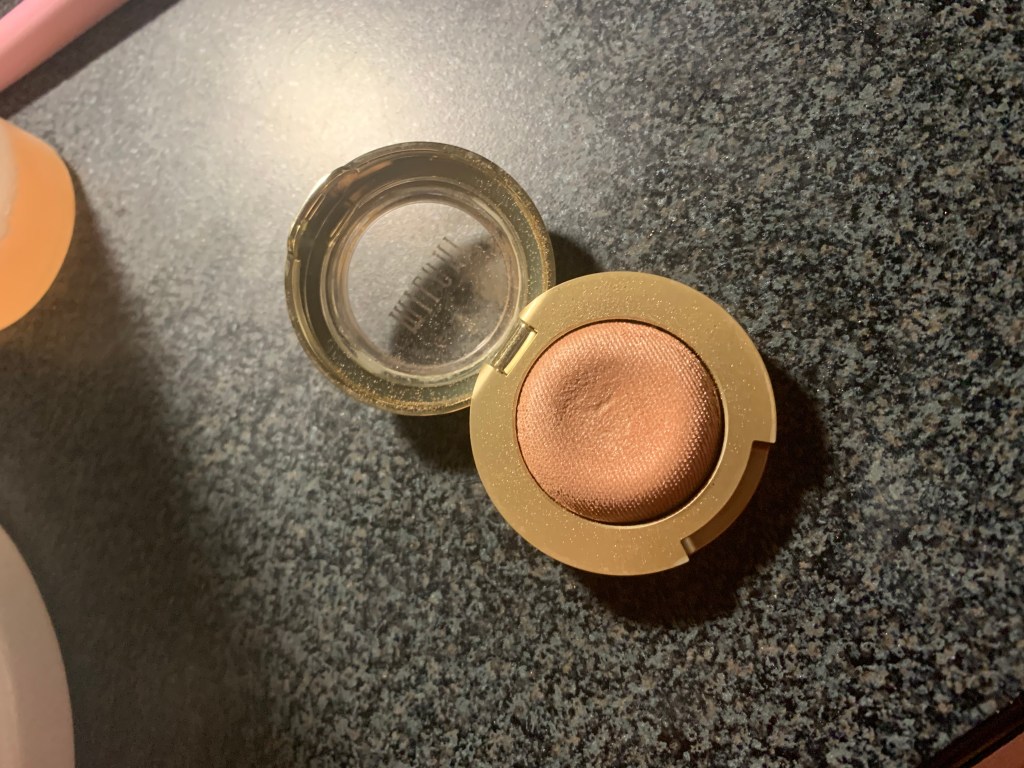
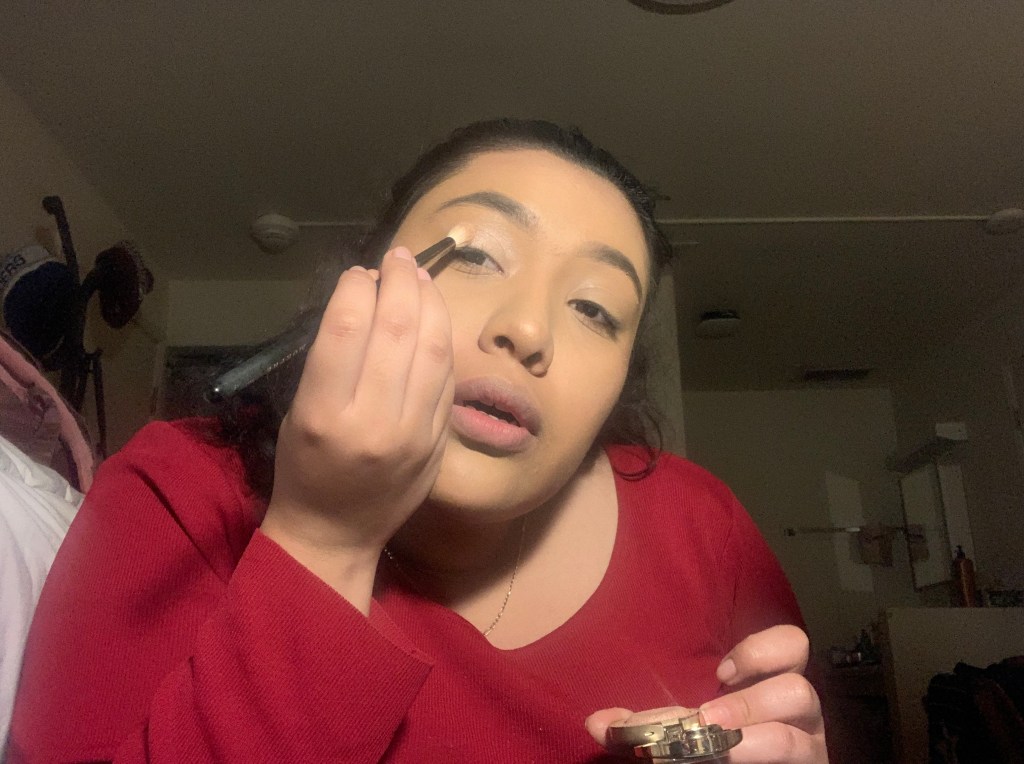
Step 8: Eye shadow
EYE SHADOW IS NOT MY STRONGEST SUIT! But here I have a single eye shadow that is glittery and when I do my soft glam I just put on this single shade.
I use a regular sized eye shadow brush and I wet it with the stetting spray mentioned in step 1 then I dip into the eye shadow and just apply all over my lid.
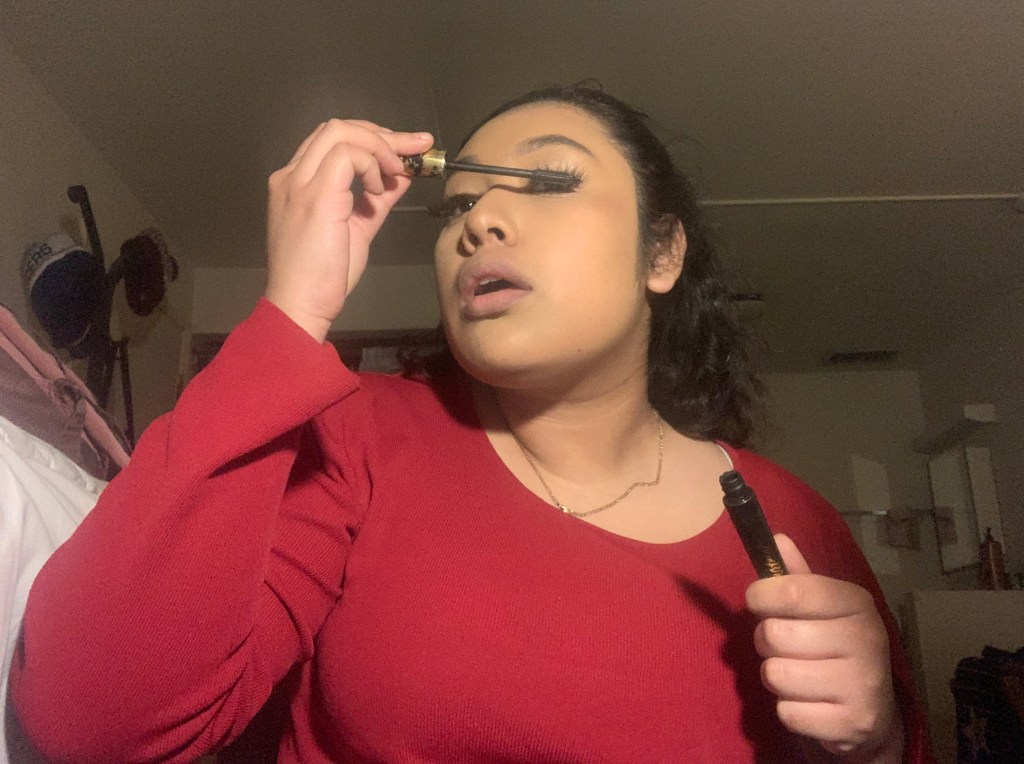
Step 9: Eyelashes
Lashes instantly make everything better. Lashes have always been difficult for me to put on because yikes that glue, but over time I finally pop them on like nothing. I just took the lashes out of the container, and I put a line of glue on the lash line and I waited for the glue to dry then I popped he lashes right above my real ones. A tip would be to use eyebrow tweezers to apply them.
Step 10: Mascara
Mascara is a very important step when you put on lashes because it combines your fake ones with your real ones. It is a beautiful beauty product because it darkens and brings your eyelashes to life and makes your face pop. Eyelashes with mascara automatically make your look bold and sexy.
I removed the applicator for the tube and gently put about 3-4 coats to the eyelashes.
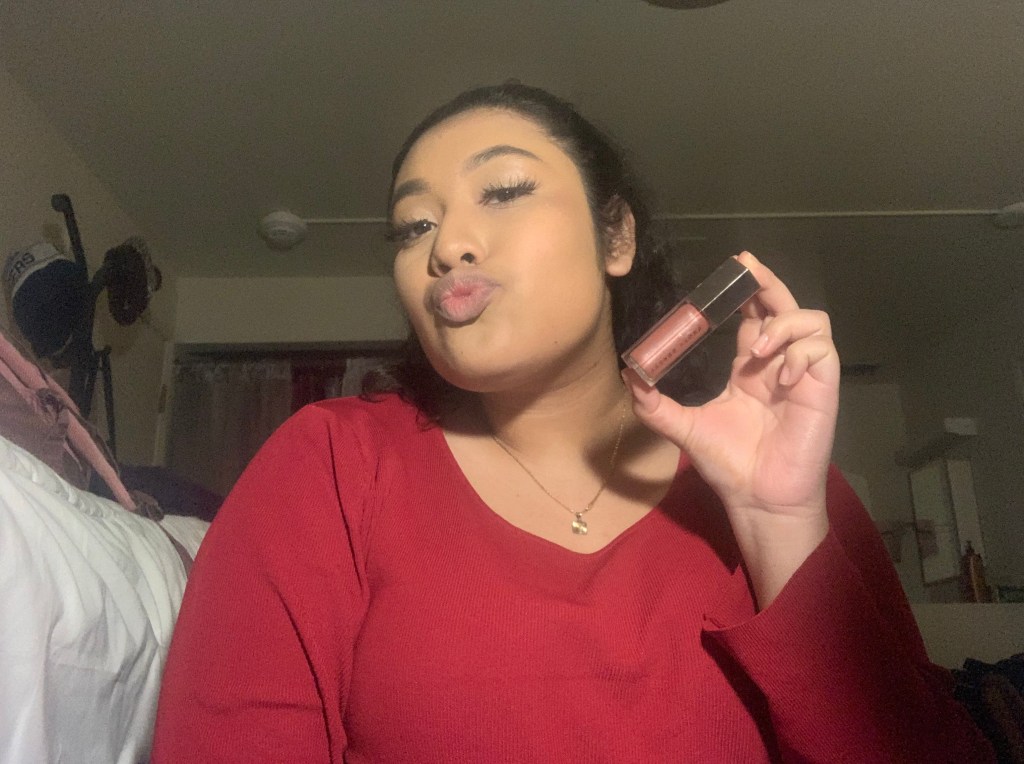
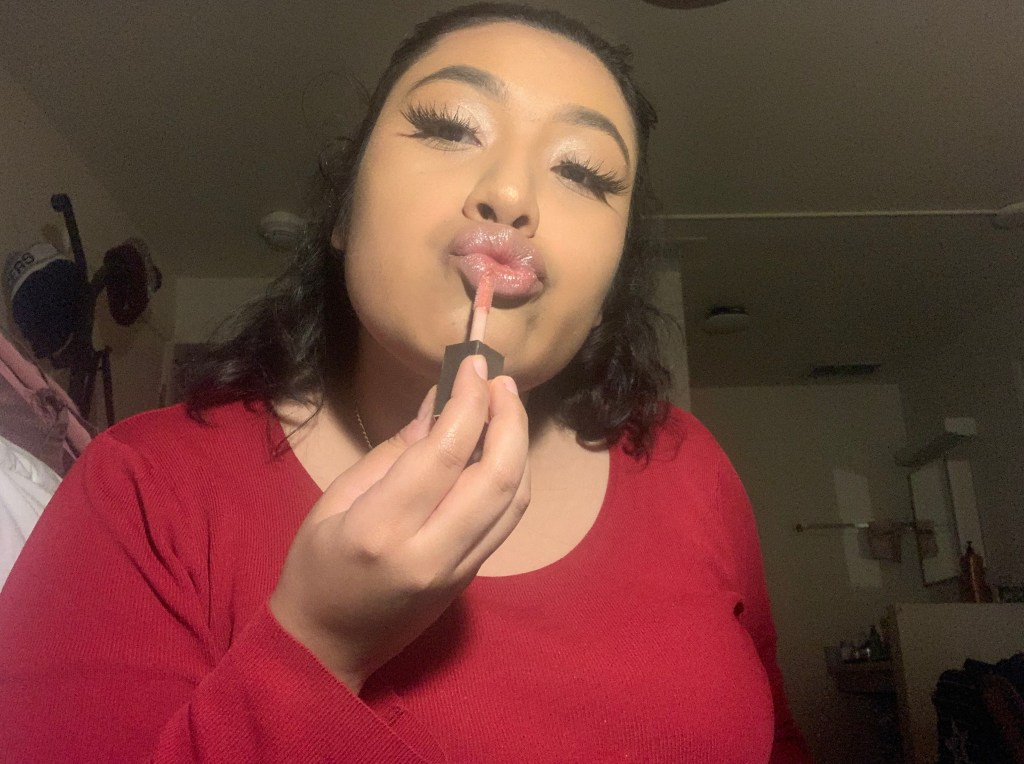
Step 11: Lip Gloss (duh)
Lip gloss instantly makes me feel like a princess. It gives that shine and plump to your lips and attracts the eye. This lip gloss by Fenty Beauty is so amazing because the formula is very creamy and shinny. You first open the lip gloss and just apply all over your lips evenly.
Step 12: Setting the face
Setting spray is the last important step you will ever encounter. This determines how your make up will look and last throughout the day. When you put on stetting spray, you are setting your face for the entire day so make sure you put it on generously. You open the cap and apply the spray all over your face. Make sure you keep it with you all day so whenever you feel your make up falling off you just spray it right there and fix it!
ALL DONE!
After all the steps, you should look like me! Maybe even cuter! But thank you so much for watching and reading along to my how-to achieve my soft glam look! All of the products mentioned in this tutorial can be found at any Ulta Beauty store or Sephora store in your local mall or plaza! Thank you again for being here and taking the time to look at my tutorial and hopefully you enjoyed it!
All photos taken in this tutorial were taken by Angelina Mendez.
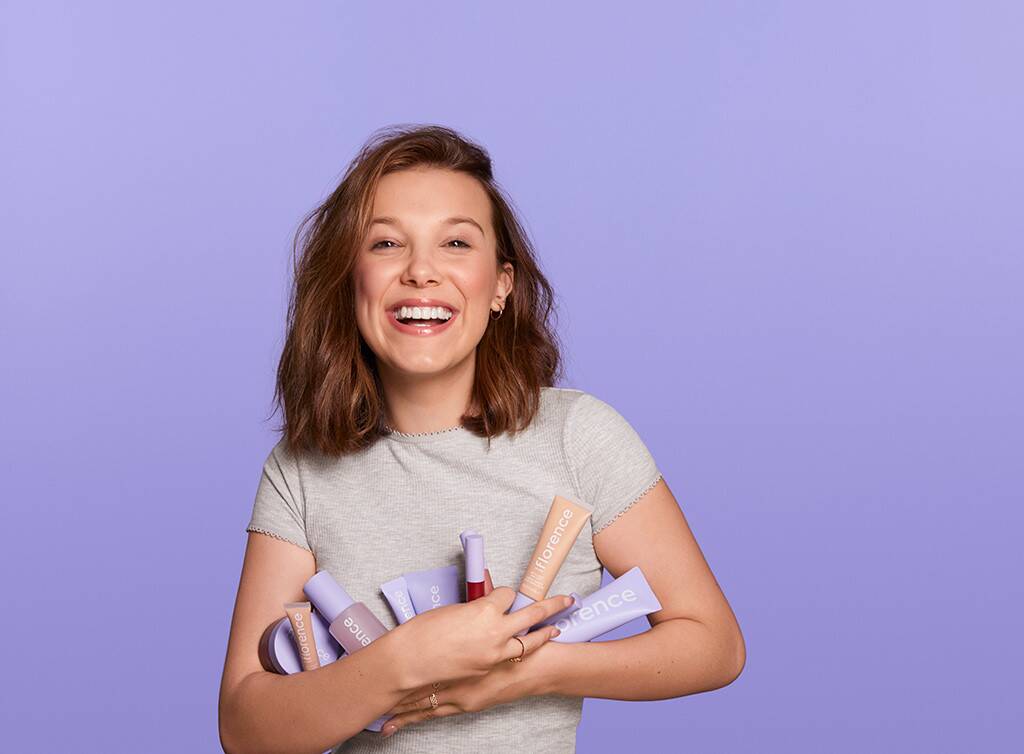
Millie Bobby Brown pictured with her products. Image credit: E! News. Second picture was taken by yours truly 🙂
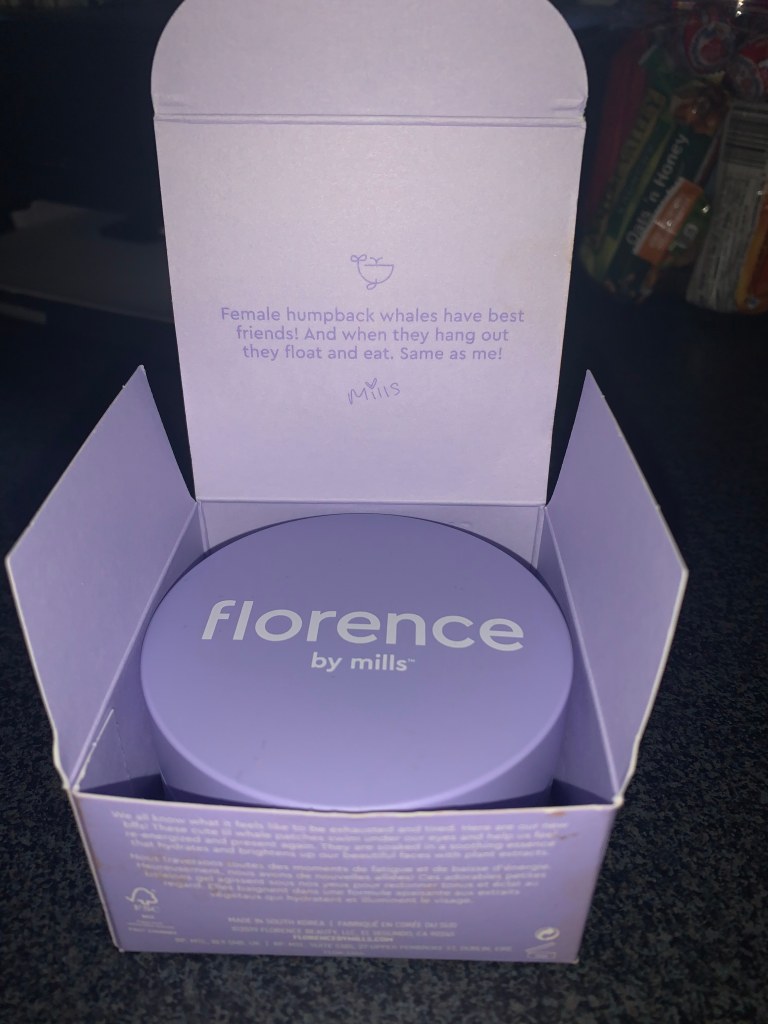
Florence by mills is a skin care/ makeup line released by the famous actor Millie Bobby Brown, who is known for her role as Eleven on the Netflix show Stranger Things. On her website, she explains what the brand is about and how clean their products are.
“We say yes to Vitamins, antioxidants, botanicals, and other clean ingredients. We create safe products that really work and are designed to make you feel good. No parabens, sulfates, dyes, animal testing or animal by-products, ever,” the website reads.
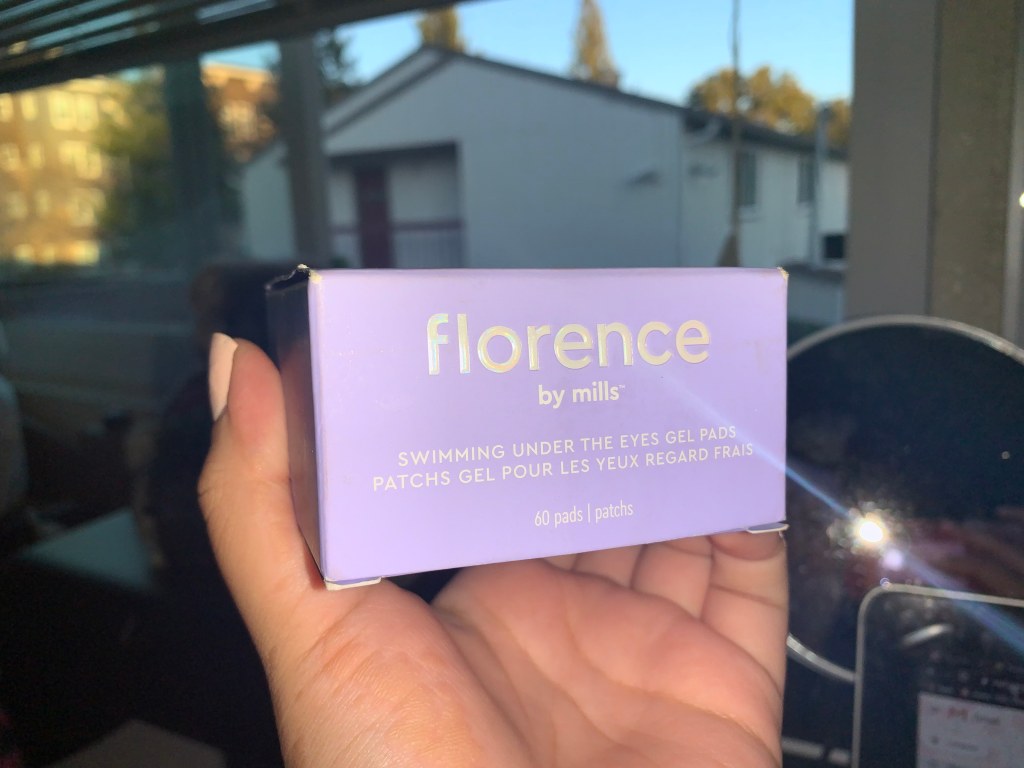
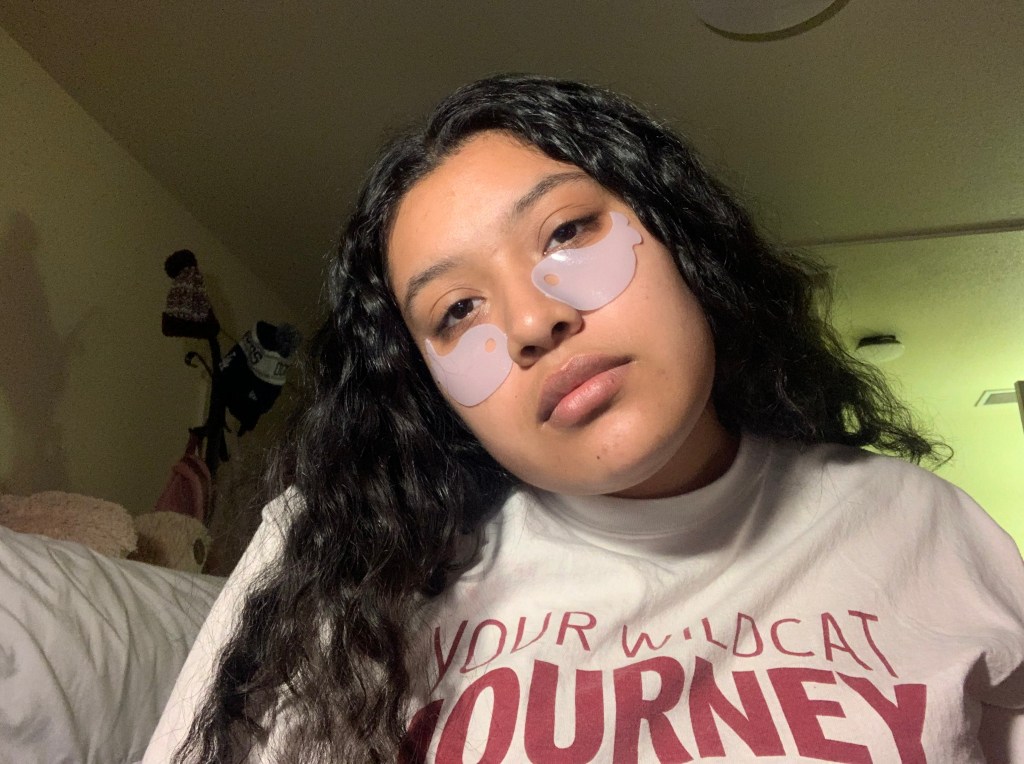
For Christmas, my sister gifted me this product because she said that my undereyes are very dark, thanks sis, and would help me look a little more alive.
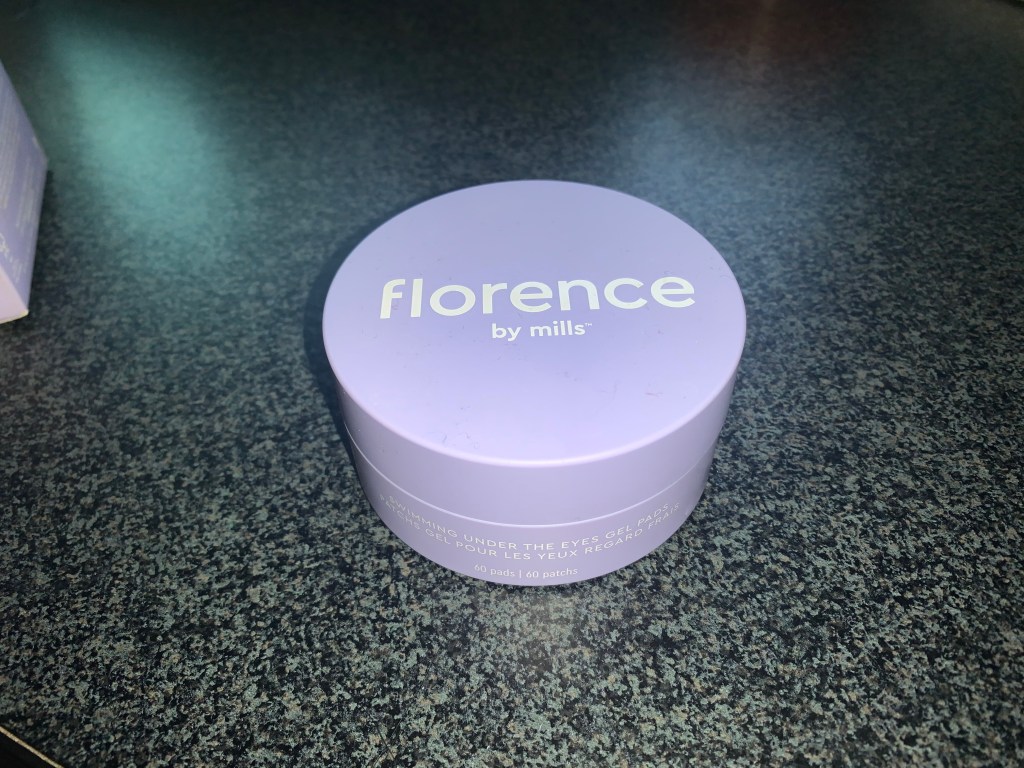
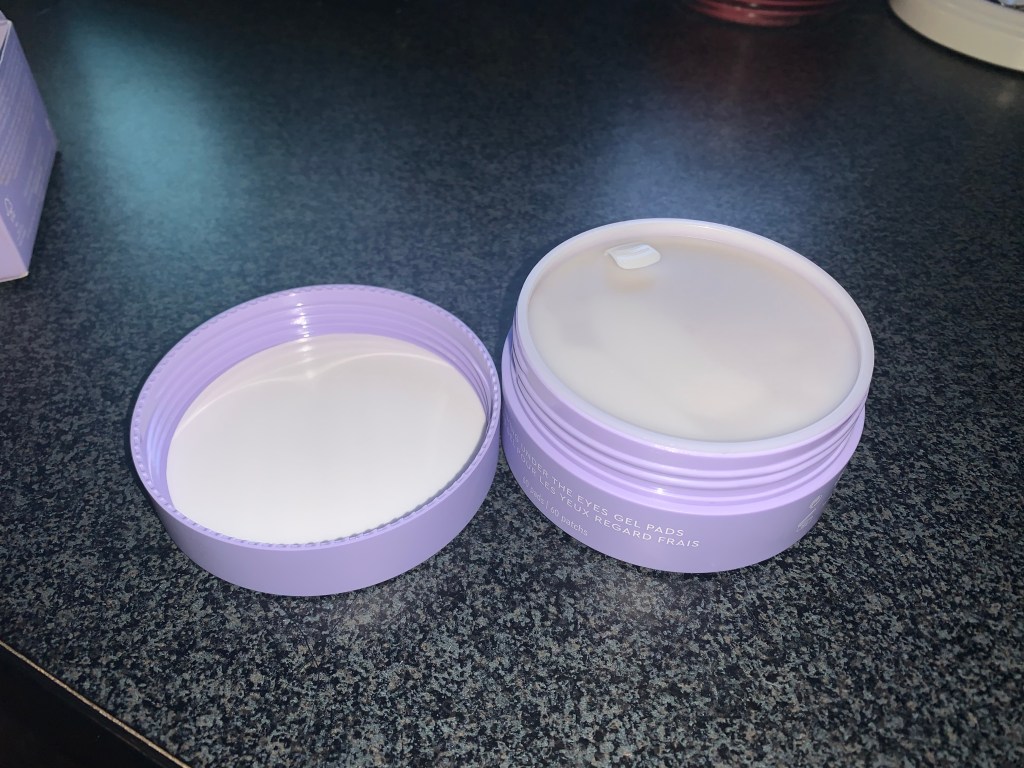
What are the gel pads?
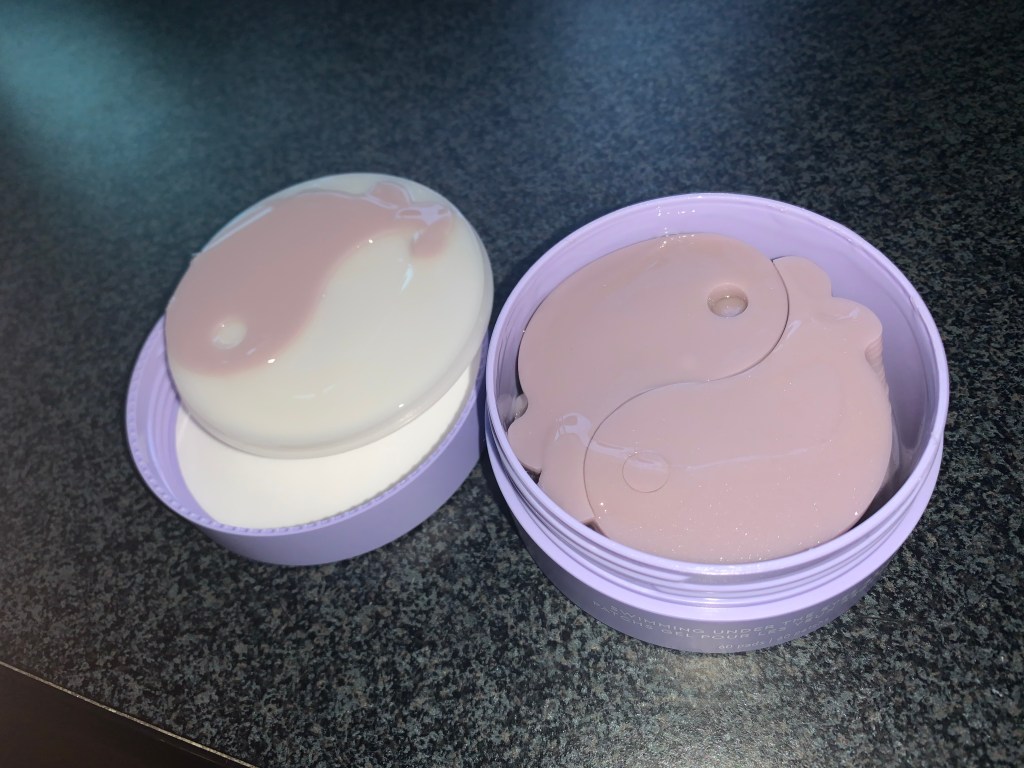
When cracking open the product, this is what it looks like. The first image is the container. On the outside, the container lists a lot of information, including the directions. There are 60 whale themed gel pads included in the product and a tiny plastic spatula. The product was made in South Korea and expires two years after opening. The PETA logo was also on the side to explain how the product is vegan and cruelty free. The directions are, “Use included spatula to gently scoop whale gel pad. Apply one pair to clean, dry under eye area. Remove after five to ten minutes and pat remaining product into skin.”
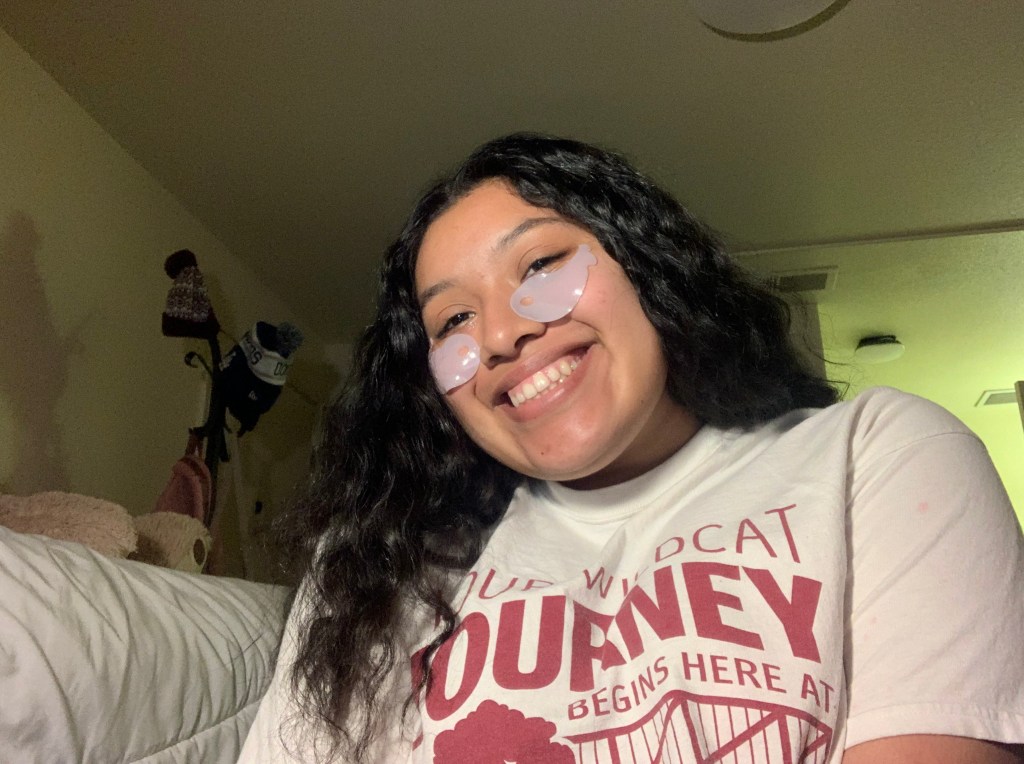
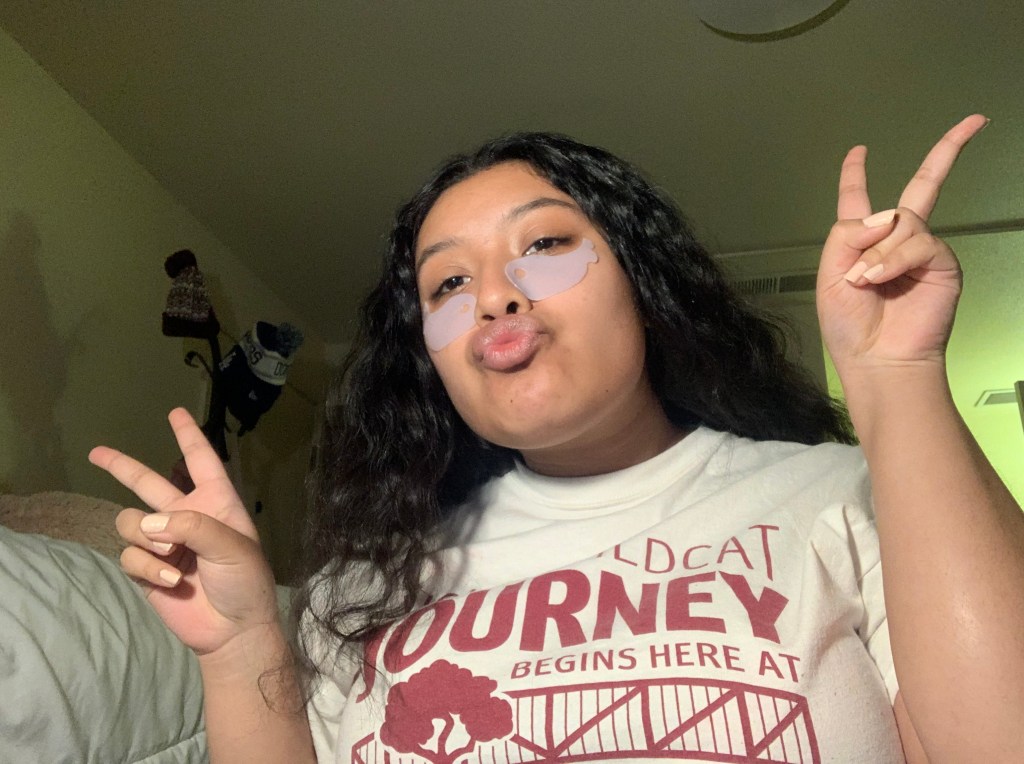
Let’s try the product out!
After putting these on and waiting ten long minutes for my timer to go off, I could say that I felt utterly refreshed. My under eyes felt hydrated and I felt alive and ready to take on the world. I would rate this an 7/10 because the purpose of this product is to make the face feel refreshed and your girl wants the darkness under her eyes GONE! But this did a good job of making me feel awake. I’m a huge believer that when it comes to your under eyes, nothing will fix it more than a good night’s sleep and water but after trying these, I felt super hydrated. But since Millie is young herself, this brand that she created fairly targets her audience range which is around middle school, so I do think this is a great way to introduce these kind of safe products to children. I do recommend it to my audience.